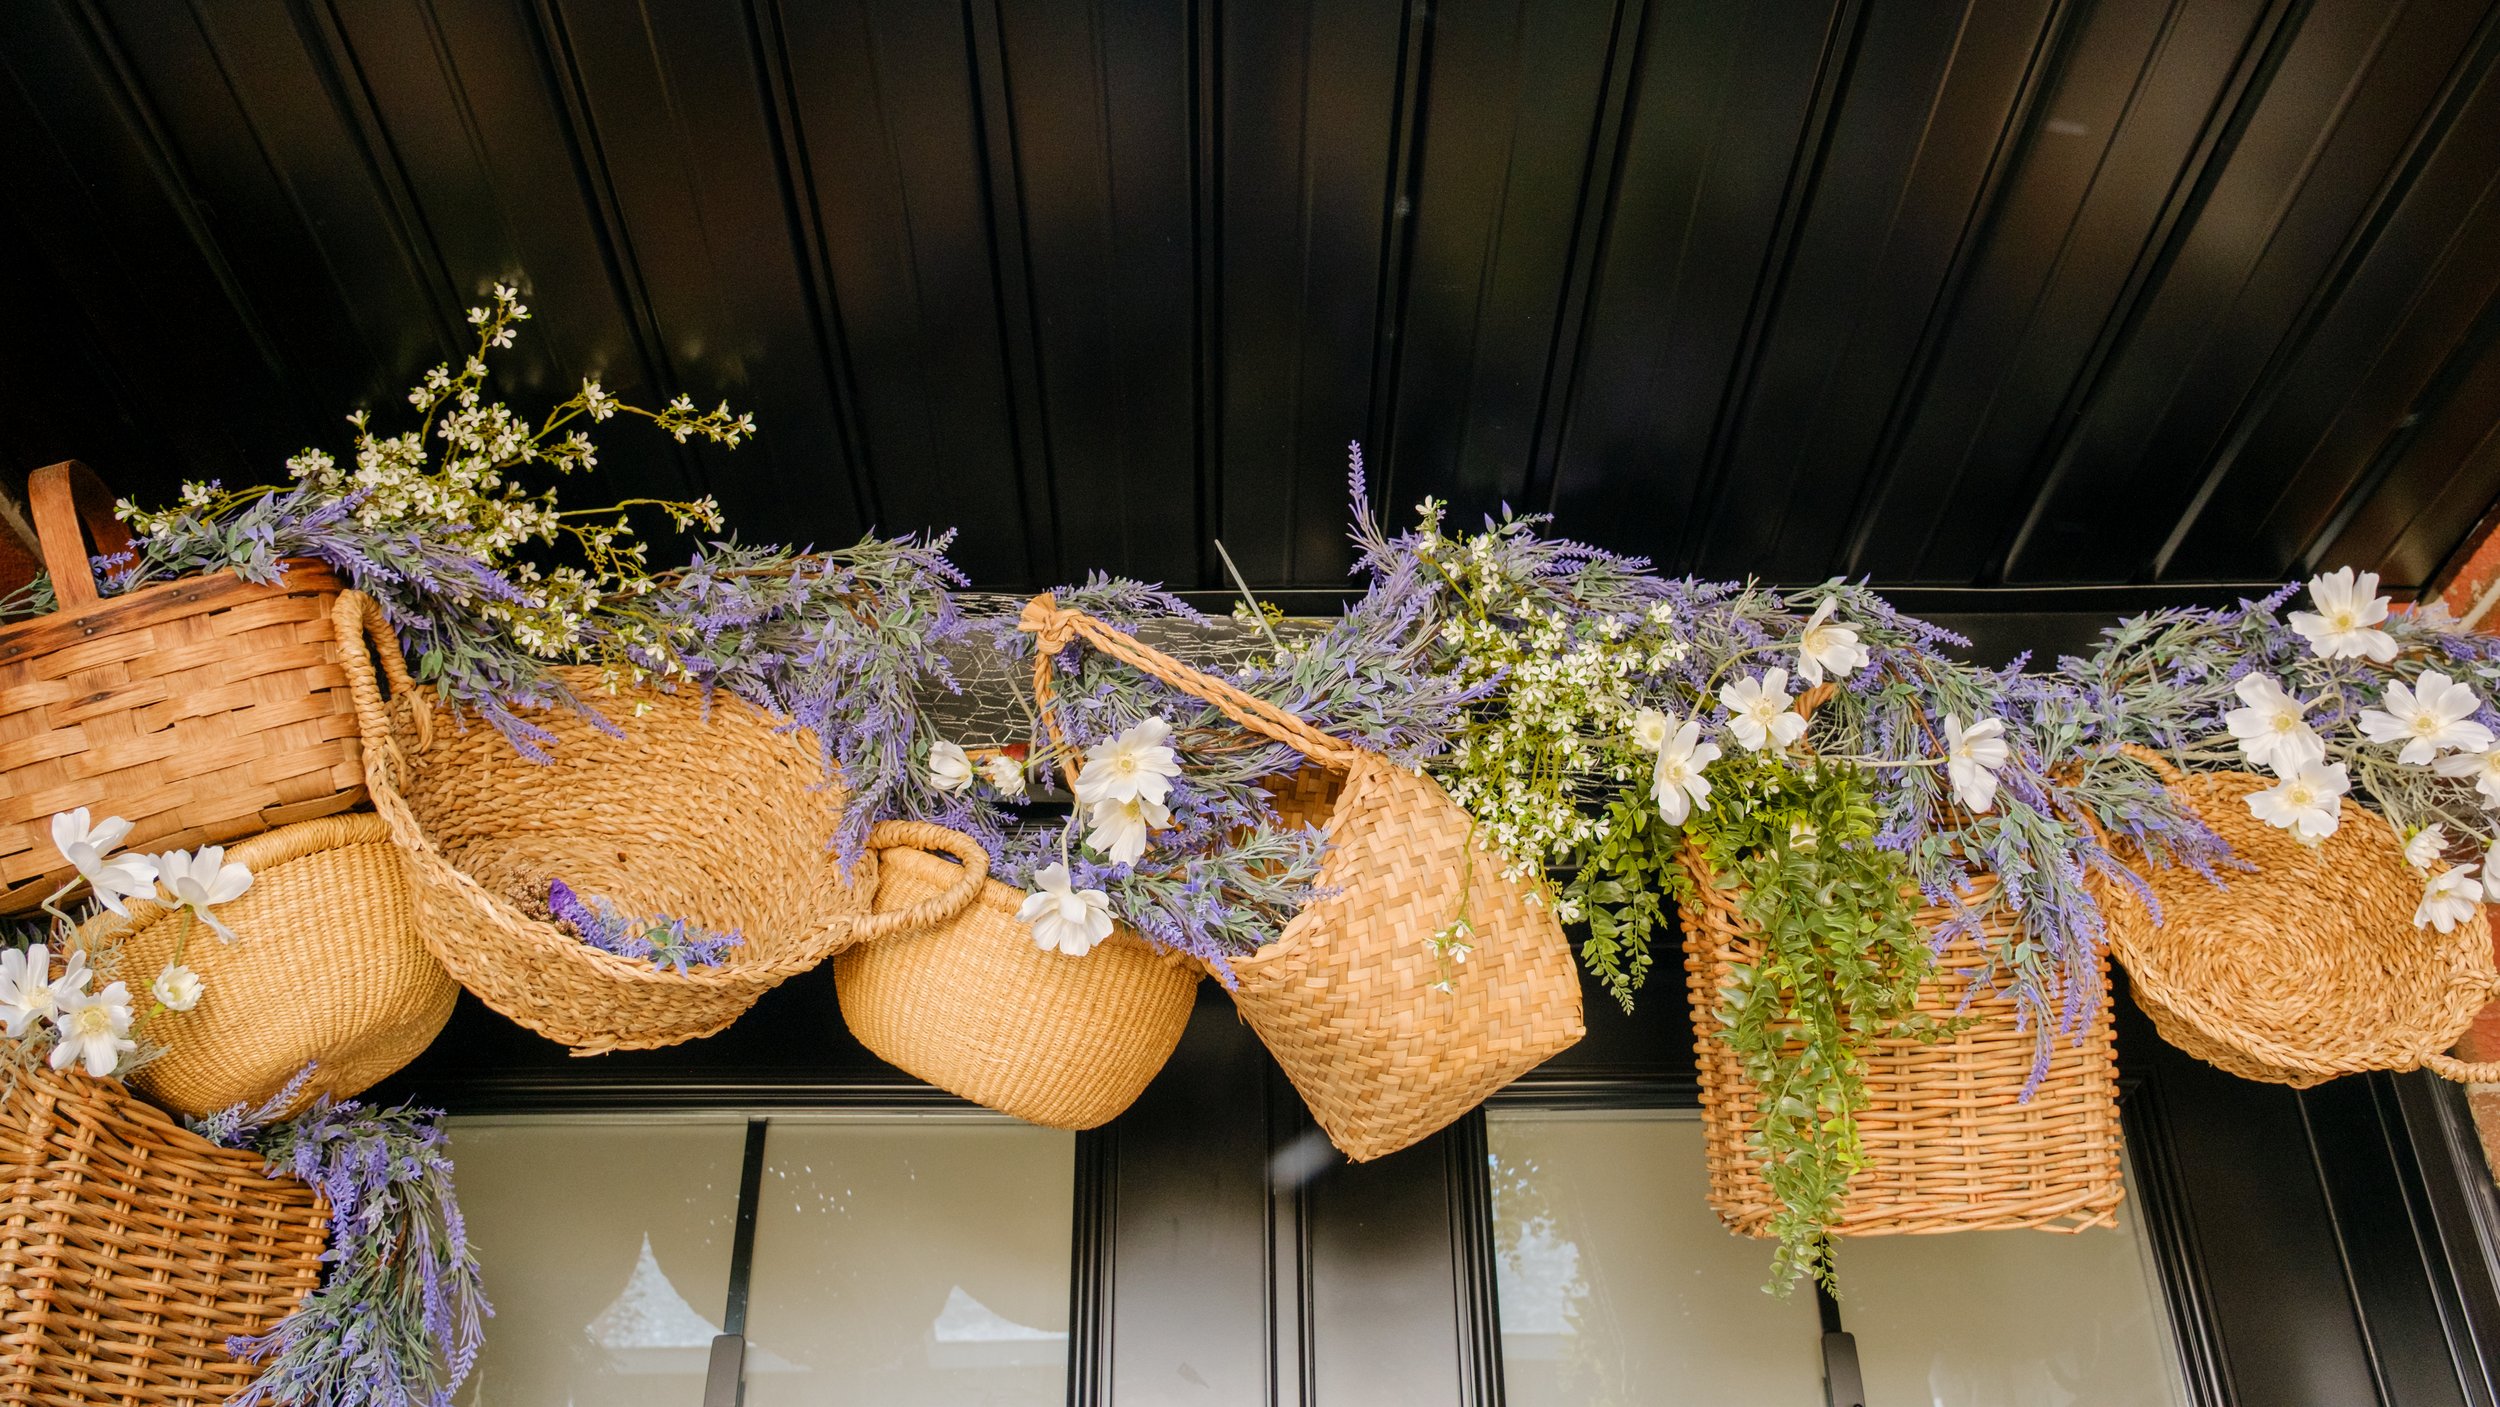

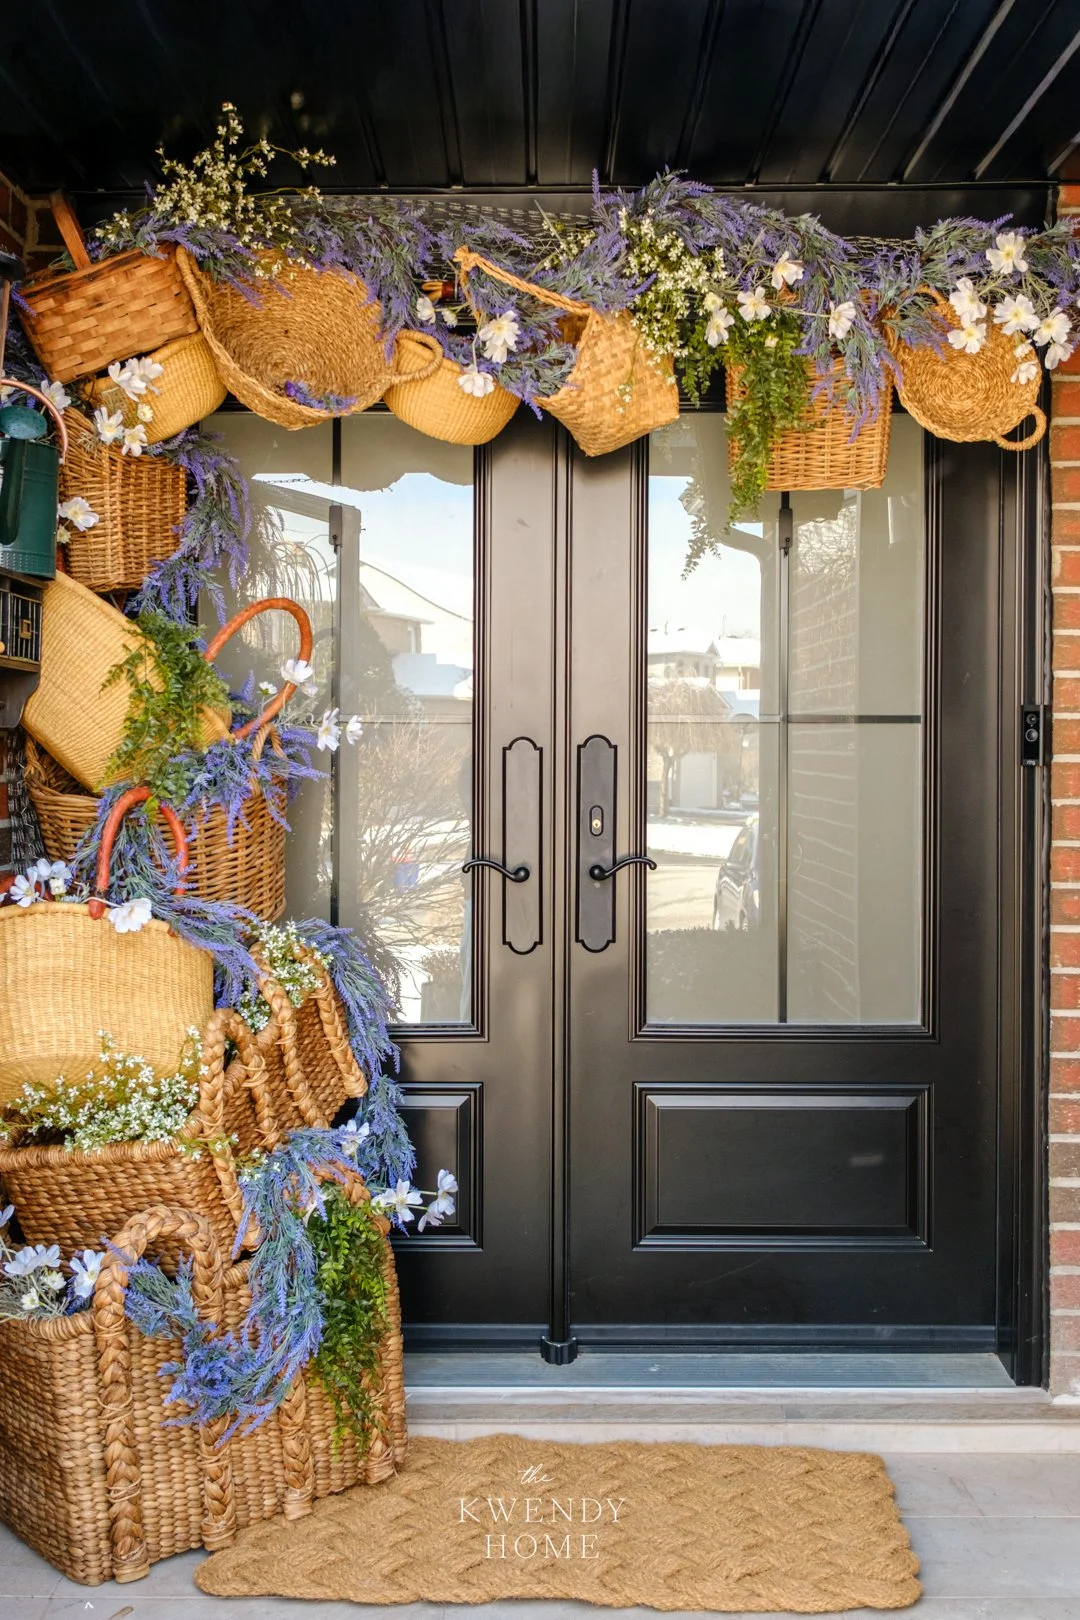
Spring Porch Idea: Basket Arch
(Using Way Too Many Baskets)
I like to mark the change in season with our front door… because nothing says spring like sweeping dead spiders off your porch and pretending it’s a fresh start.
This year, I wanted something a little extra, aka those elaborate storefronts you see in London and Paris. The kind that look effortless but are definitely not.
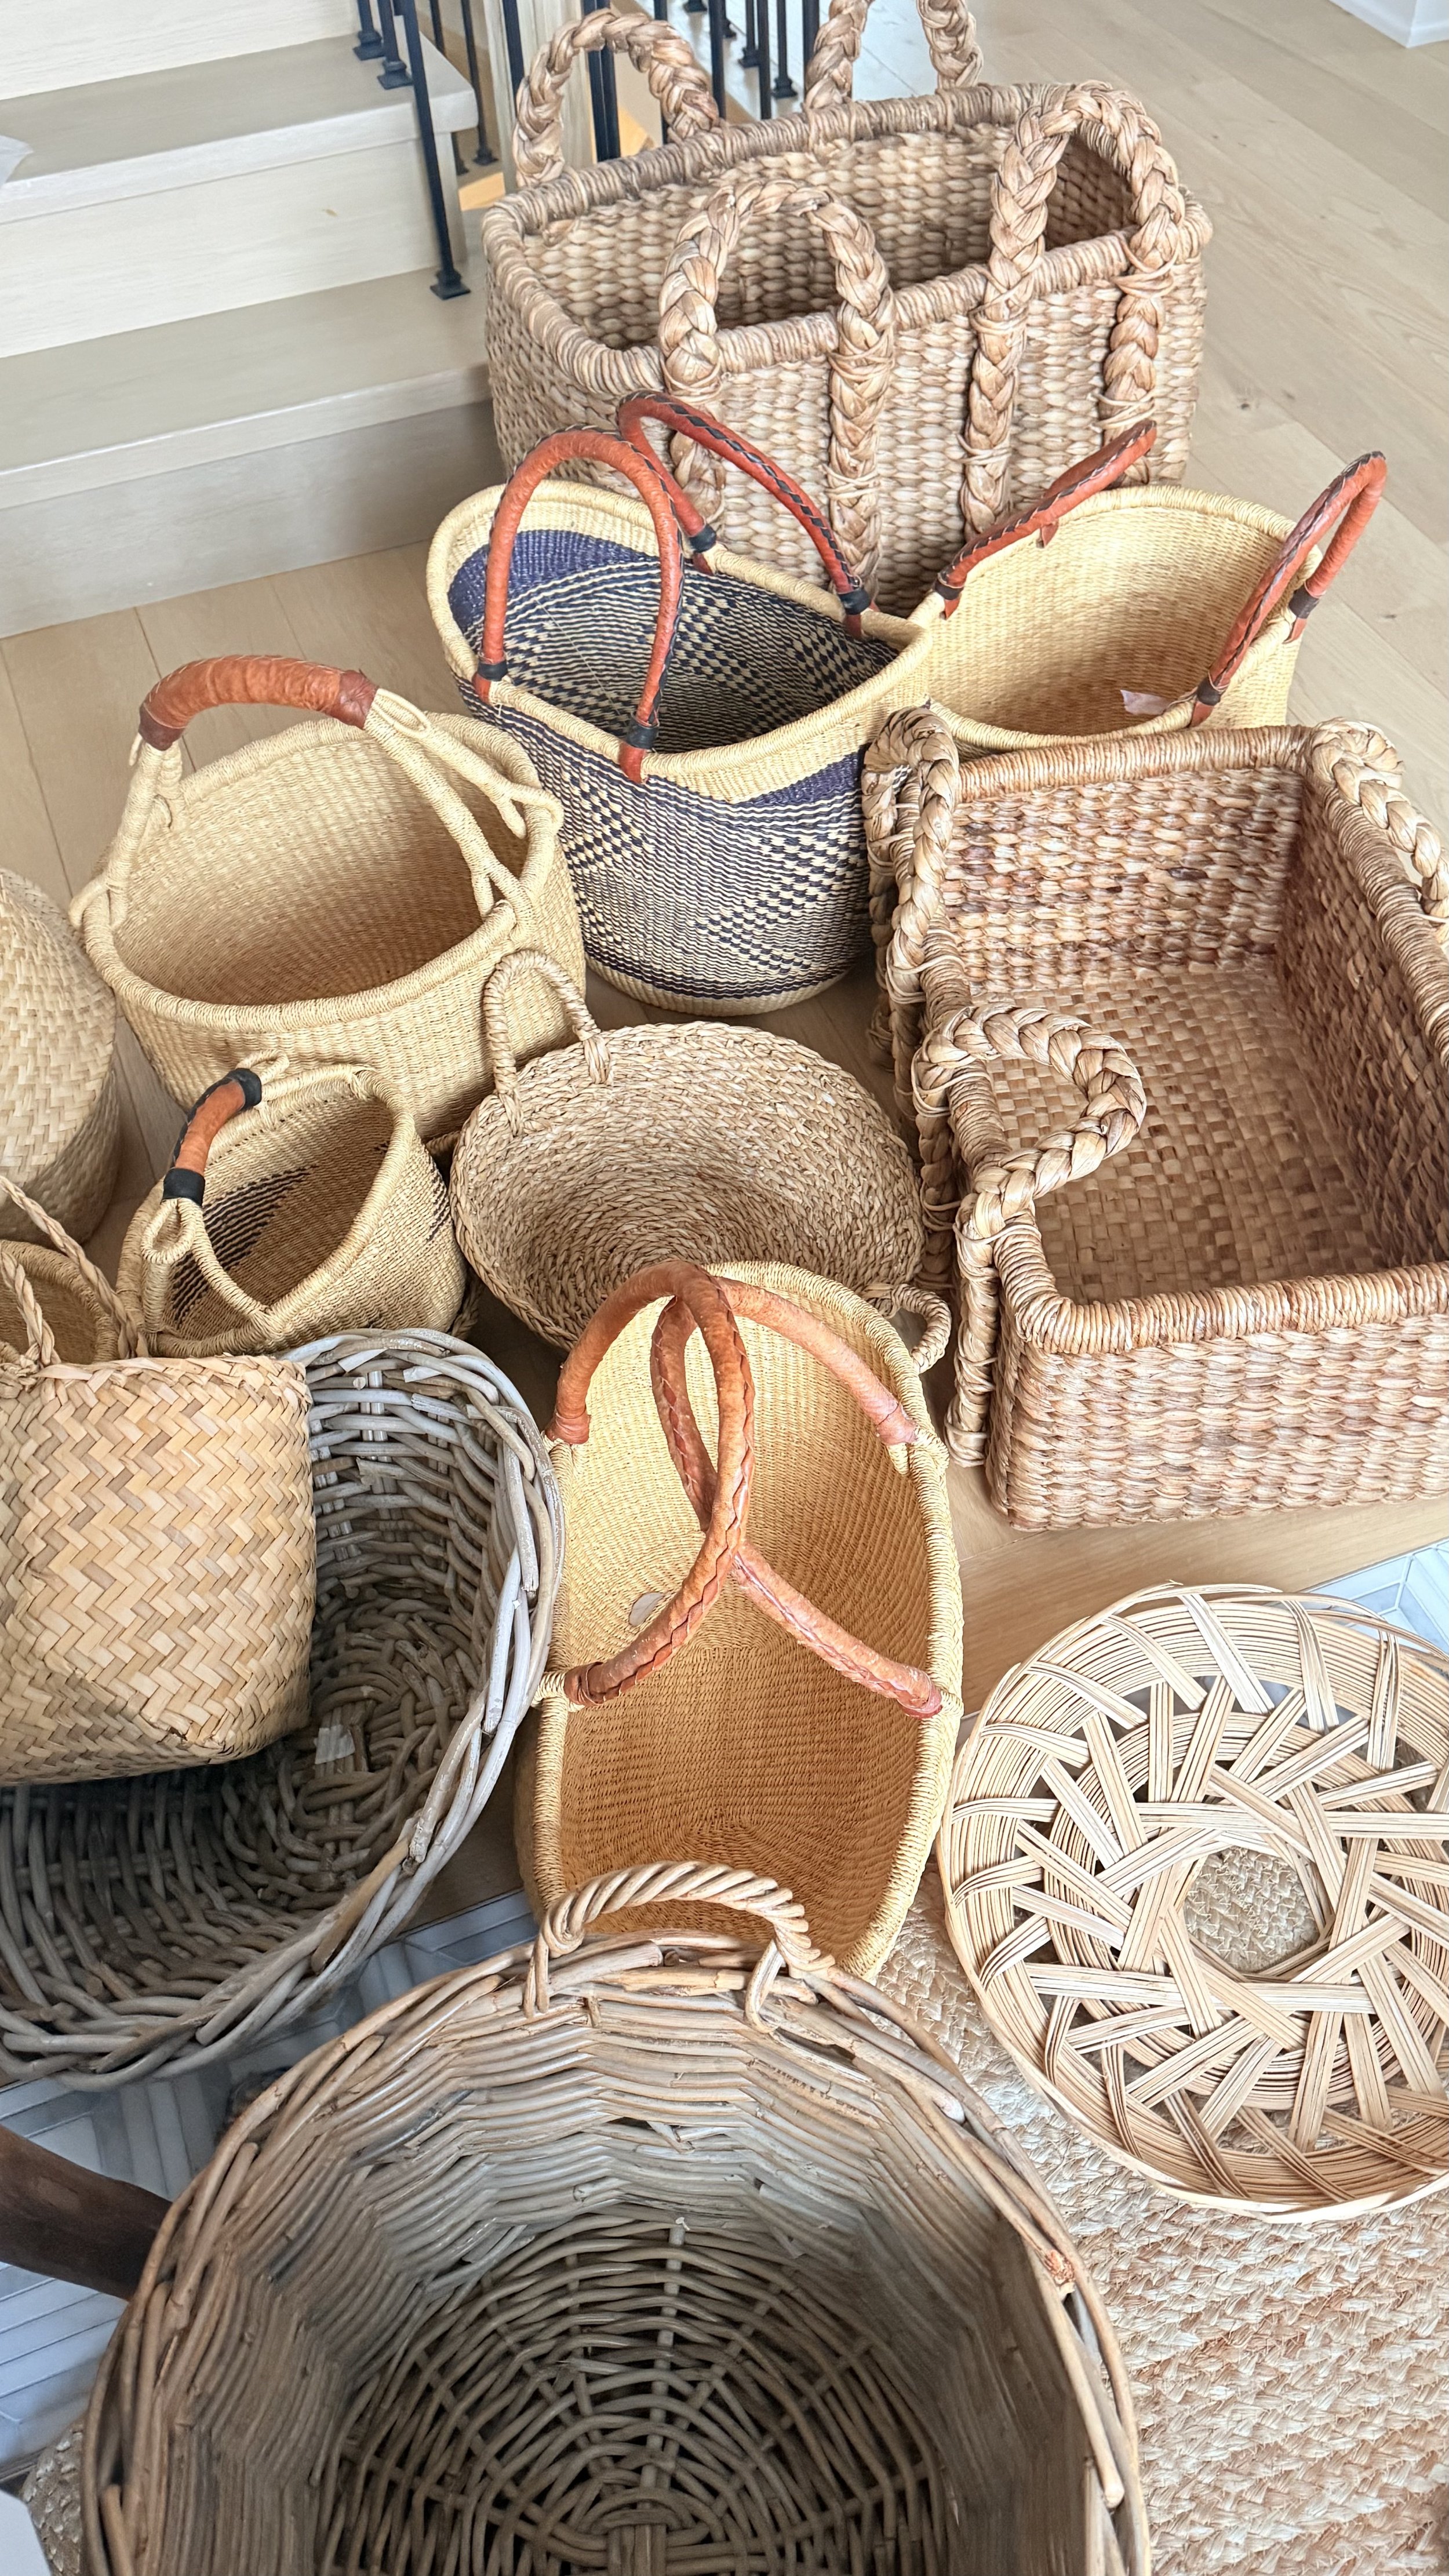
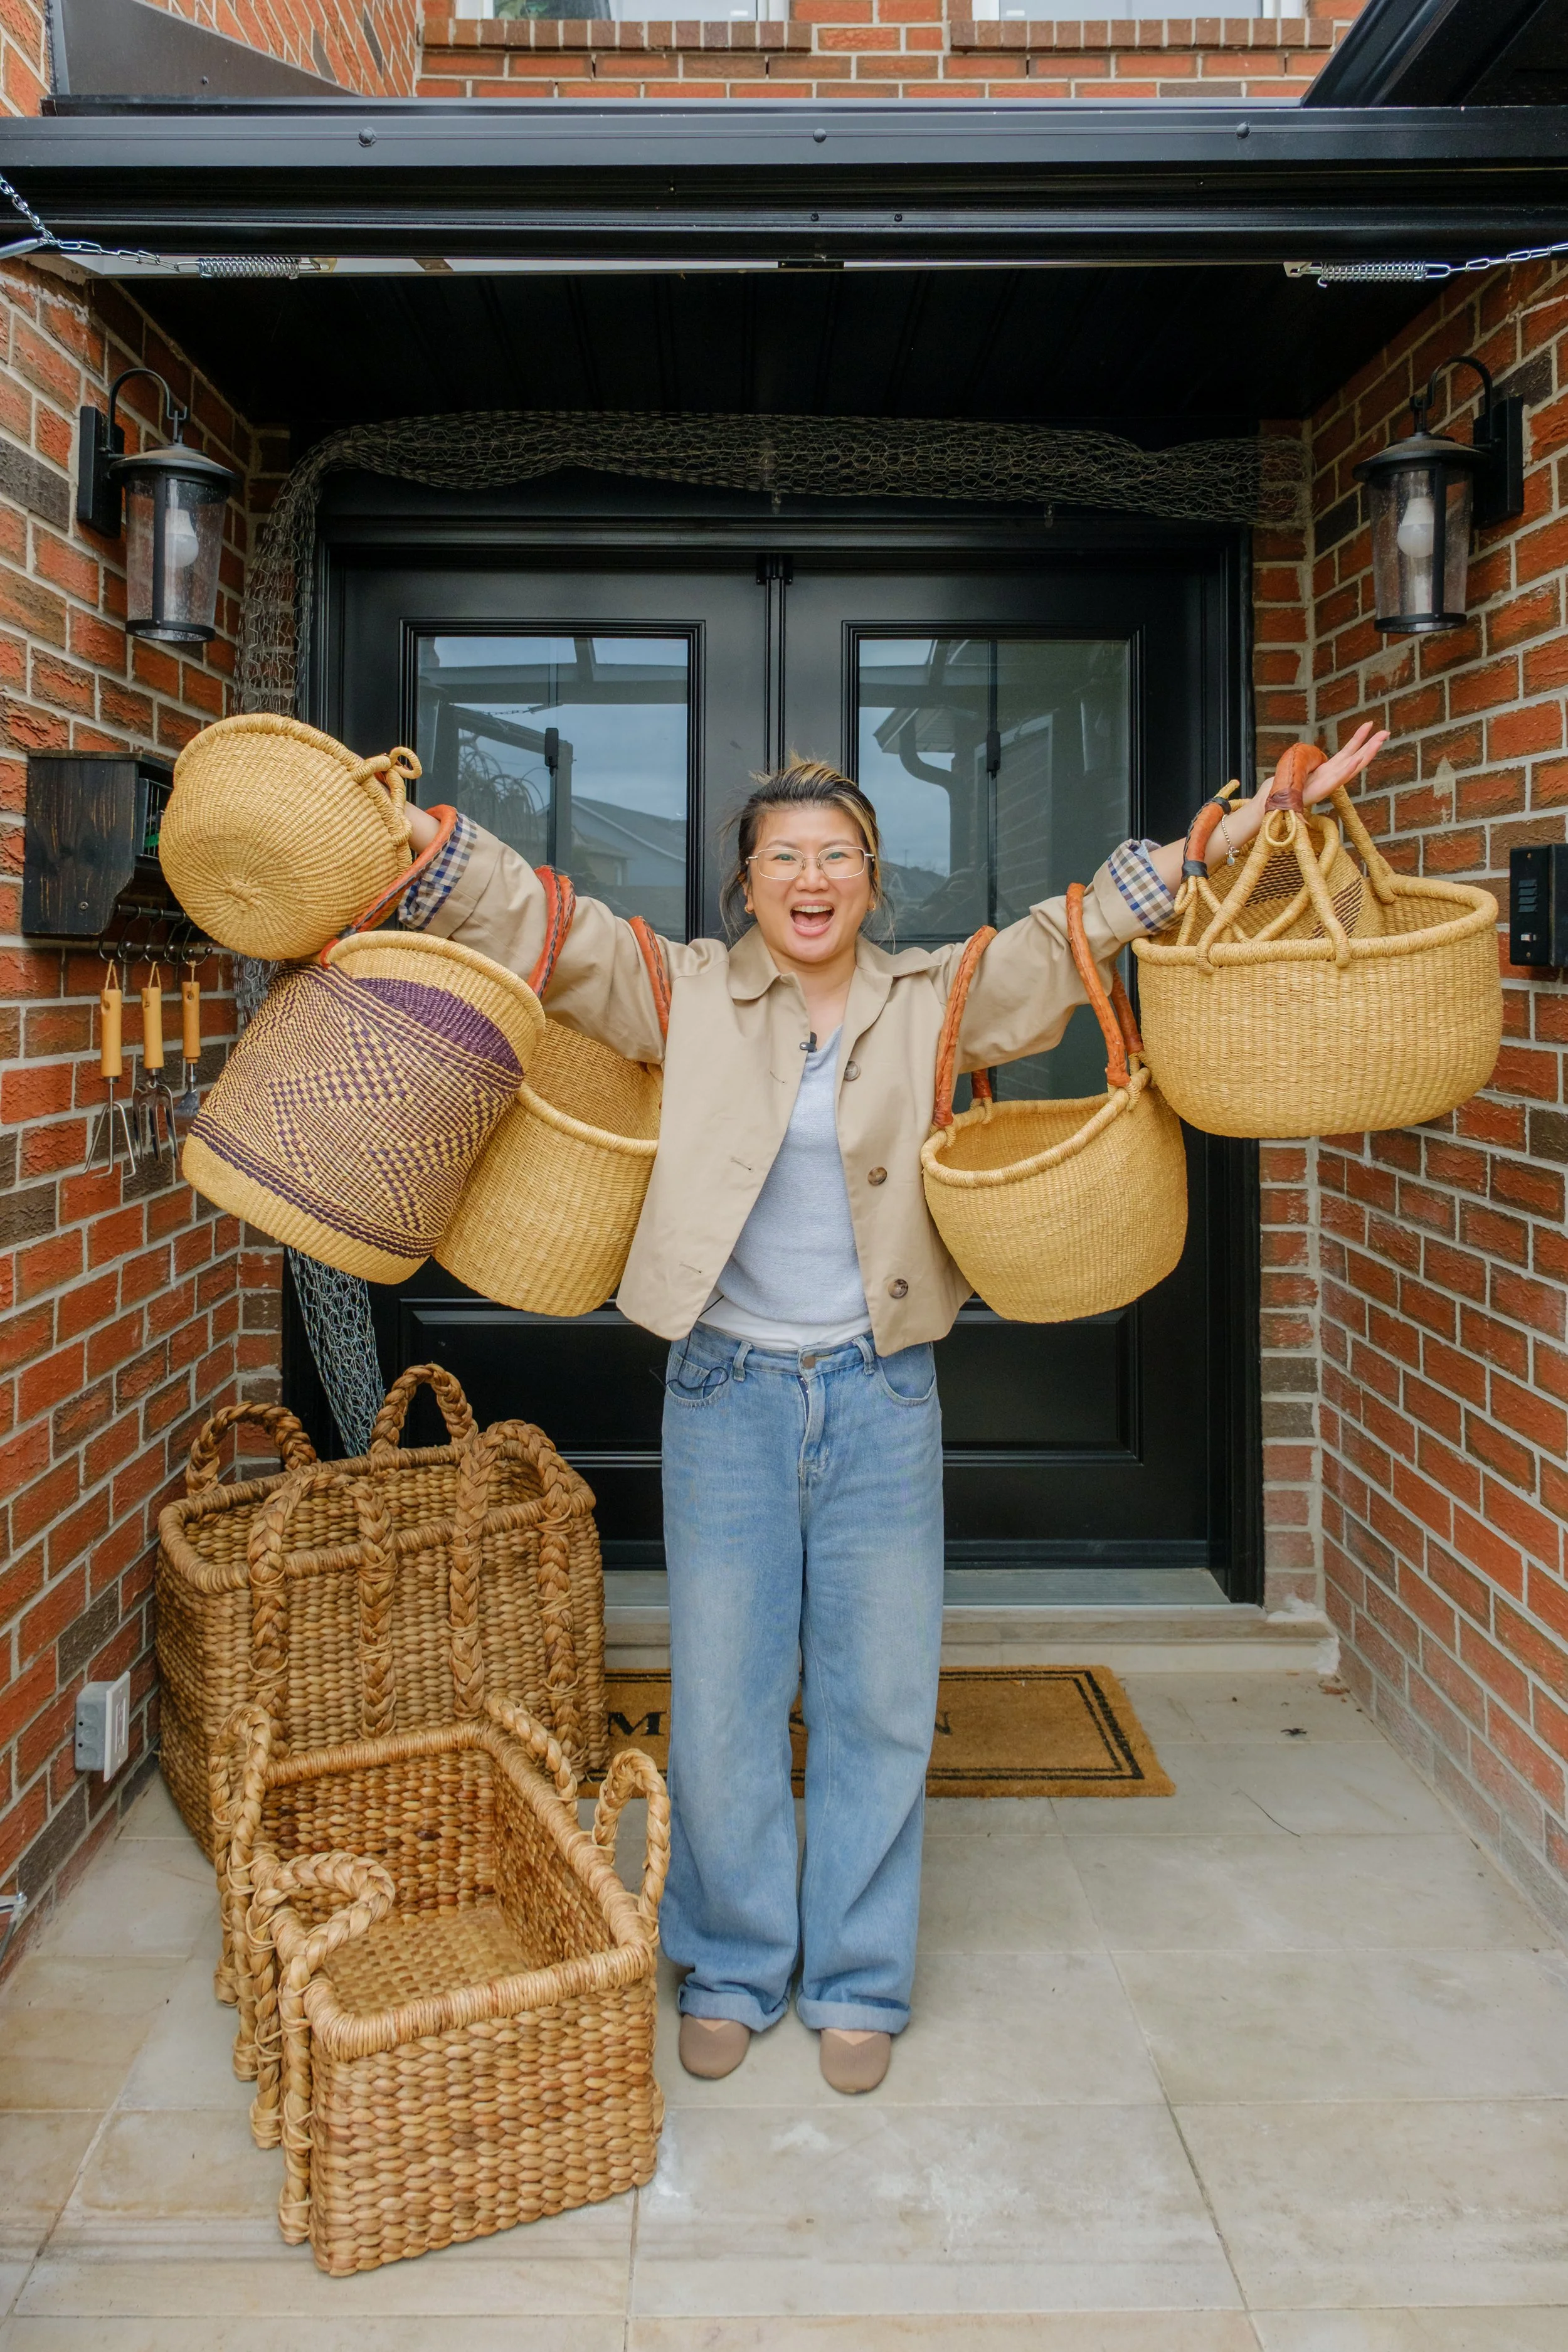
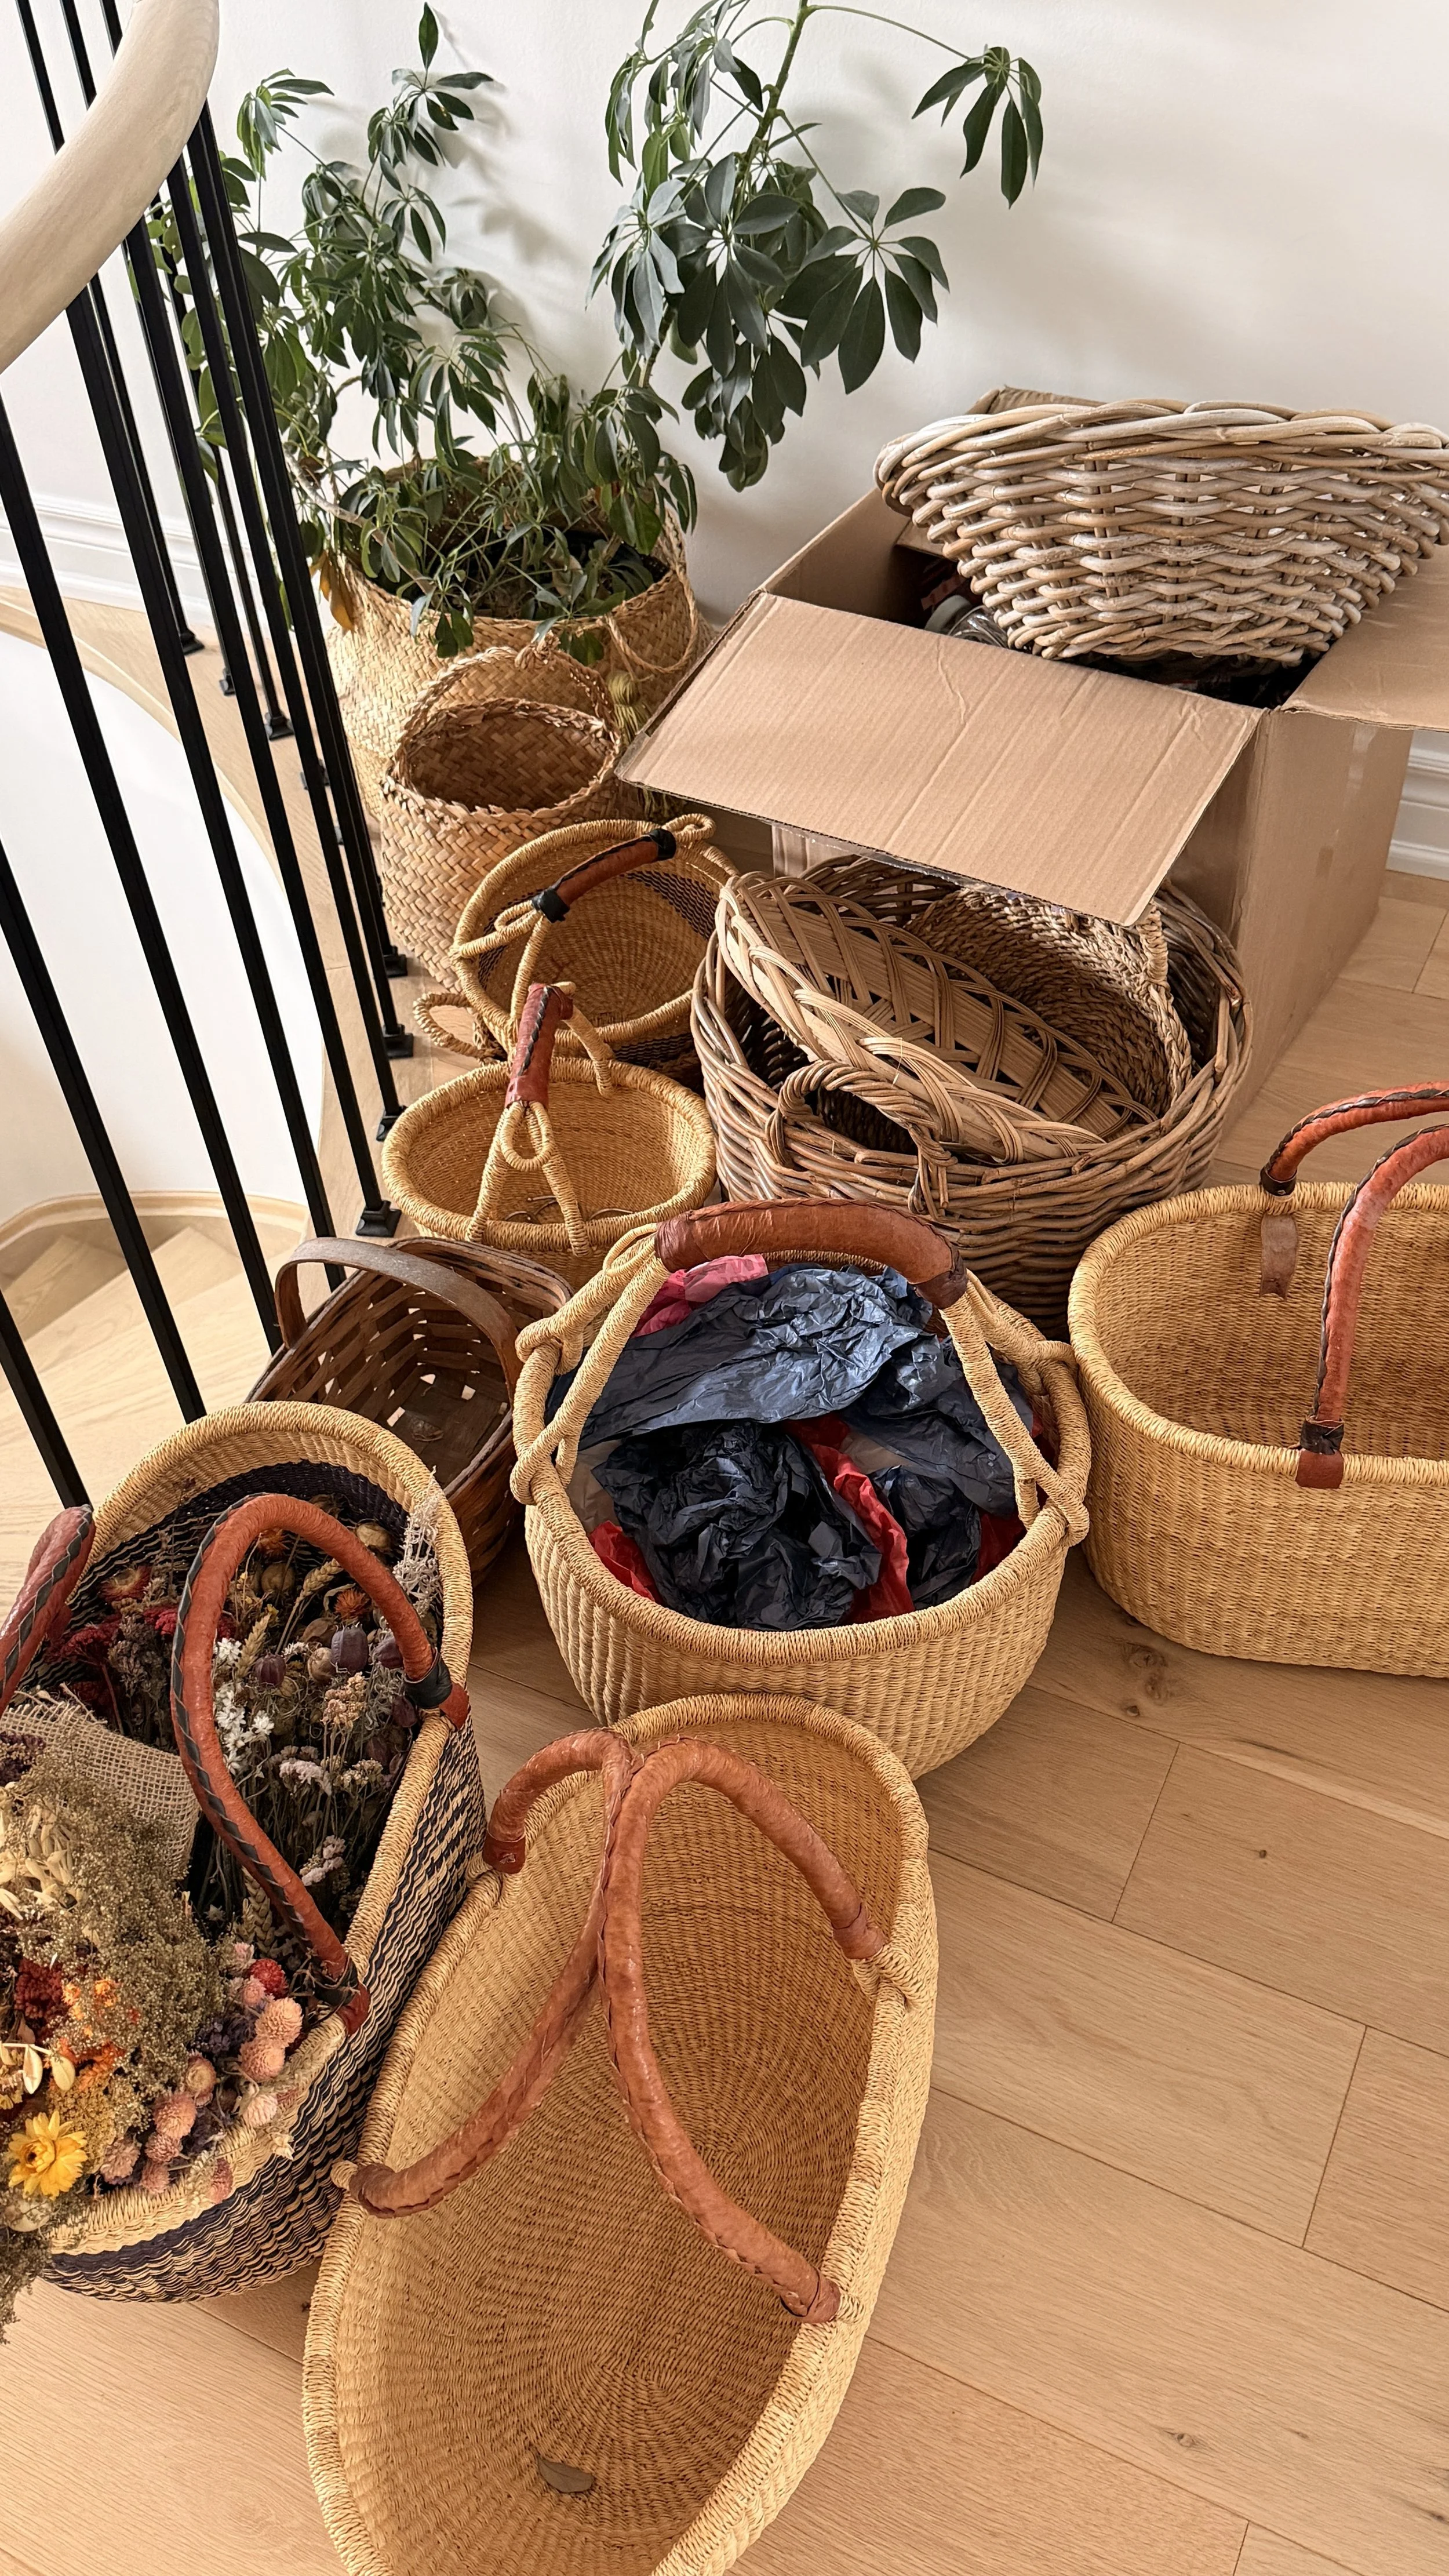
And to my surprise (but literally no one else’s), I already owned enough baskets to open a small wicker franchise. I know what you’re thinking, how do I have so many? The answer is simple, every time we visit an antique store, thrift store or farmer’s market, I always end up leaving with one.
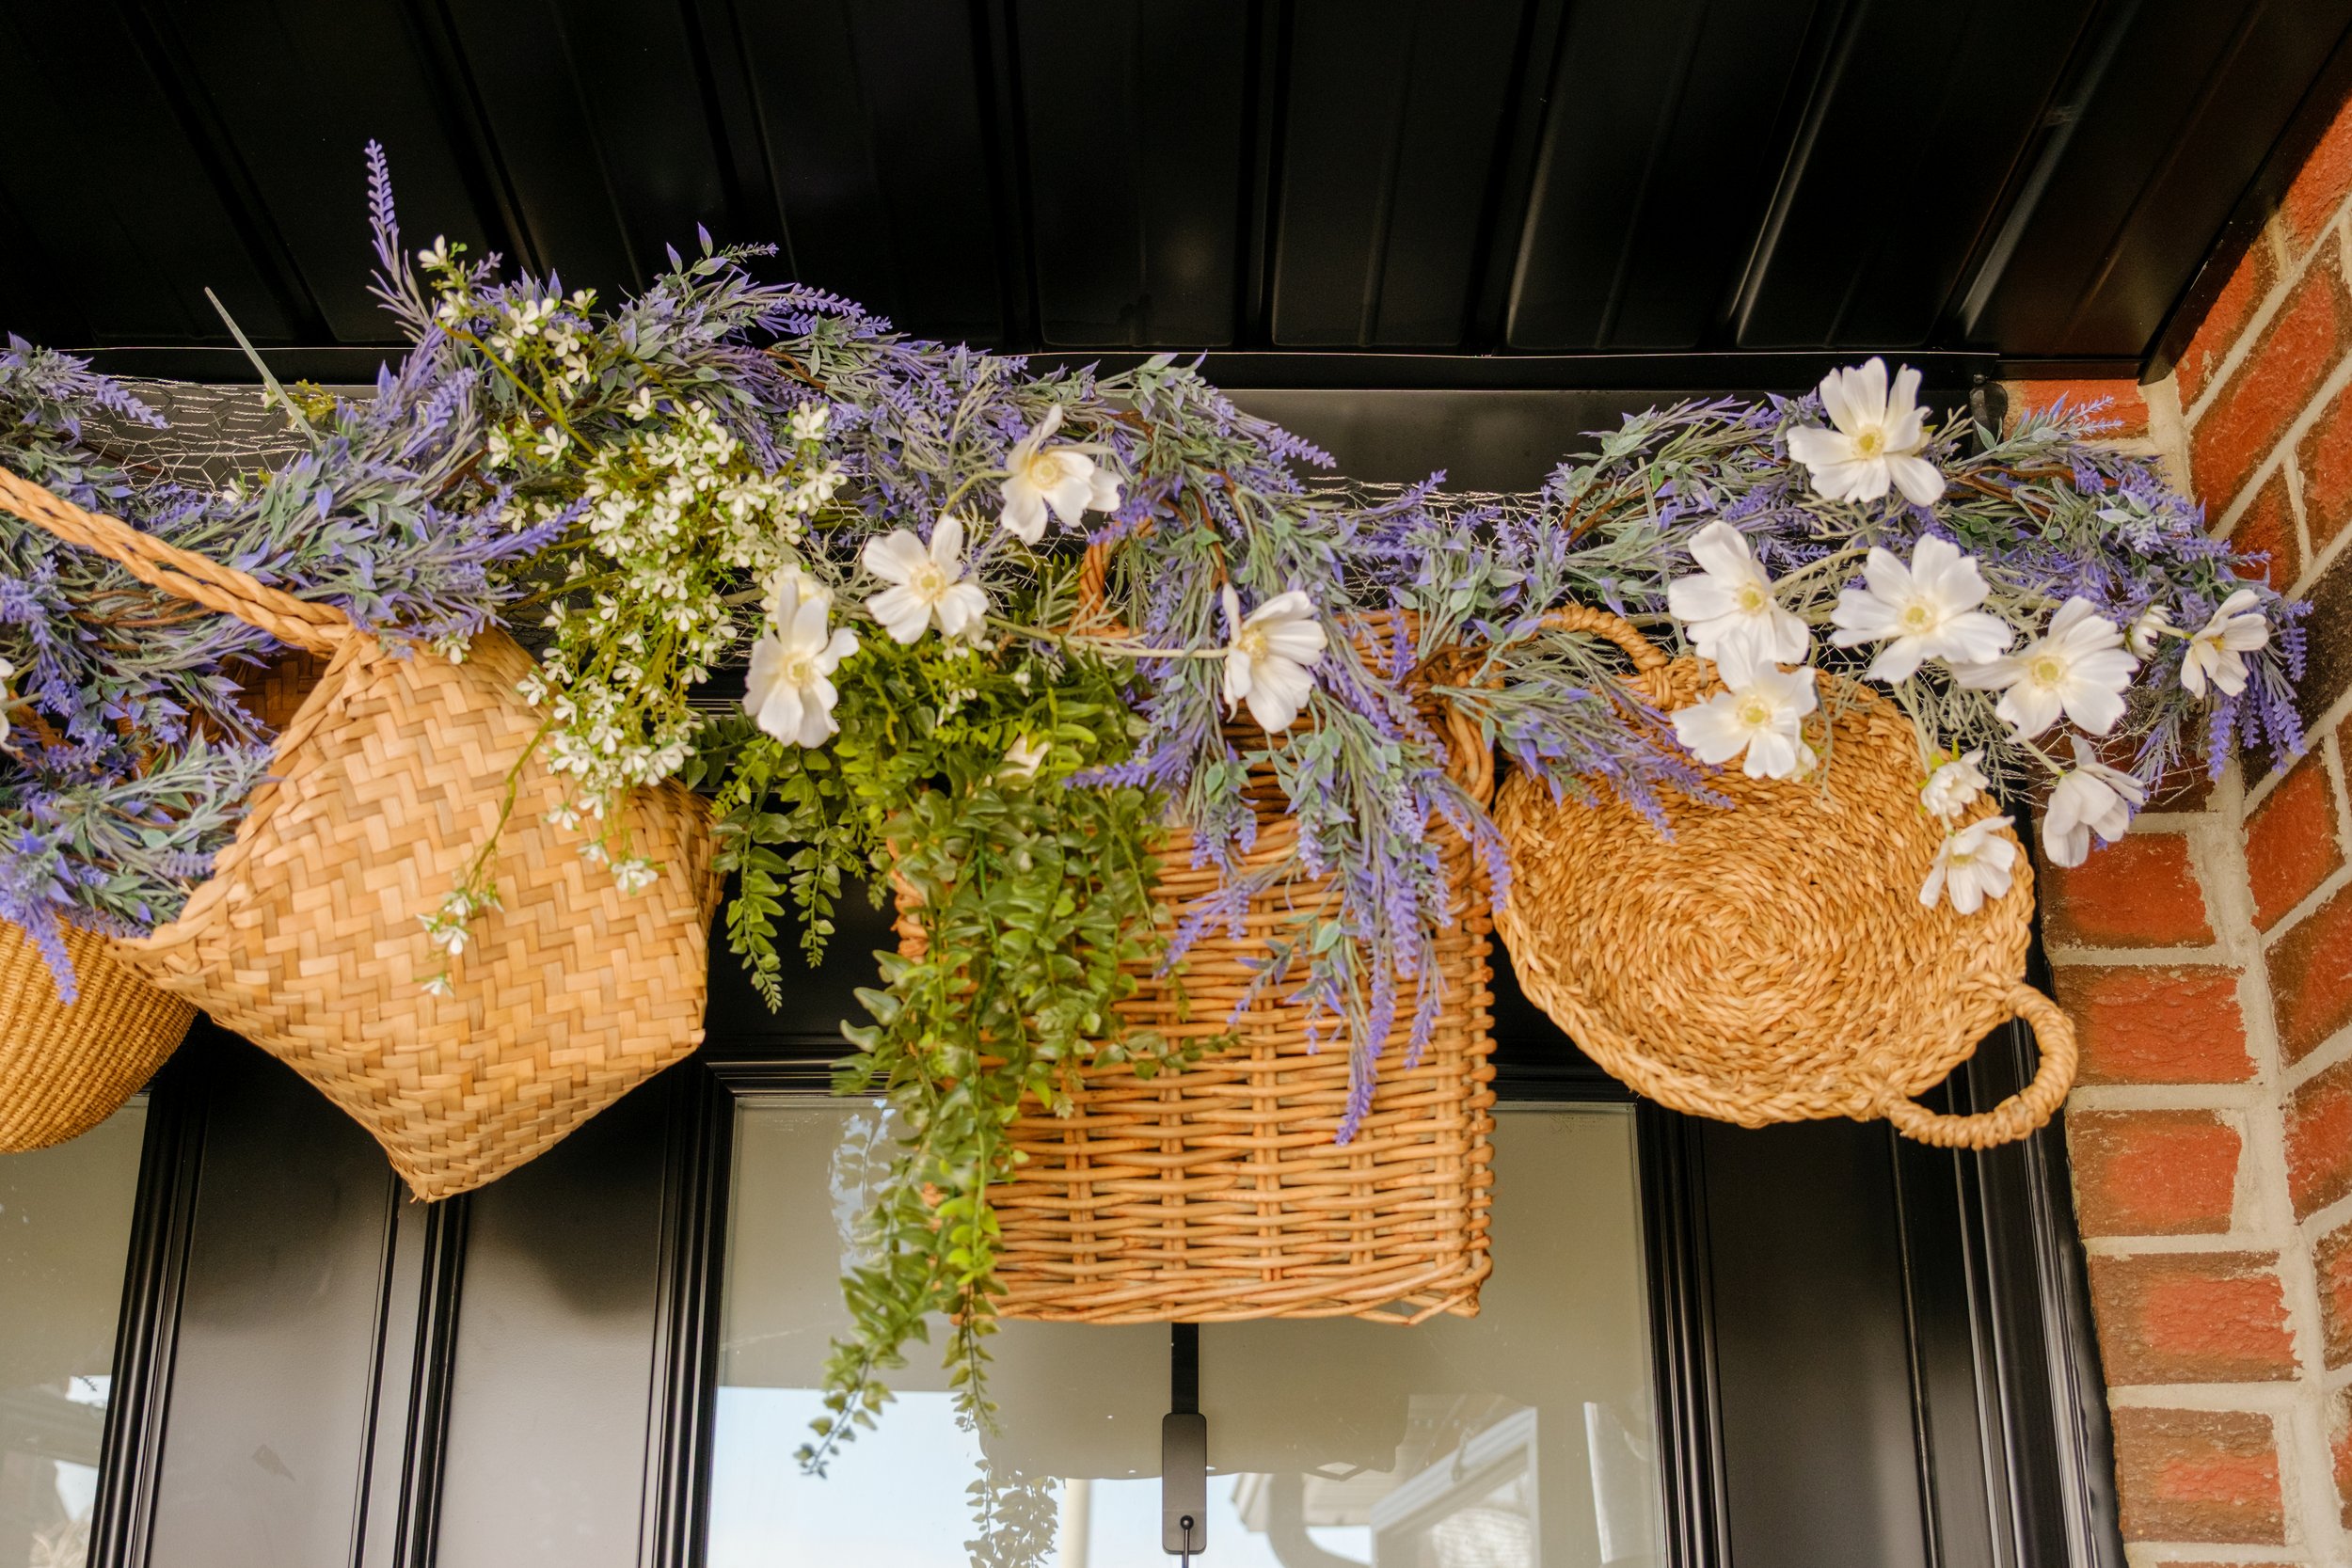
So here’s exactly how I turned that into… whatever this is 👇 it’s giving English cottage core.
🛠️ What You’ll Need
A mix of woven baskets (the more variety in shapes, the better)
Chicken wire
A basic frame (wood or metal)
Zip ties
Faux florals (lavender, cosmos, greenery or whatever suits the season and your theme)
Trailing plants or moss
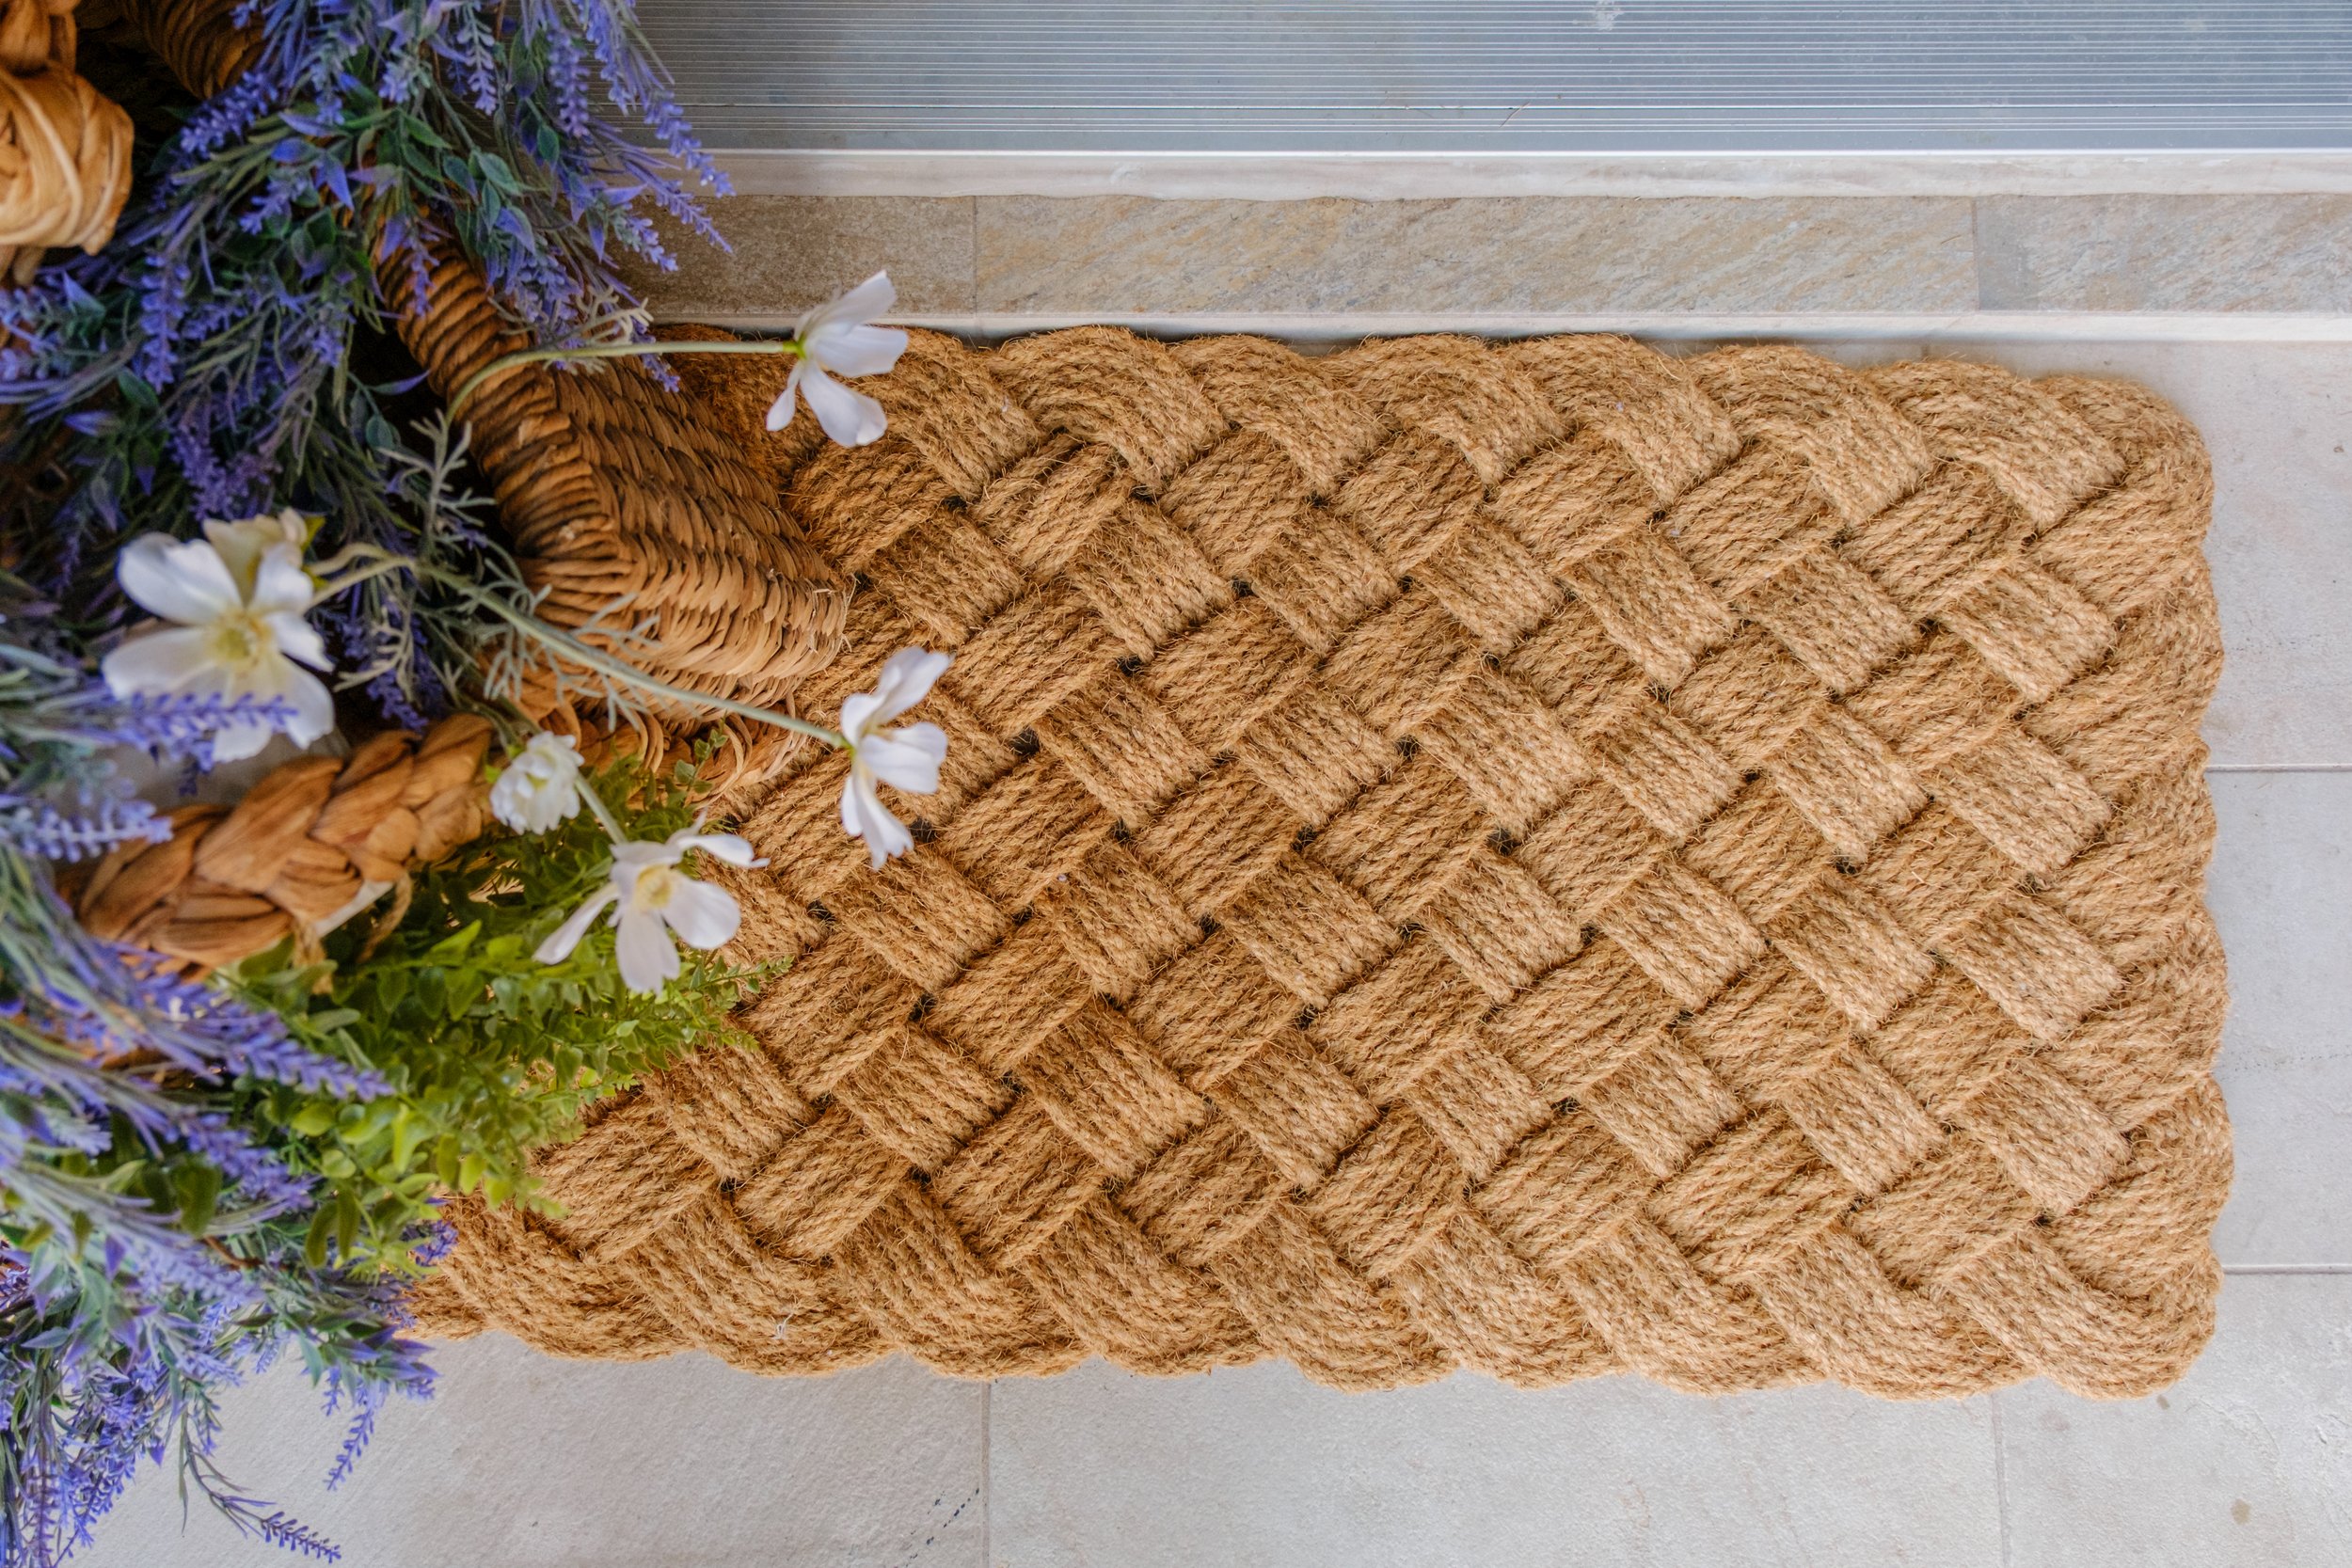
A woven mat or statement door mat
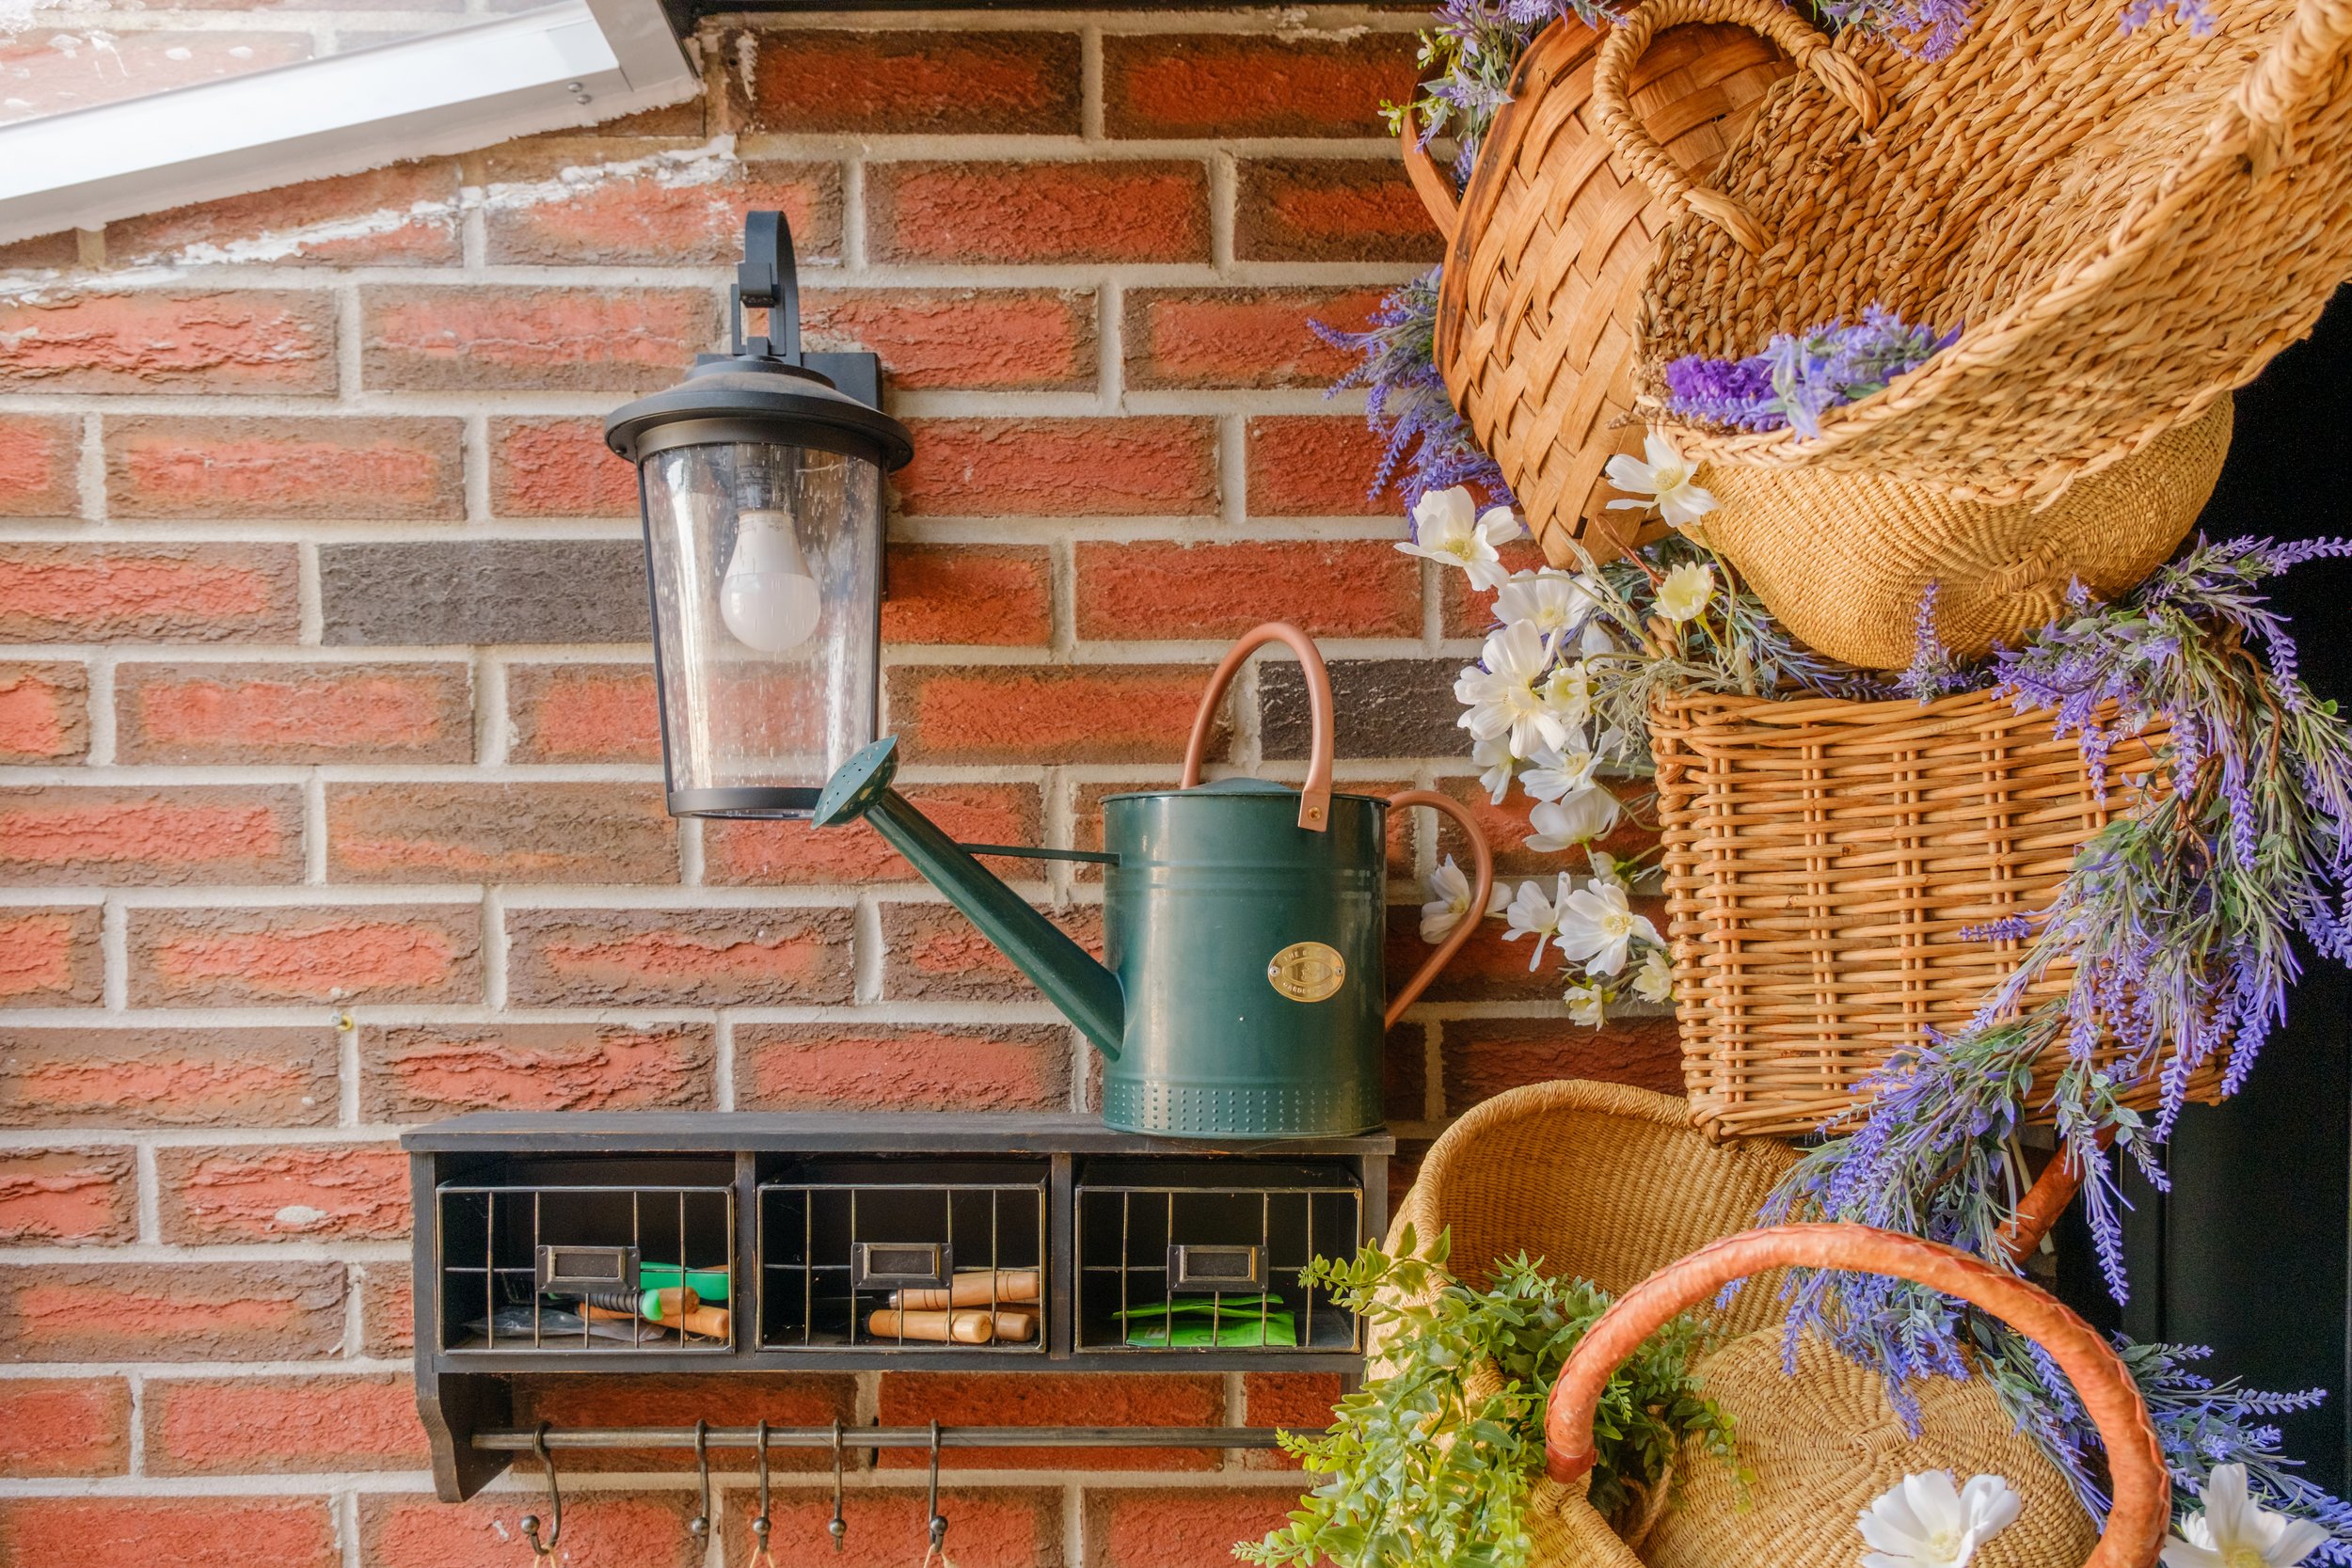
Command Hooks
💡 Note: My porch is covered in a glass vestibule so it’s quite weather and pest protected.
🌸 Step-by-Step: How to Create a Basket Door Installation
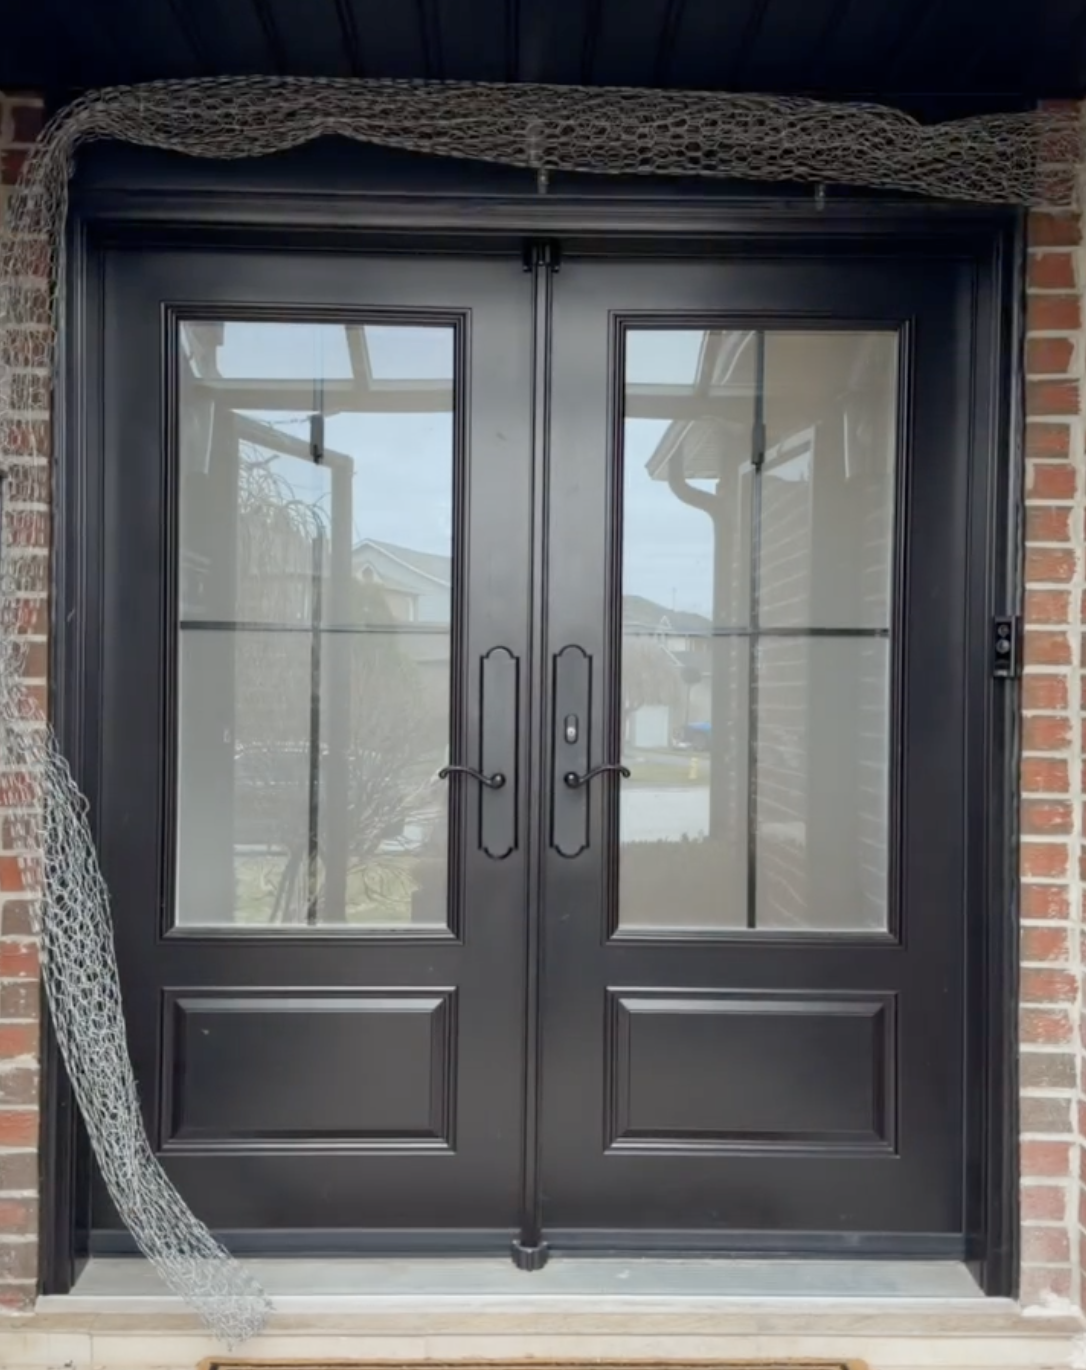
1. Build Your Arch Frame
Start by creating a simple frame by rolling the chicken wire into a tube . I secured it with pieces of wire so that it stayed in that shape.
This is your foundation, the thing that holds everything together (emotionally and structurally).
I had two black Command Hooks on either side of my door that holds up to 5lbs that I hung the chicken wire to. I know this will hold because it held our heavy Christmas garlands over the holidays without budging.
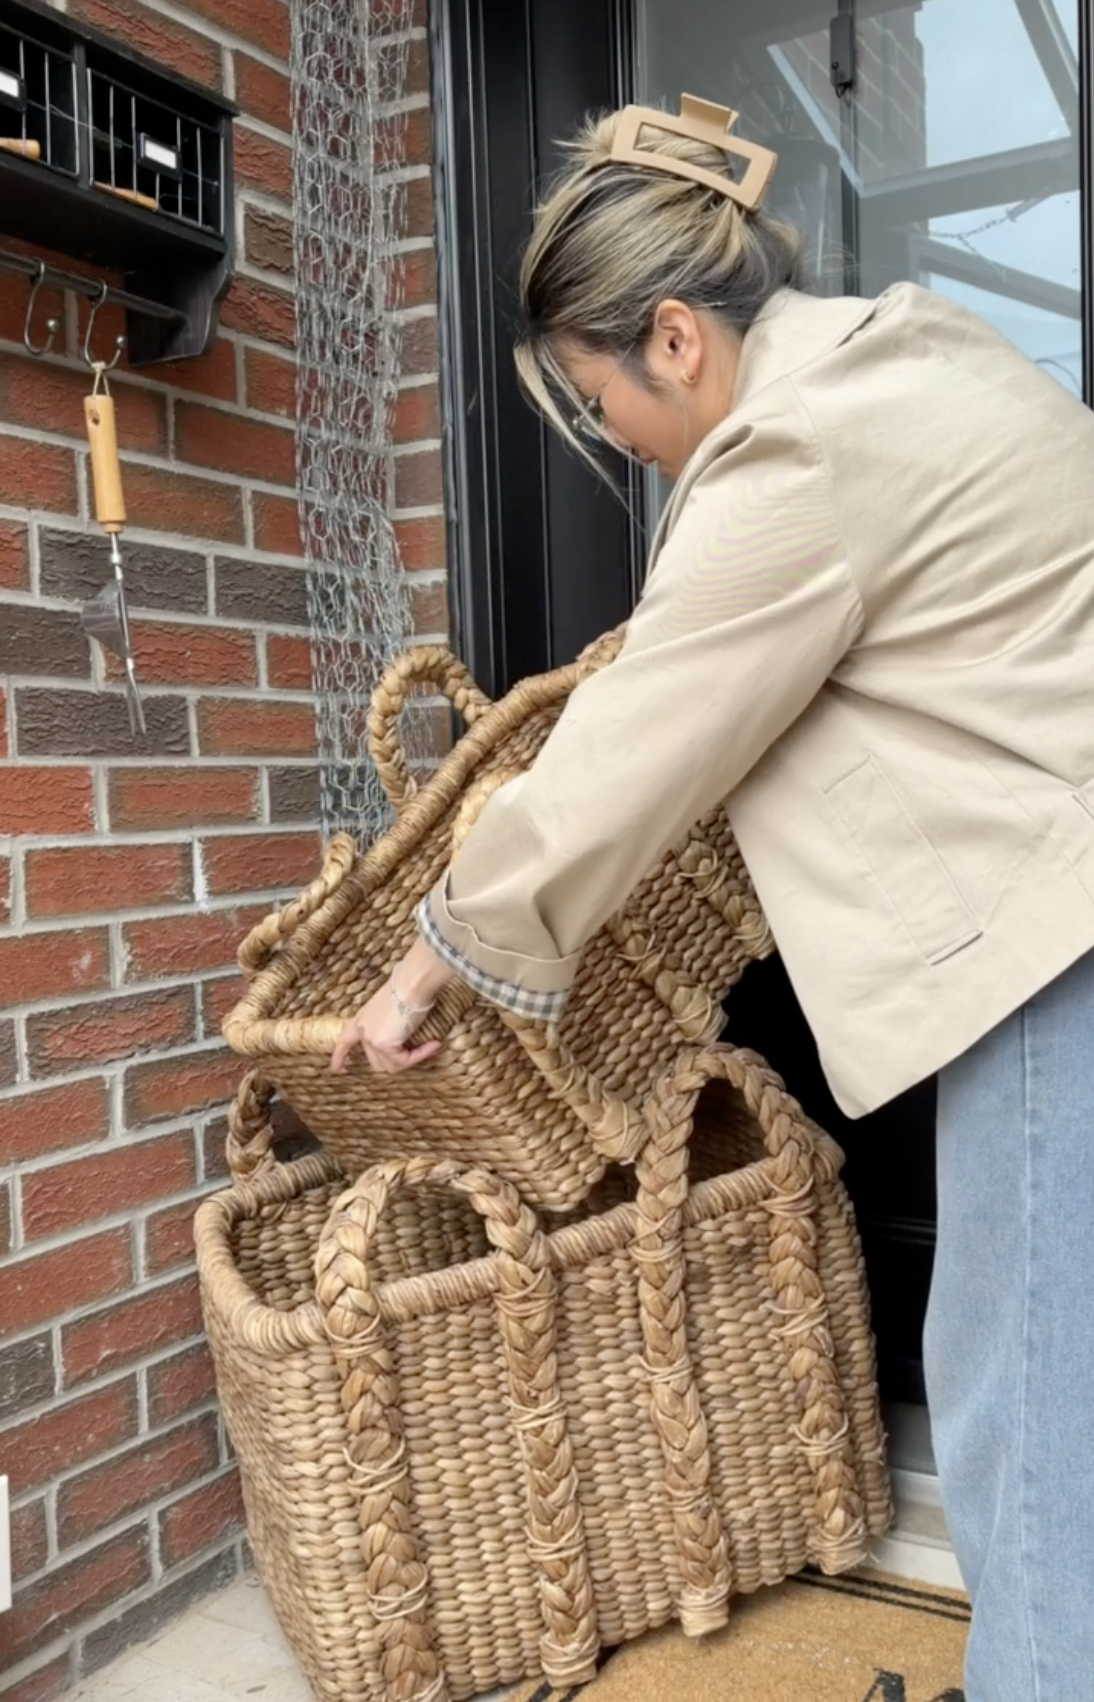
2. Anchor Your Largest Basket First
Begin at the bottom with your biggest basket to balance it out.
Secure it to the frame using zip ties.
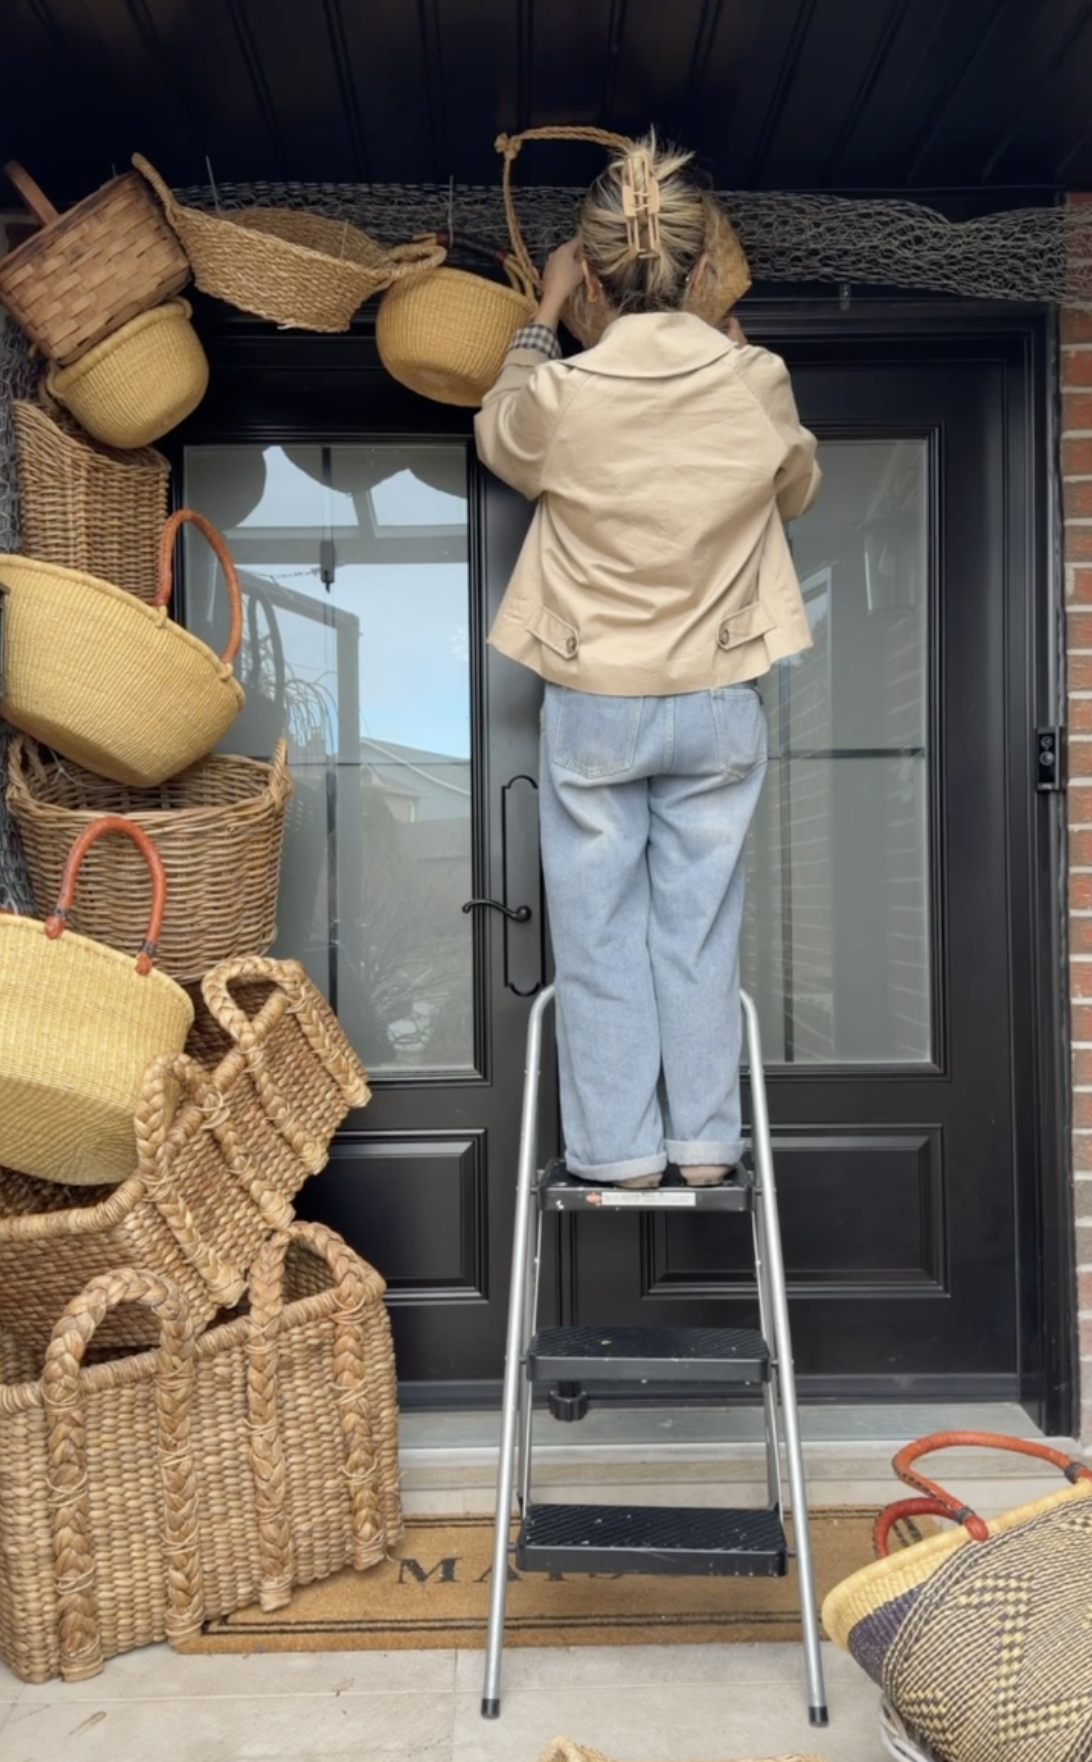
3. Build Around It (Trust the Process… Kind Of)
This is arguably the hardest part if you’re working alone. You’re going to run back and forth to see if things look balanced and if it looks good.
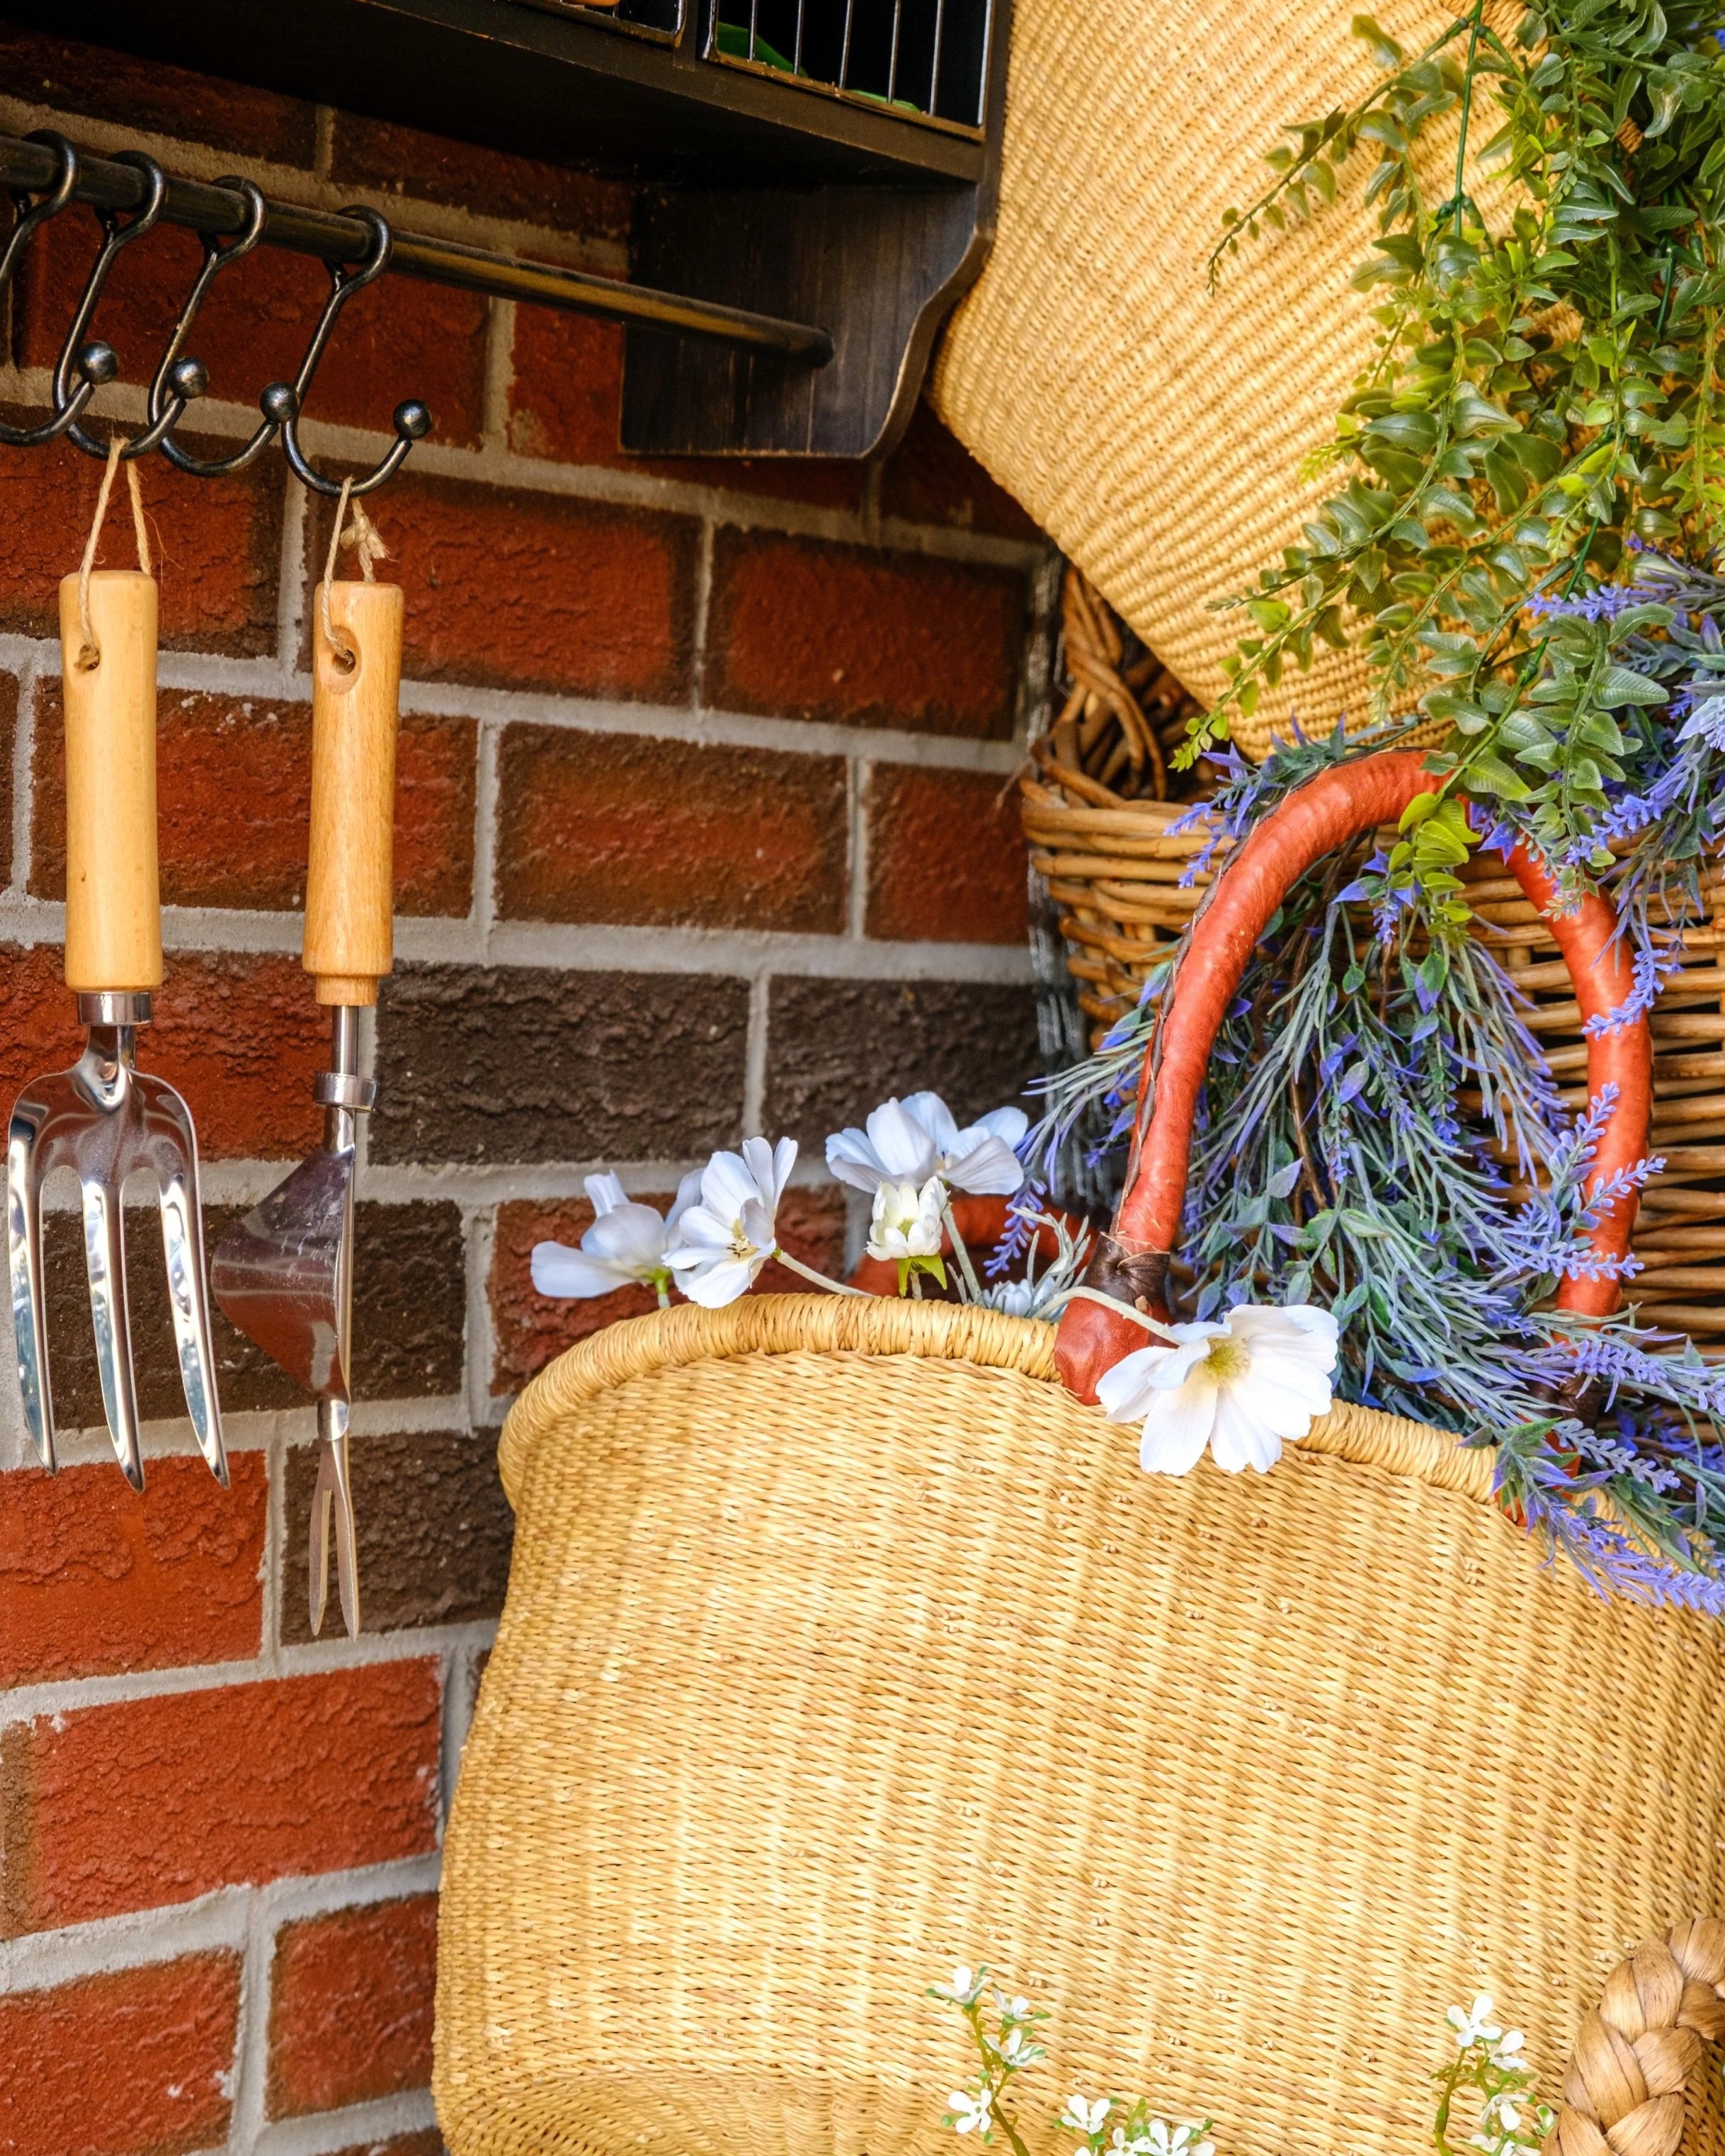
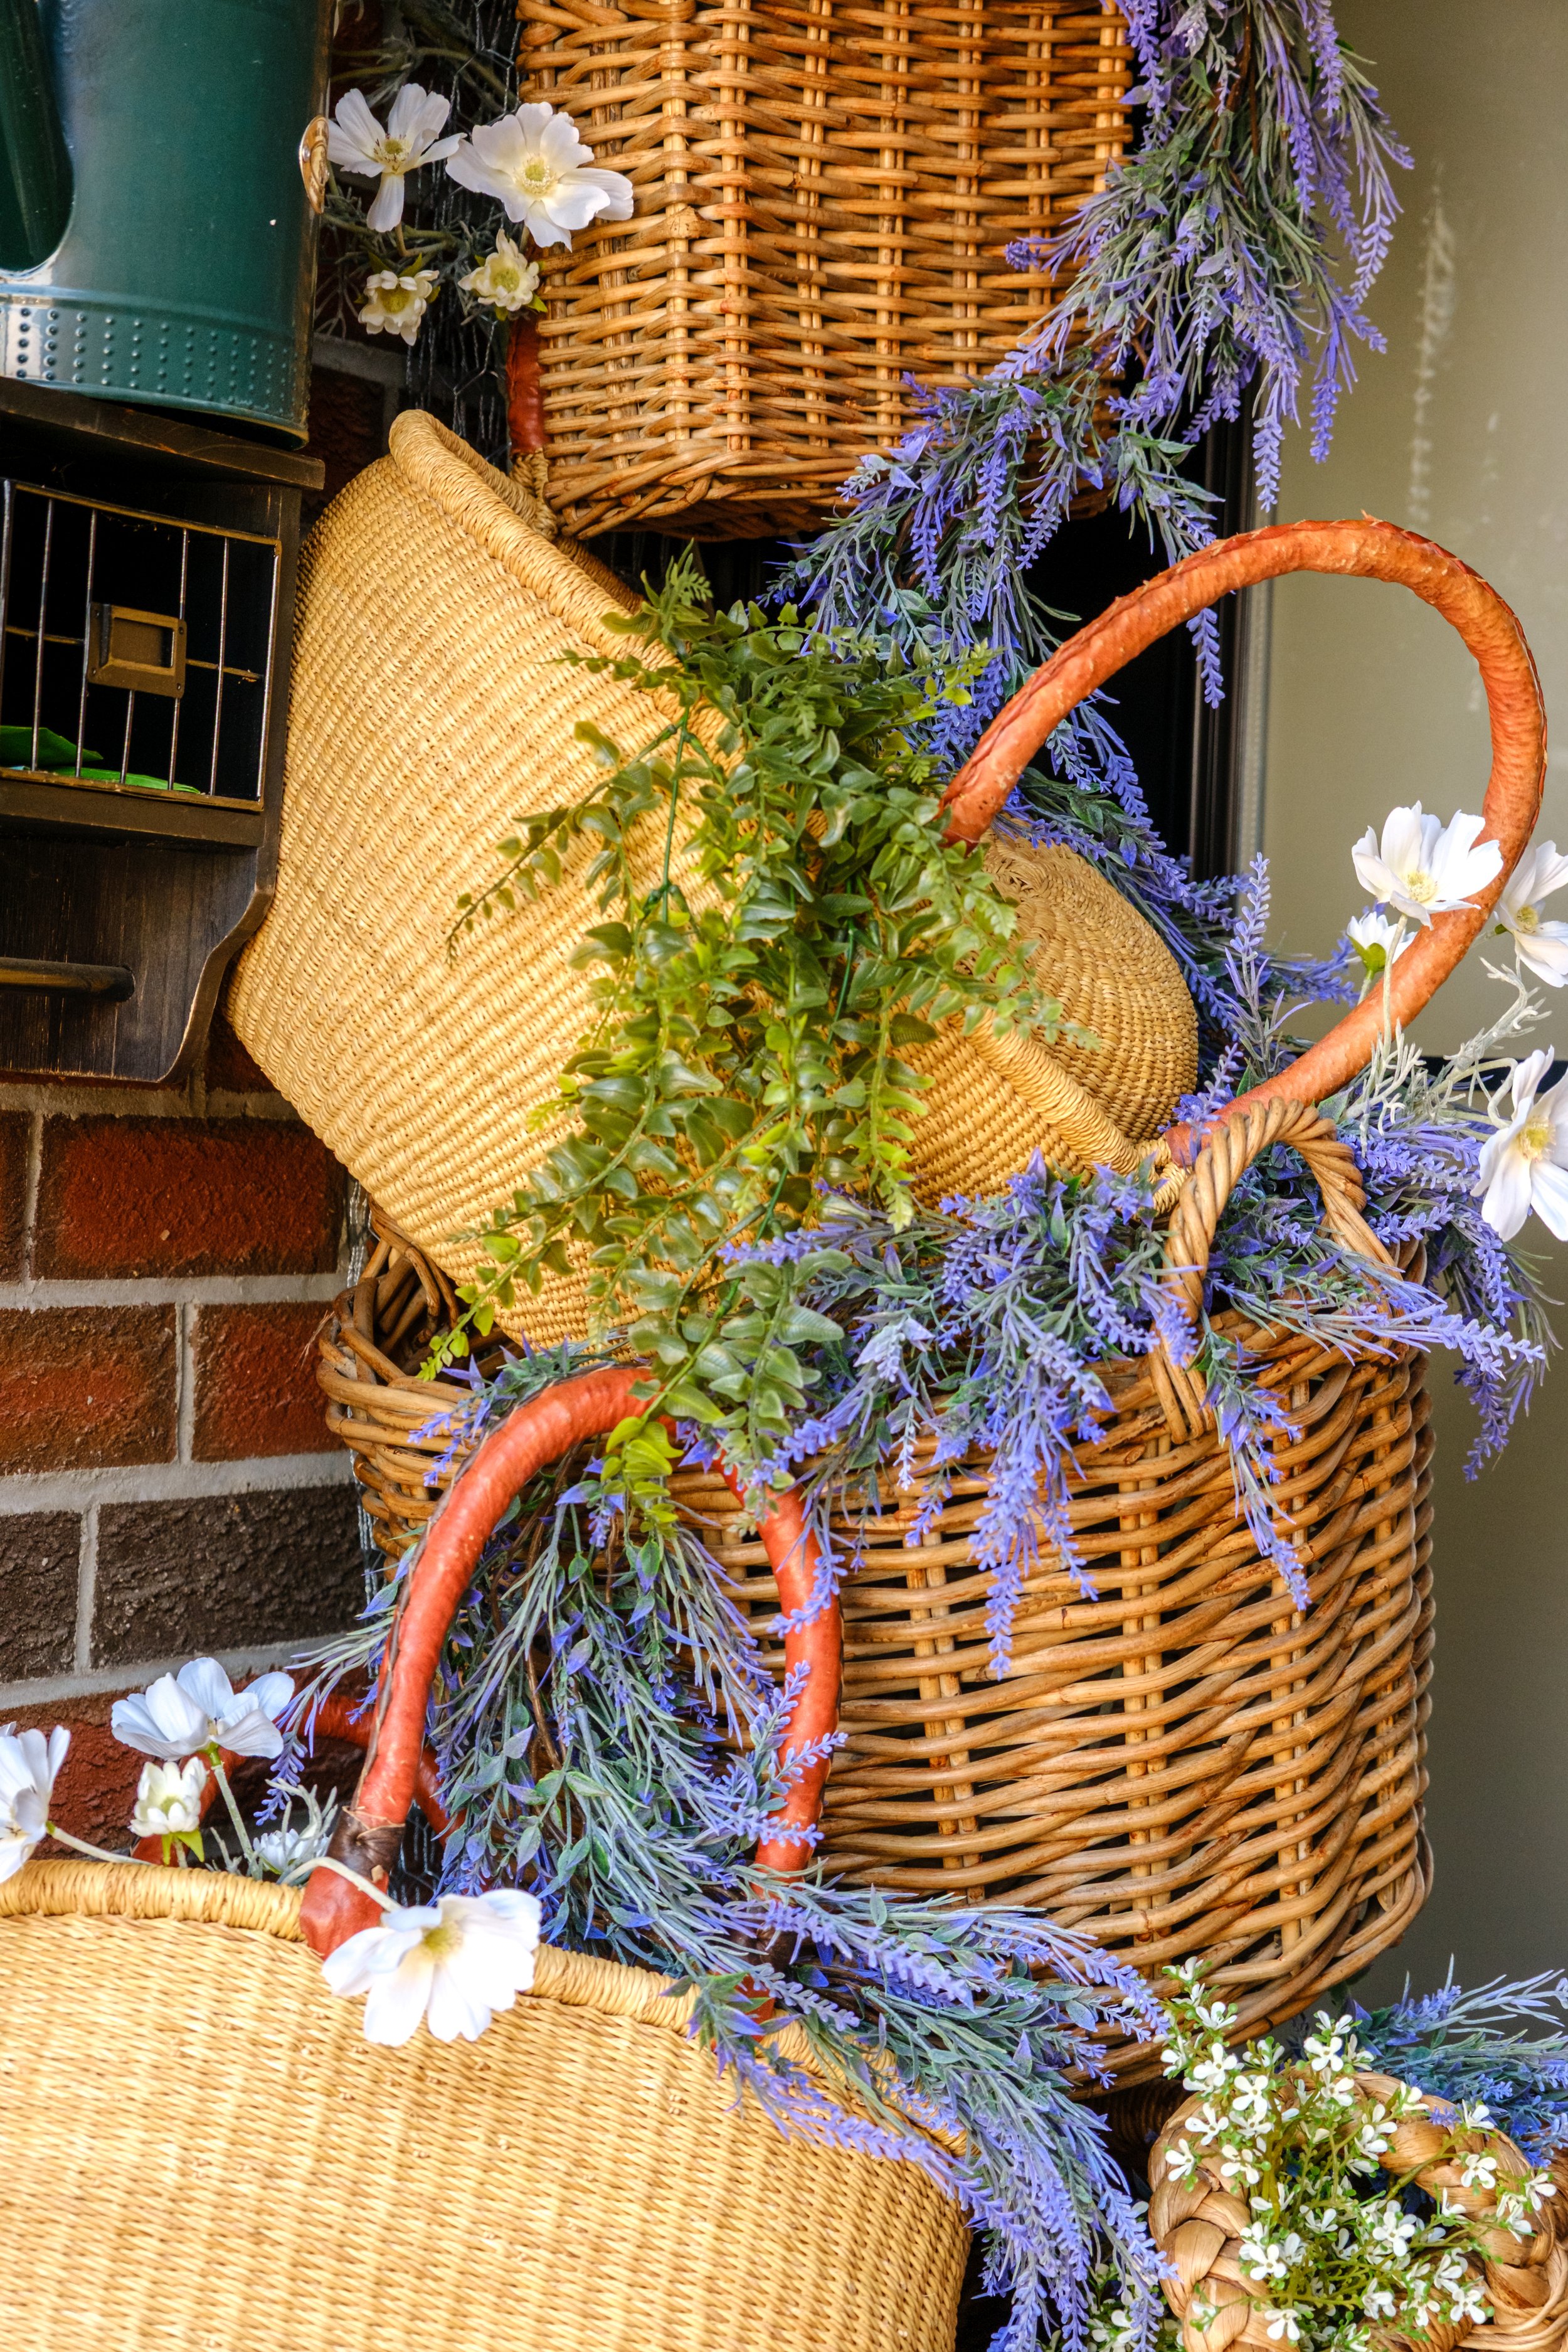
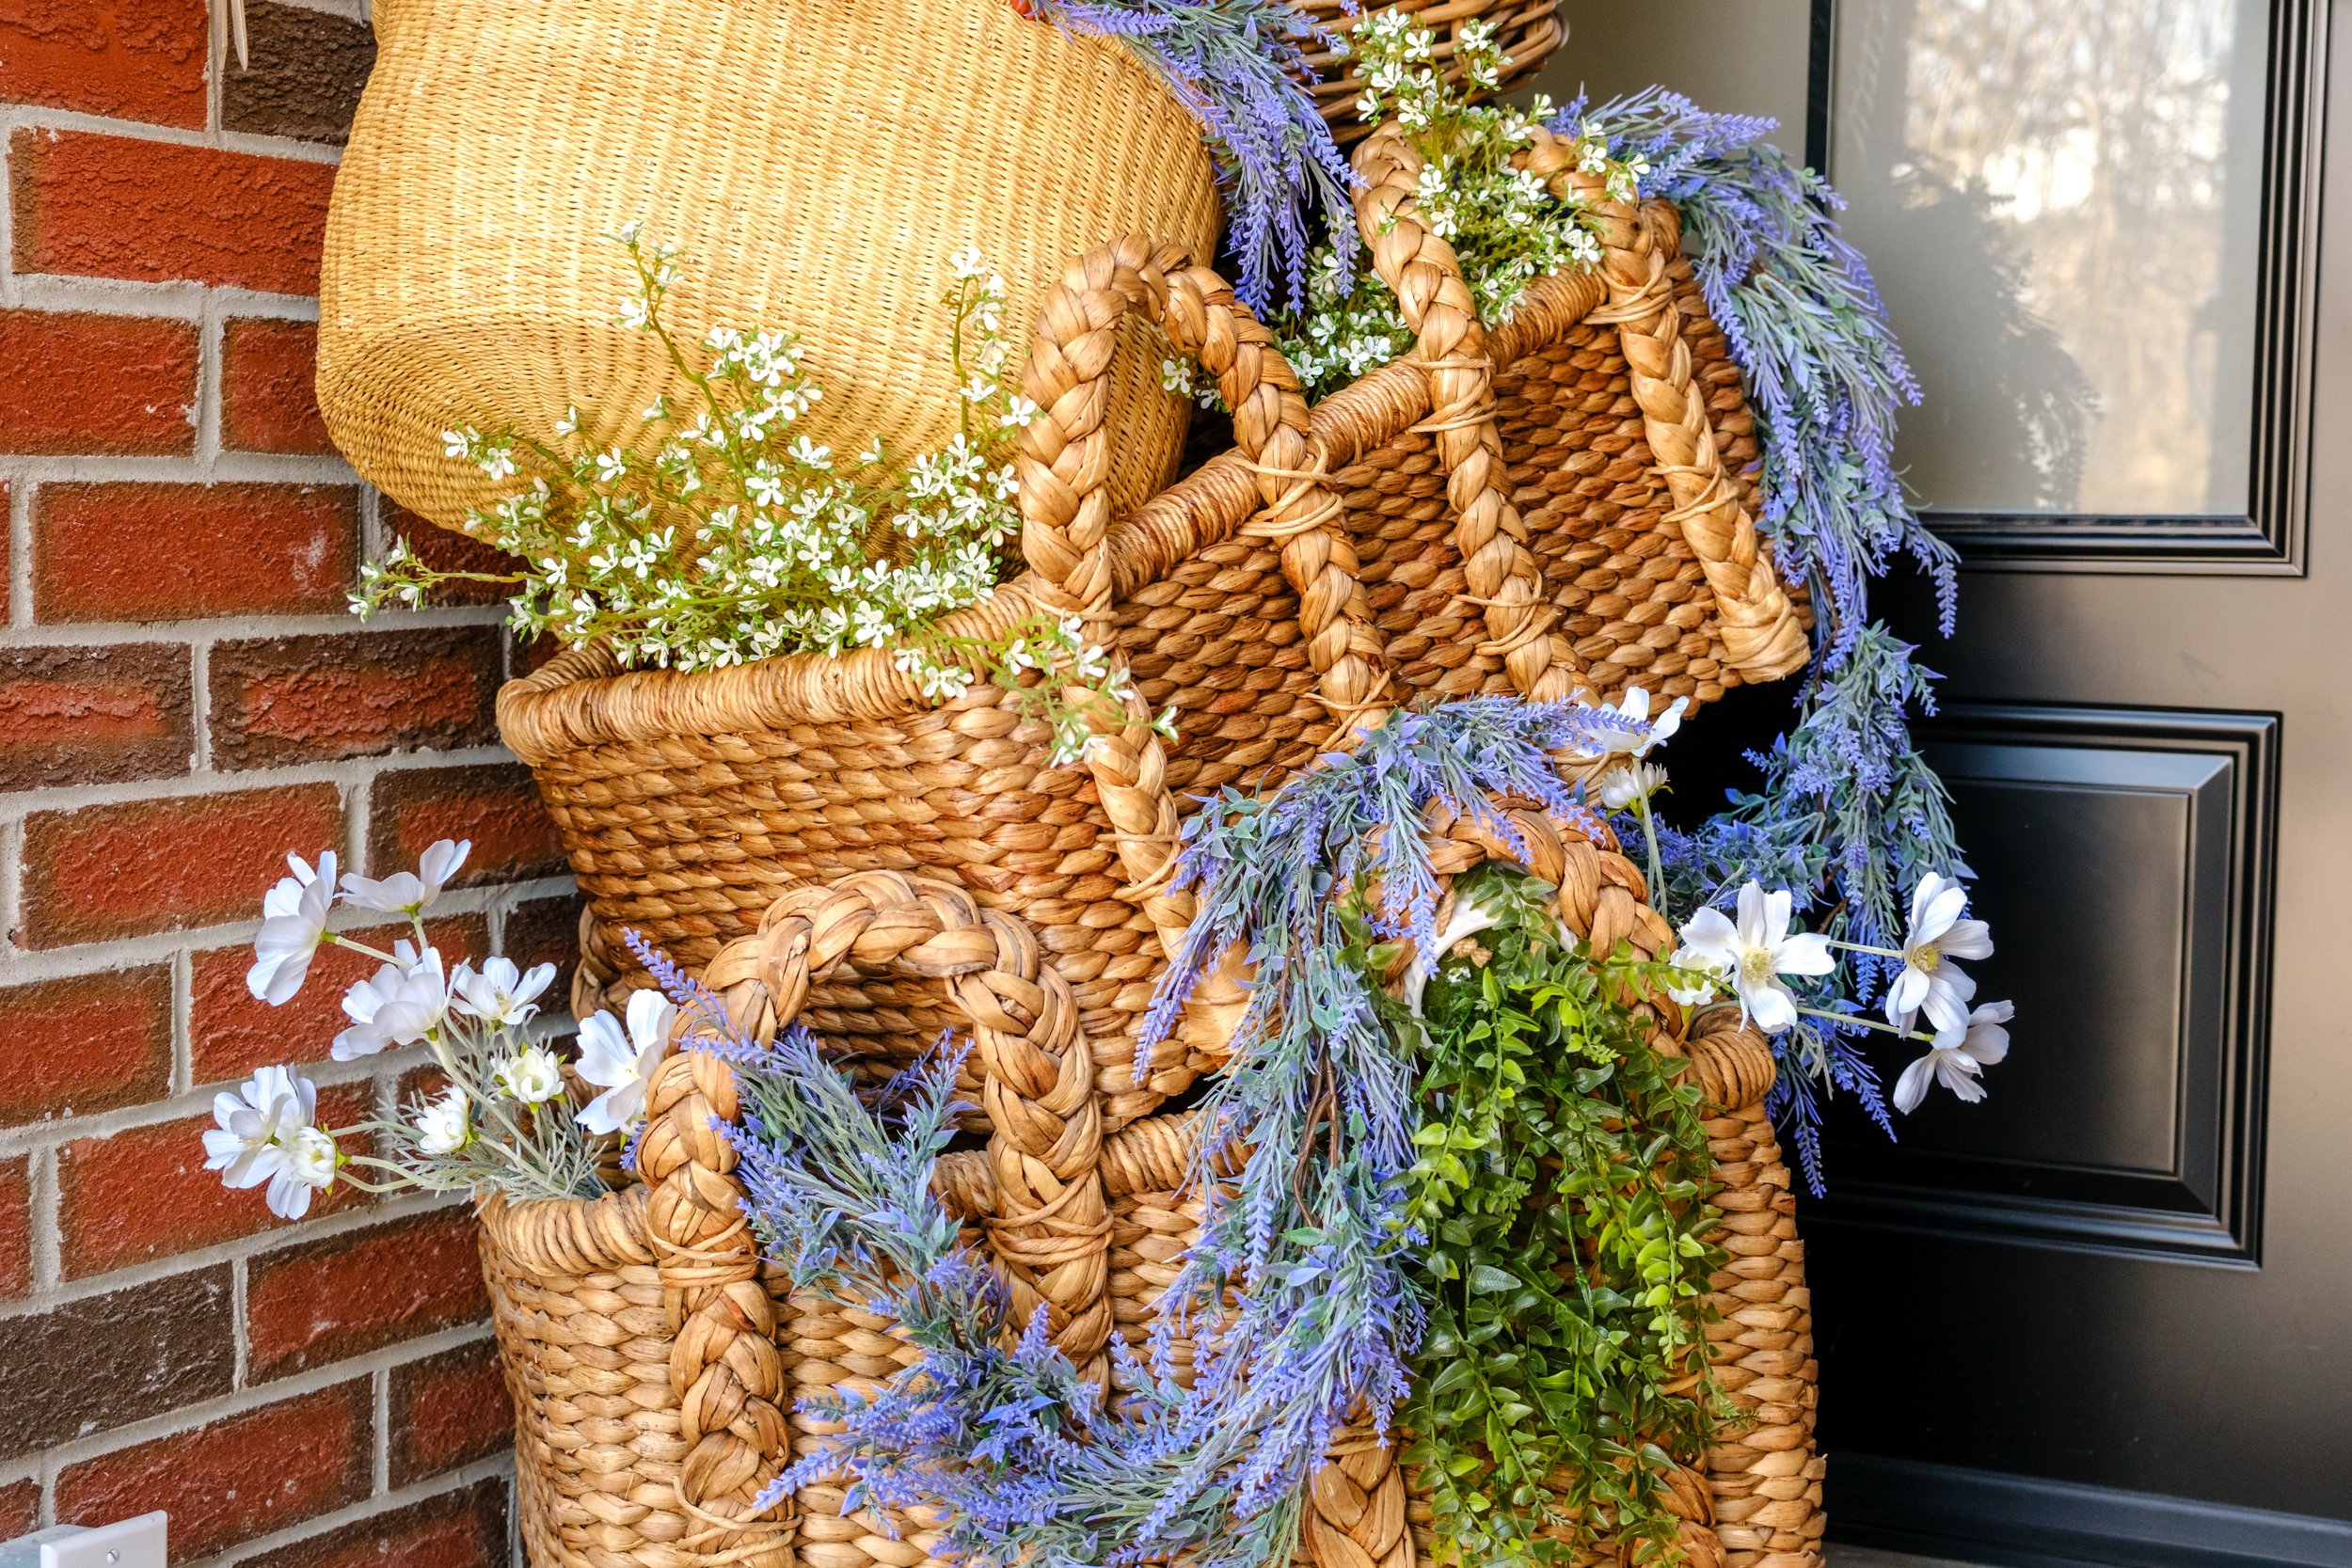
My tip here is to mix the shape and colour/ weave of the baskets. Notice how I had some thicker and darker weave interspersed with a lighter grass bolga basket type weave. This gave it a more organic look but took some time to nail down.
For example, the two small rounder and lighter baskets were intentionally spread apart because if they were next together it would look too uniform. The same goes for the two farmer basket style basket in the lighter material.
Essentially:
Work your way up from largest to smallest baskets
Overlap slightly for that layered, “collected” look
Mix shapes and sizes to keep it interesting
At this stage, you may find yourself stepping back every 2 minutes asking:
“Is this cute… or am I crazy?”
This is normal.
Make it stand out
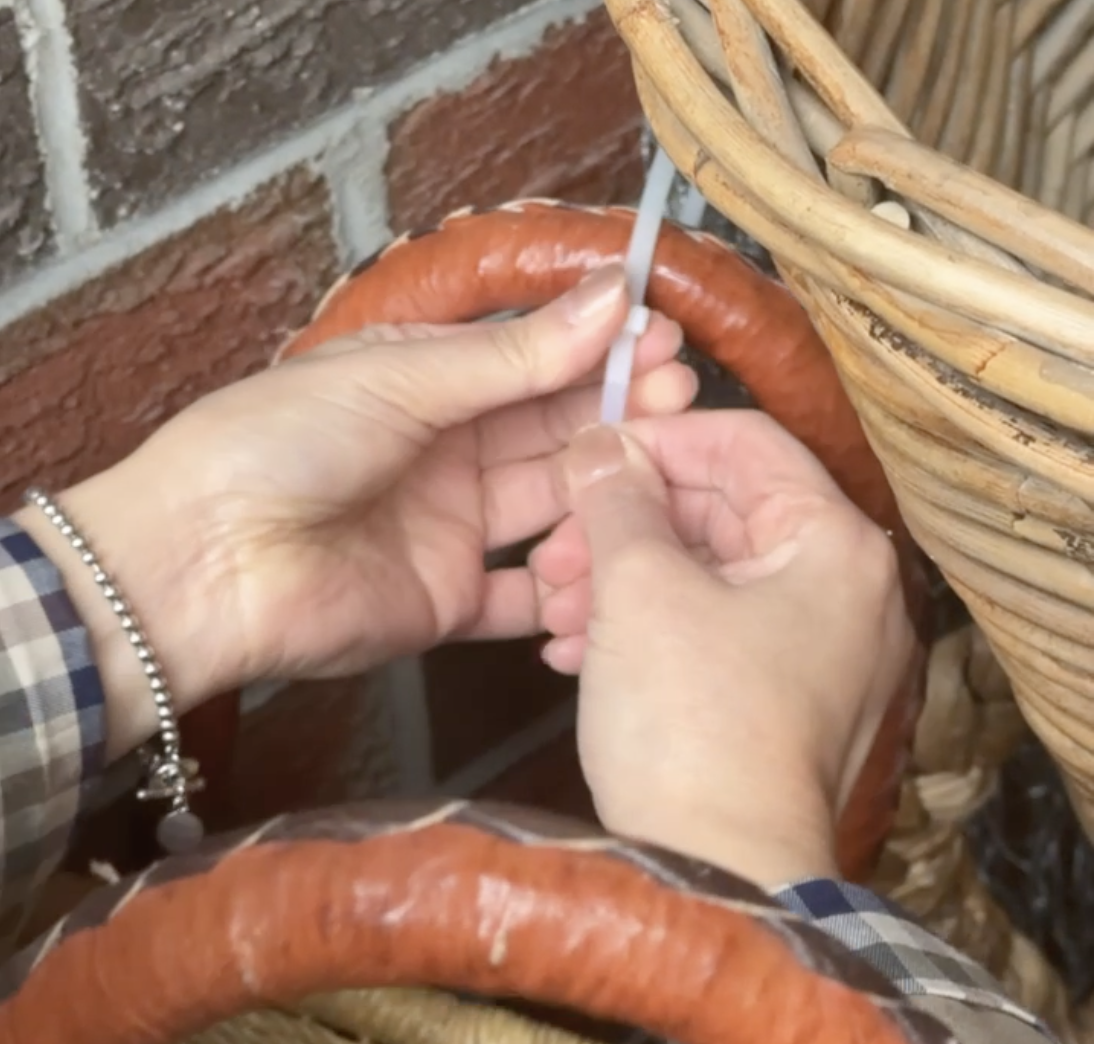
4. Secure Everything (a.k.a. Zip-Tie Era)
Now commit.
Zip-tie your way around the entire structure until everything feels sturdy.
Think:
Woman with a dream… and limited upper body strength.
Take your time here—this part is what makes the whole thing actually hold.
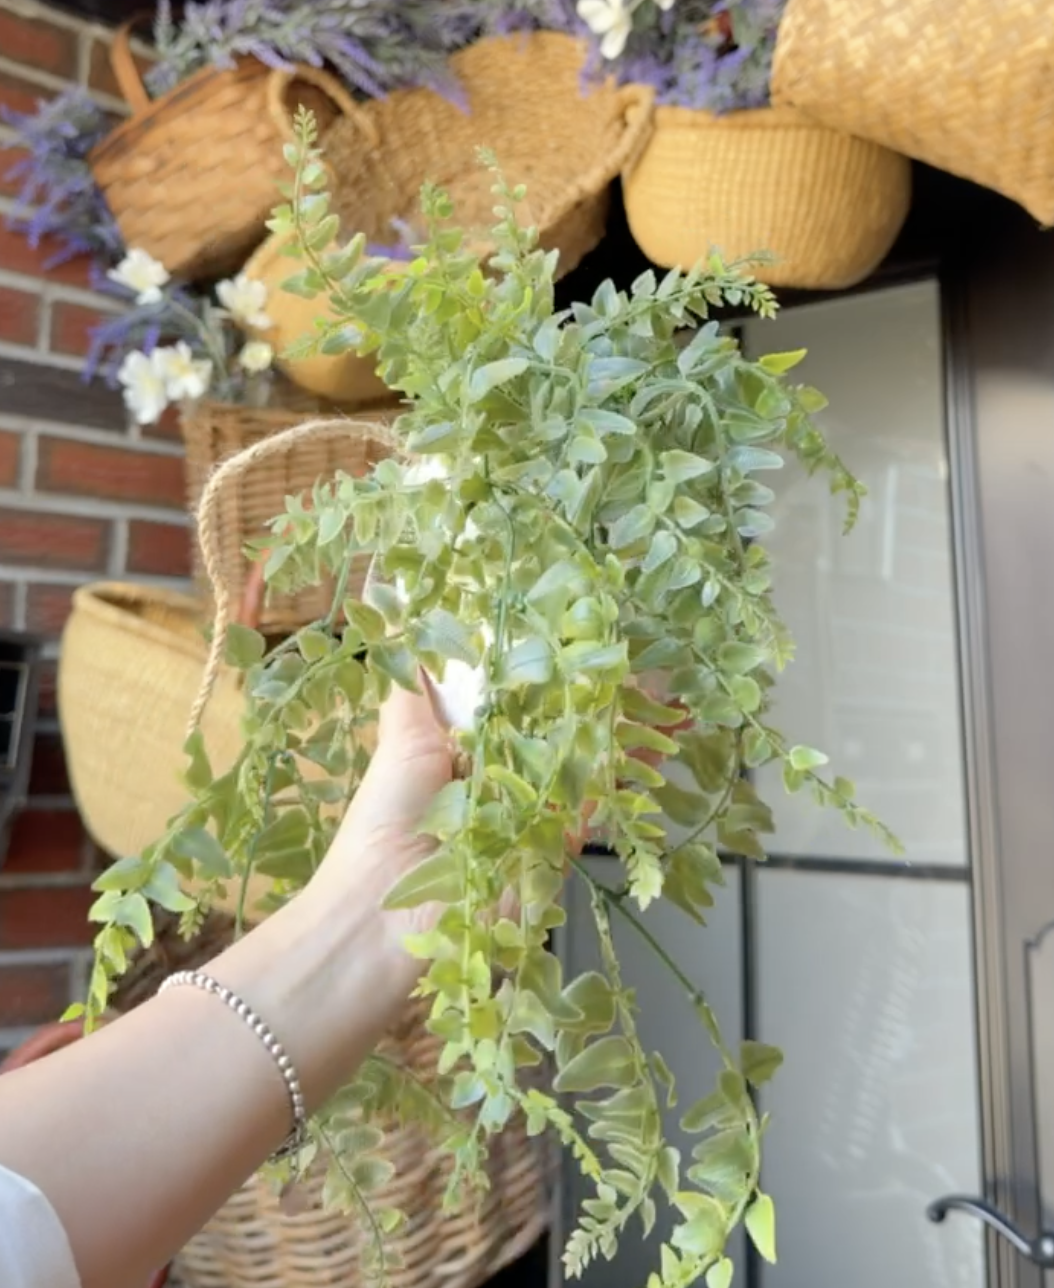
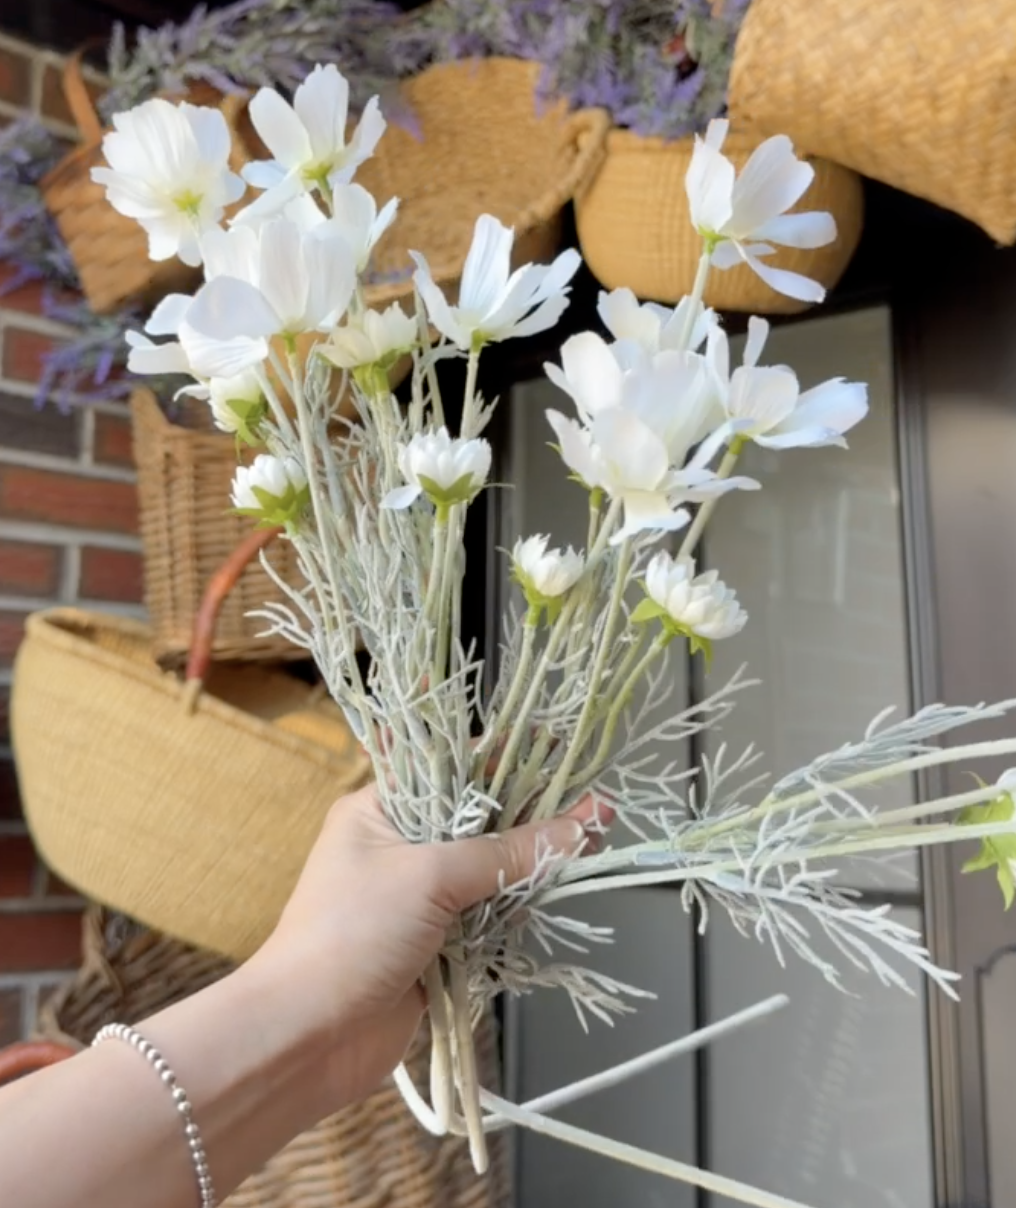
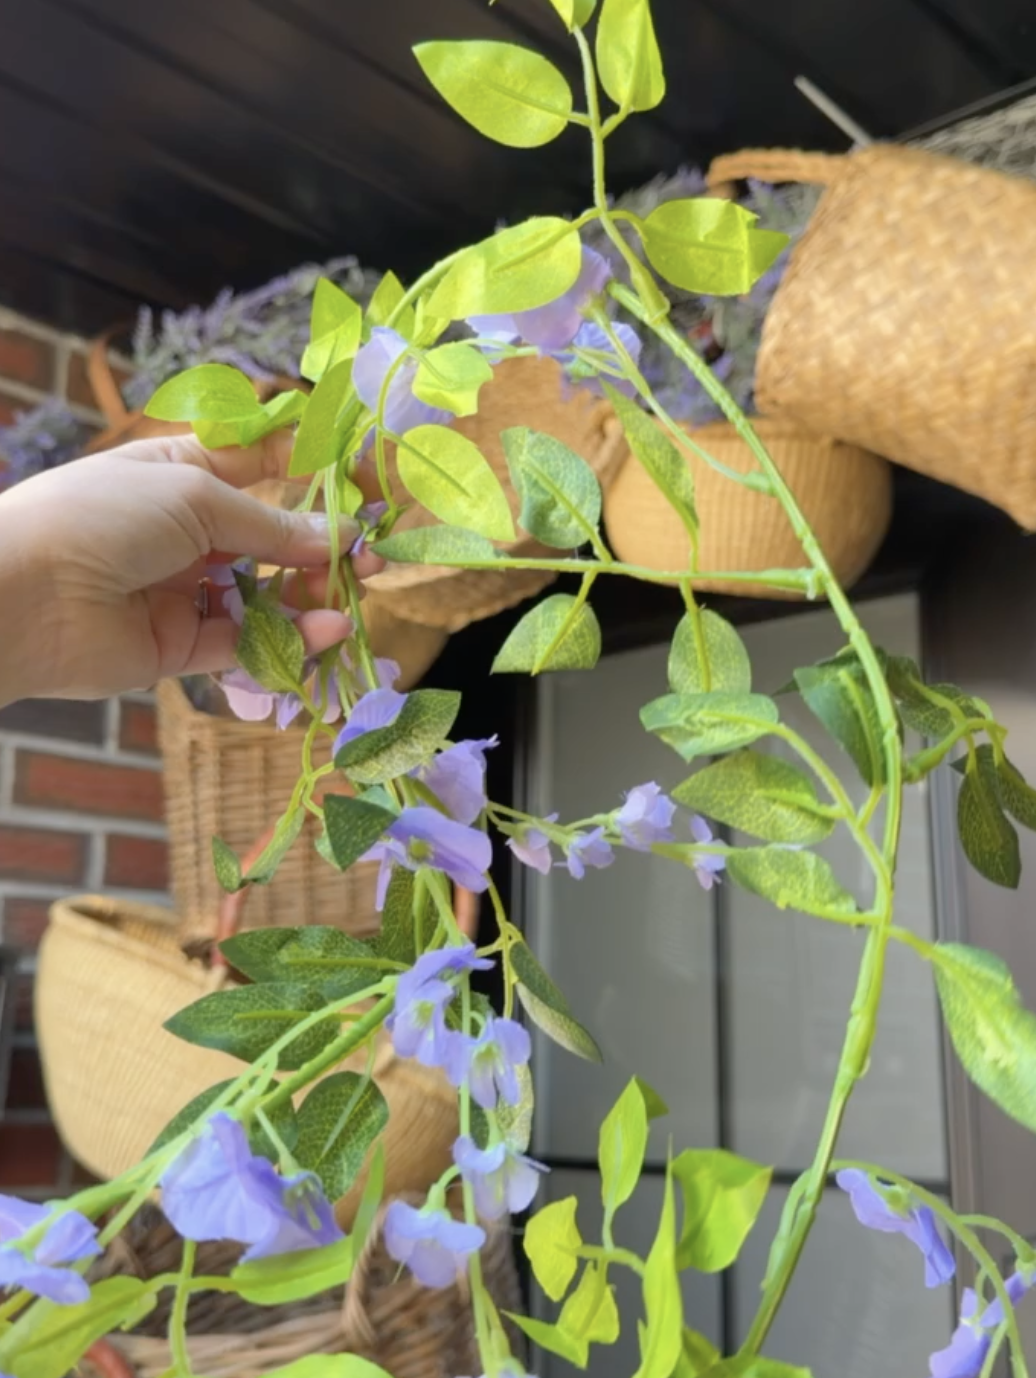
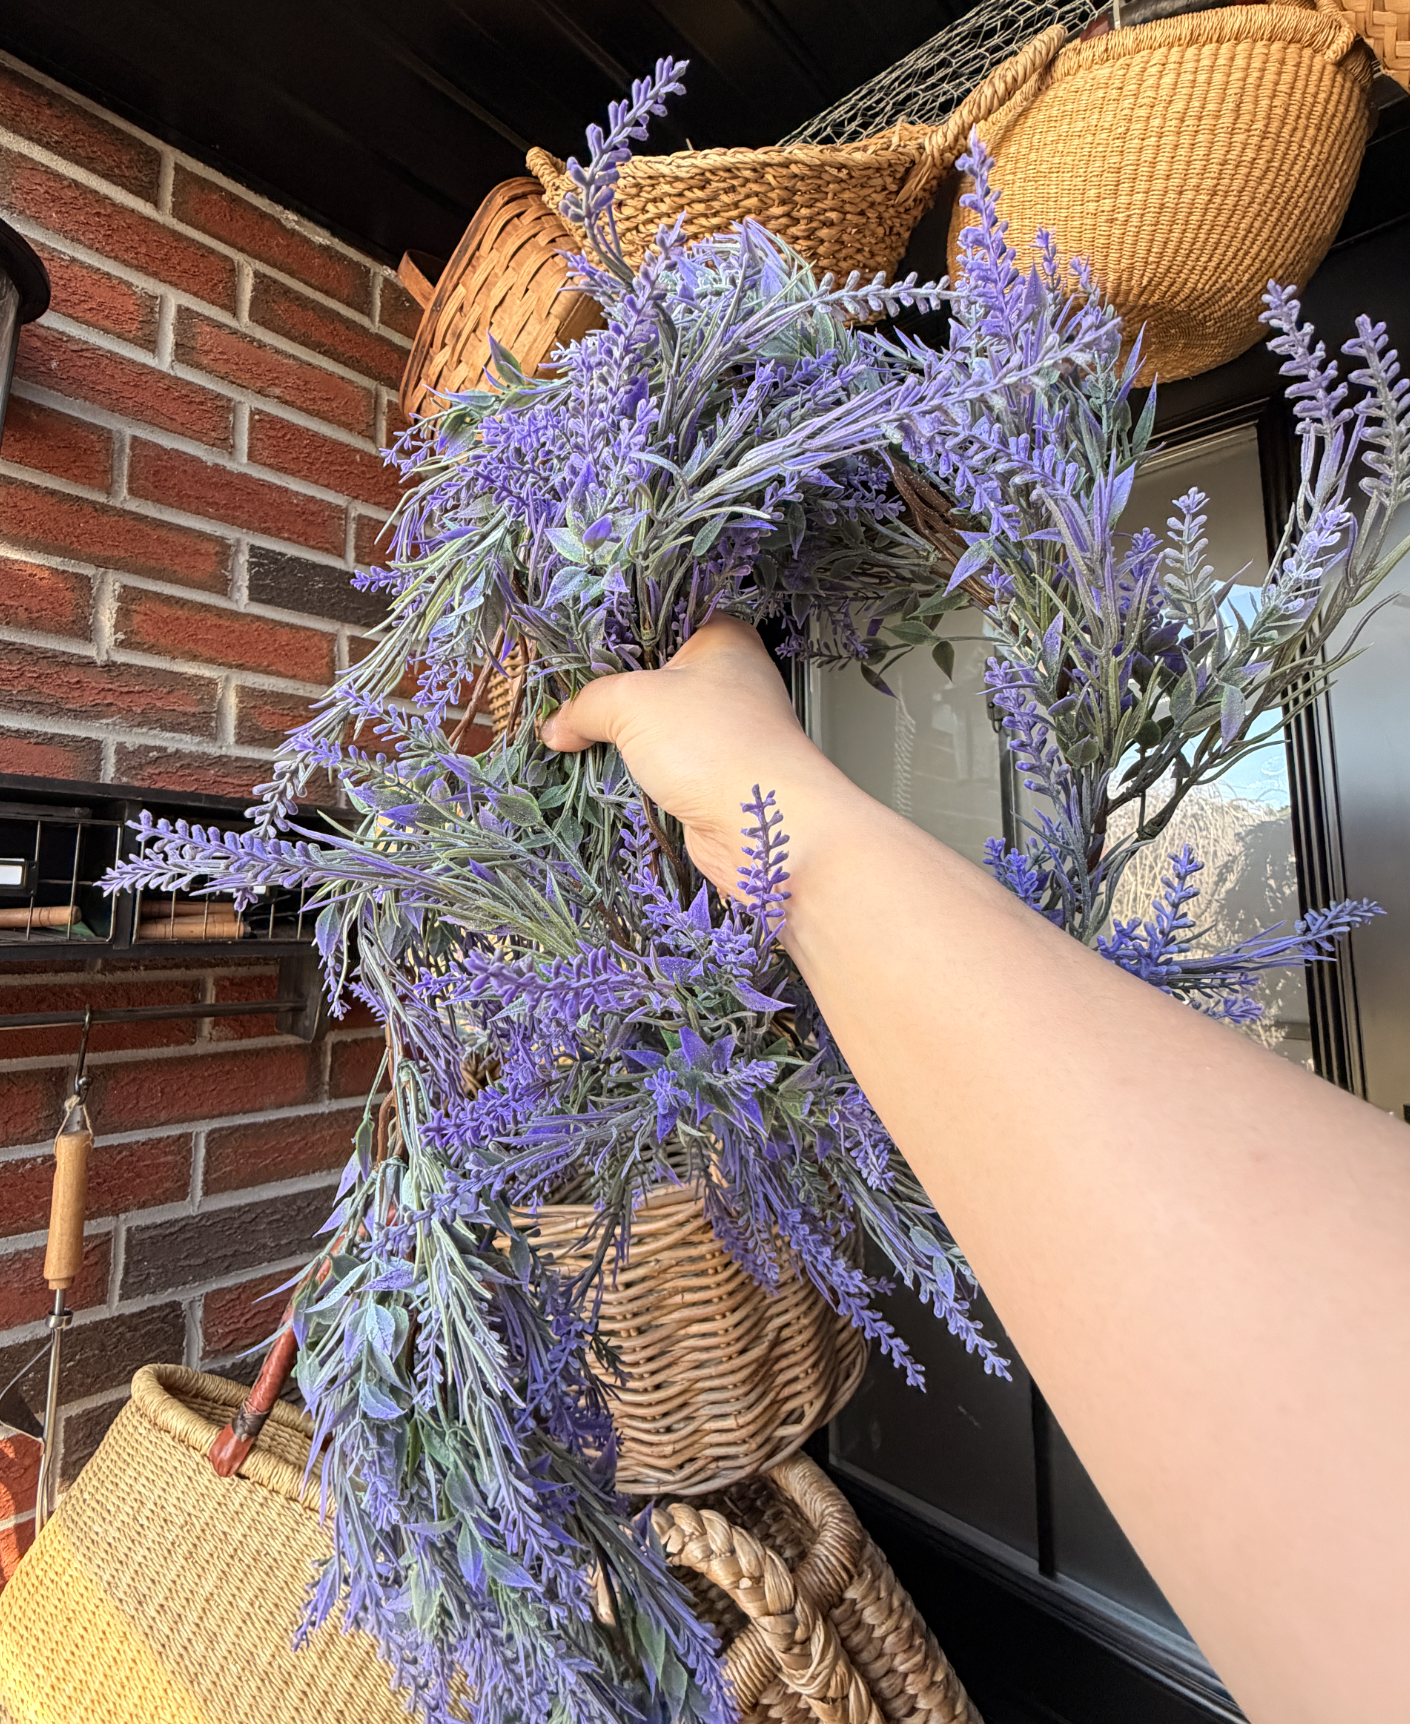
5. Weave in Florals and Greenery
Now for the magic:
Lavender garlands → soft, romantic base
Cosmos → a light, playful contrast that also adds movement
Dripping ferns → effortless, slightly wild texture
Weave them through the baskets and wire so it looks natural—not overly arranged.
💡 The goal:
“Casually European… like you definitely didn’t overthink this.” (But you and I know that we so did.)
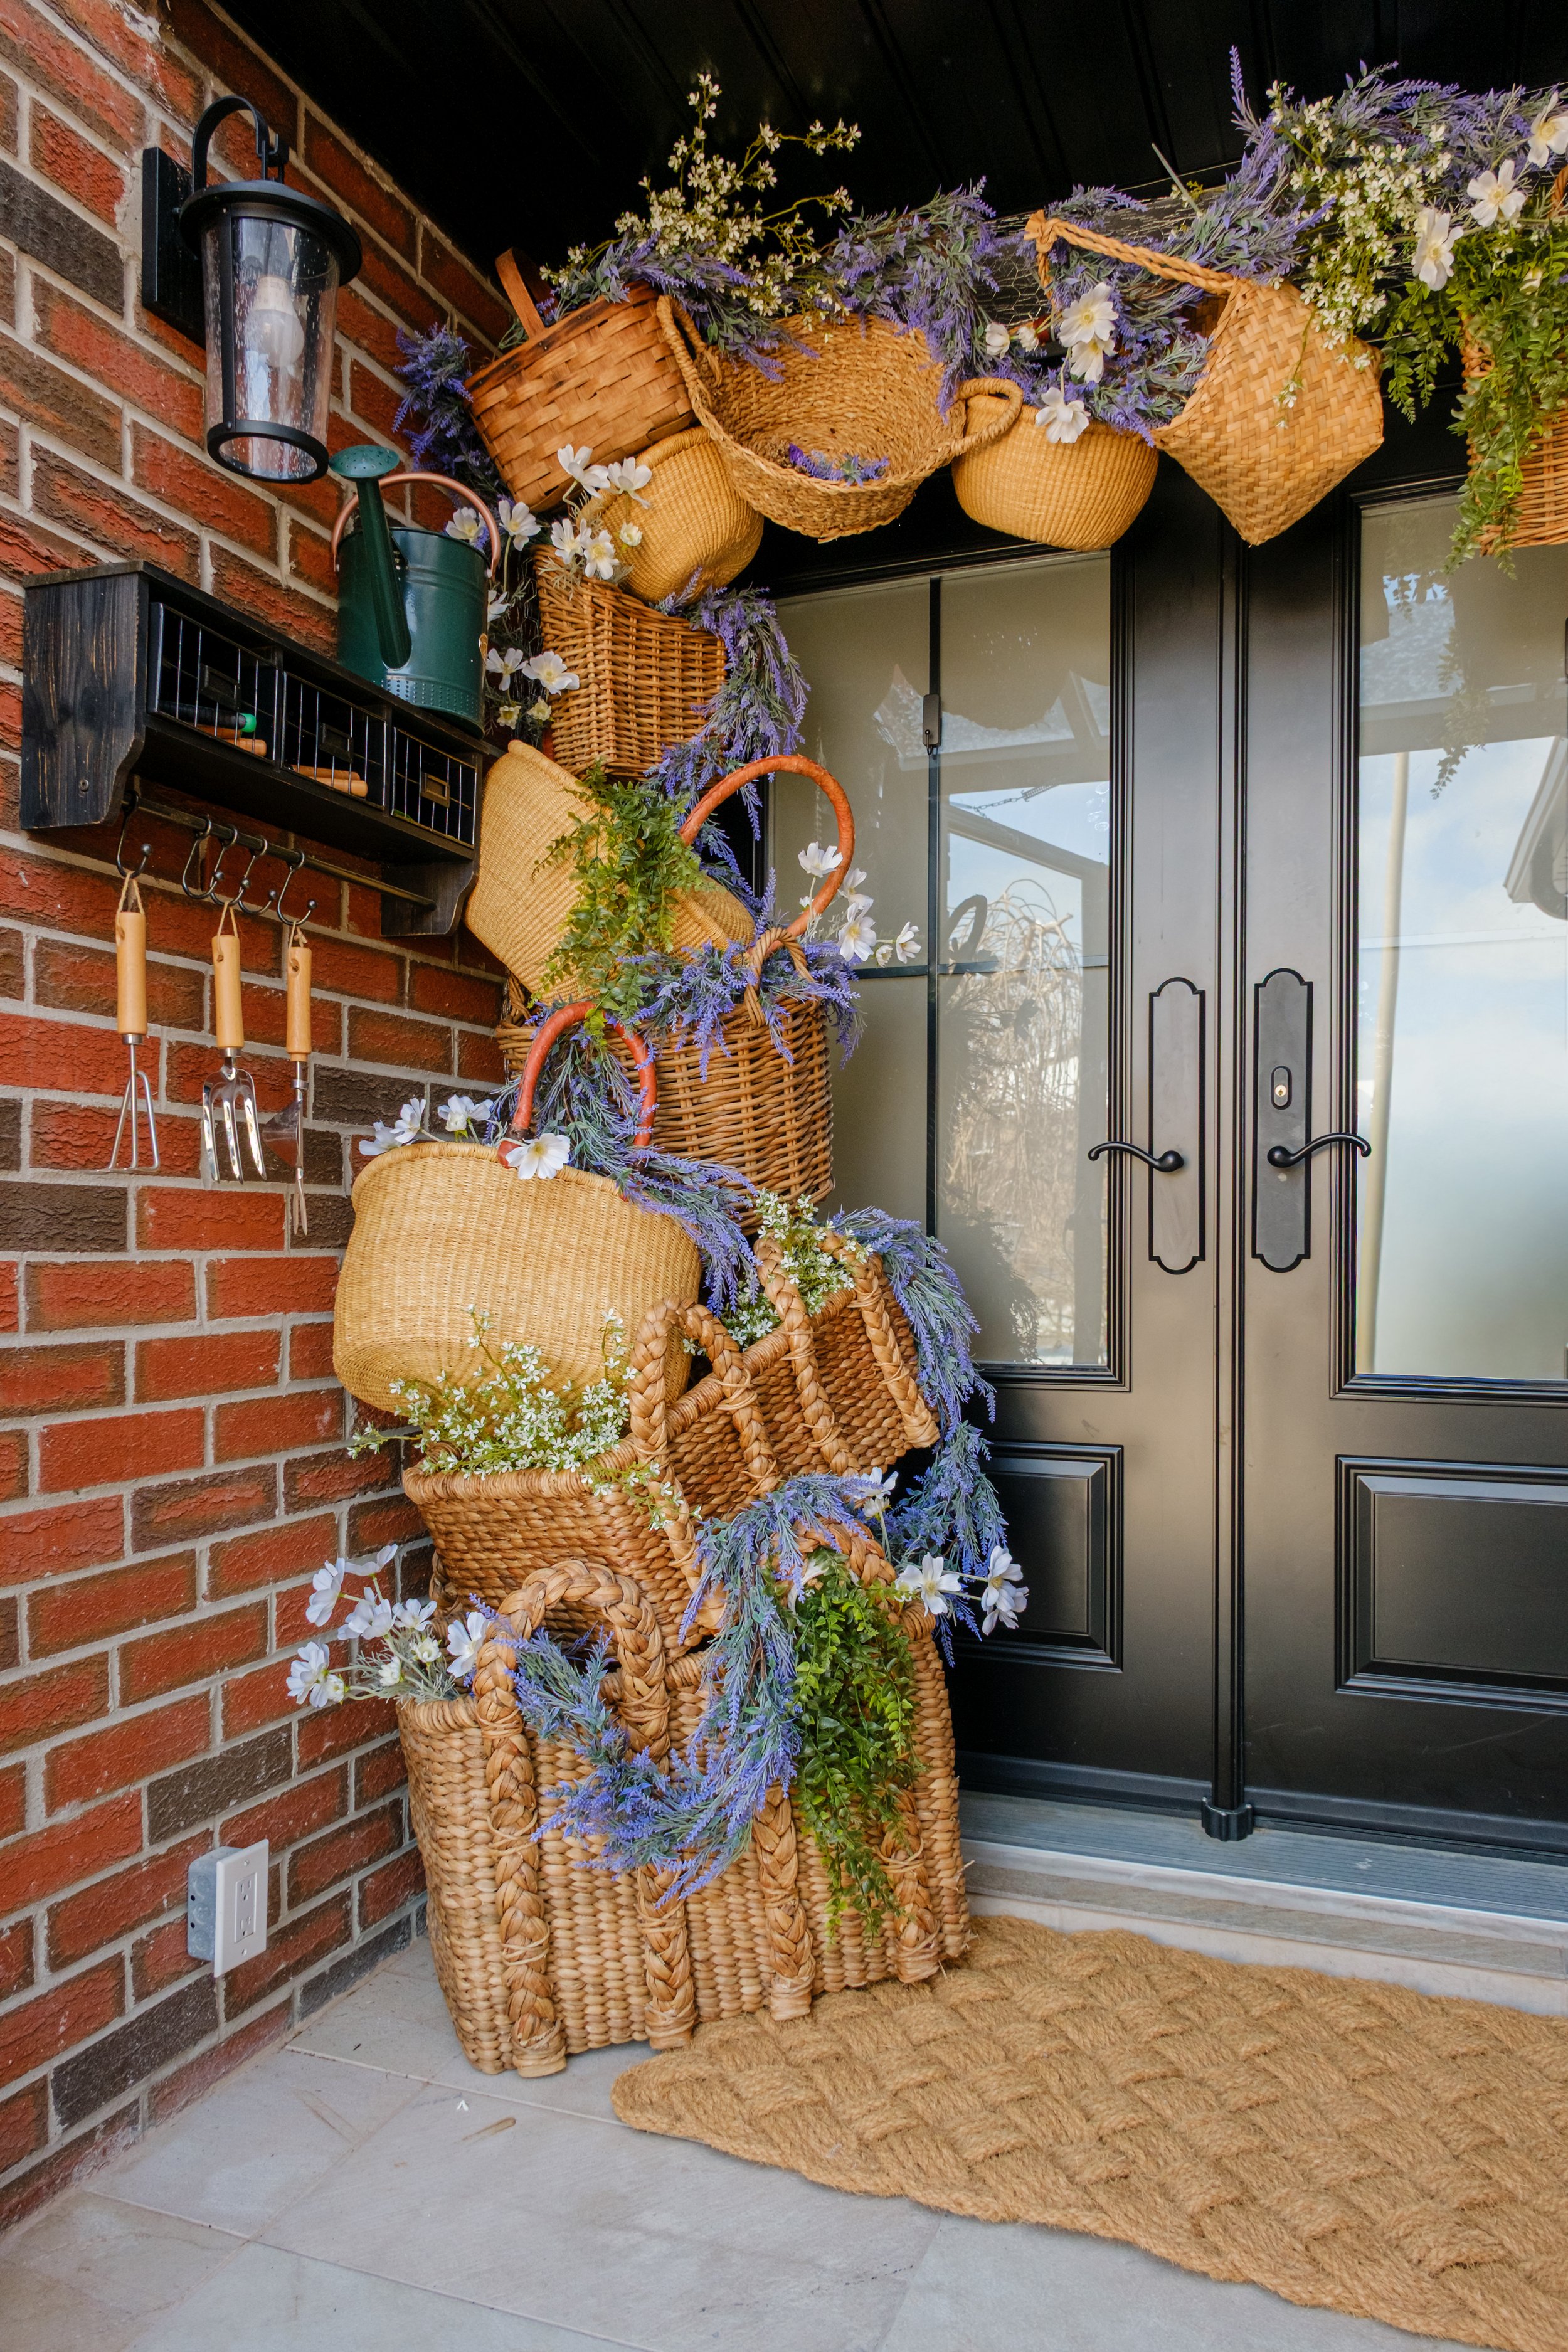

6. Add a Statement Finishing Piece
Top or ground your design with something bold—like a woven mat. I love the texture of this one! It looks soft and welcoming!@
This pulls everything together and gives:
South of France… if you squint…
7. Step Back and Style
Adjust anything that feels off:
Tuck in loose stems
Shift baskets slightly
Add or remove pieces for balance
This is where it goes from “pile of baskets” to “intentional design.”
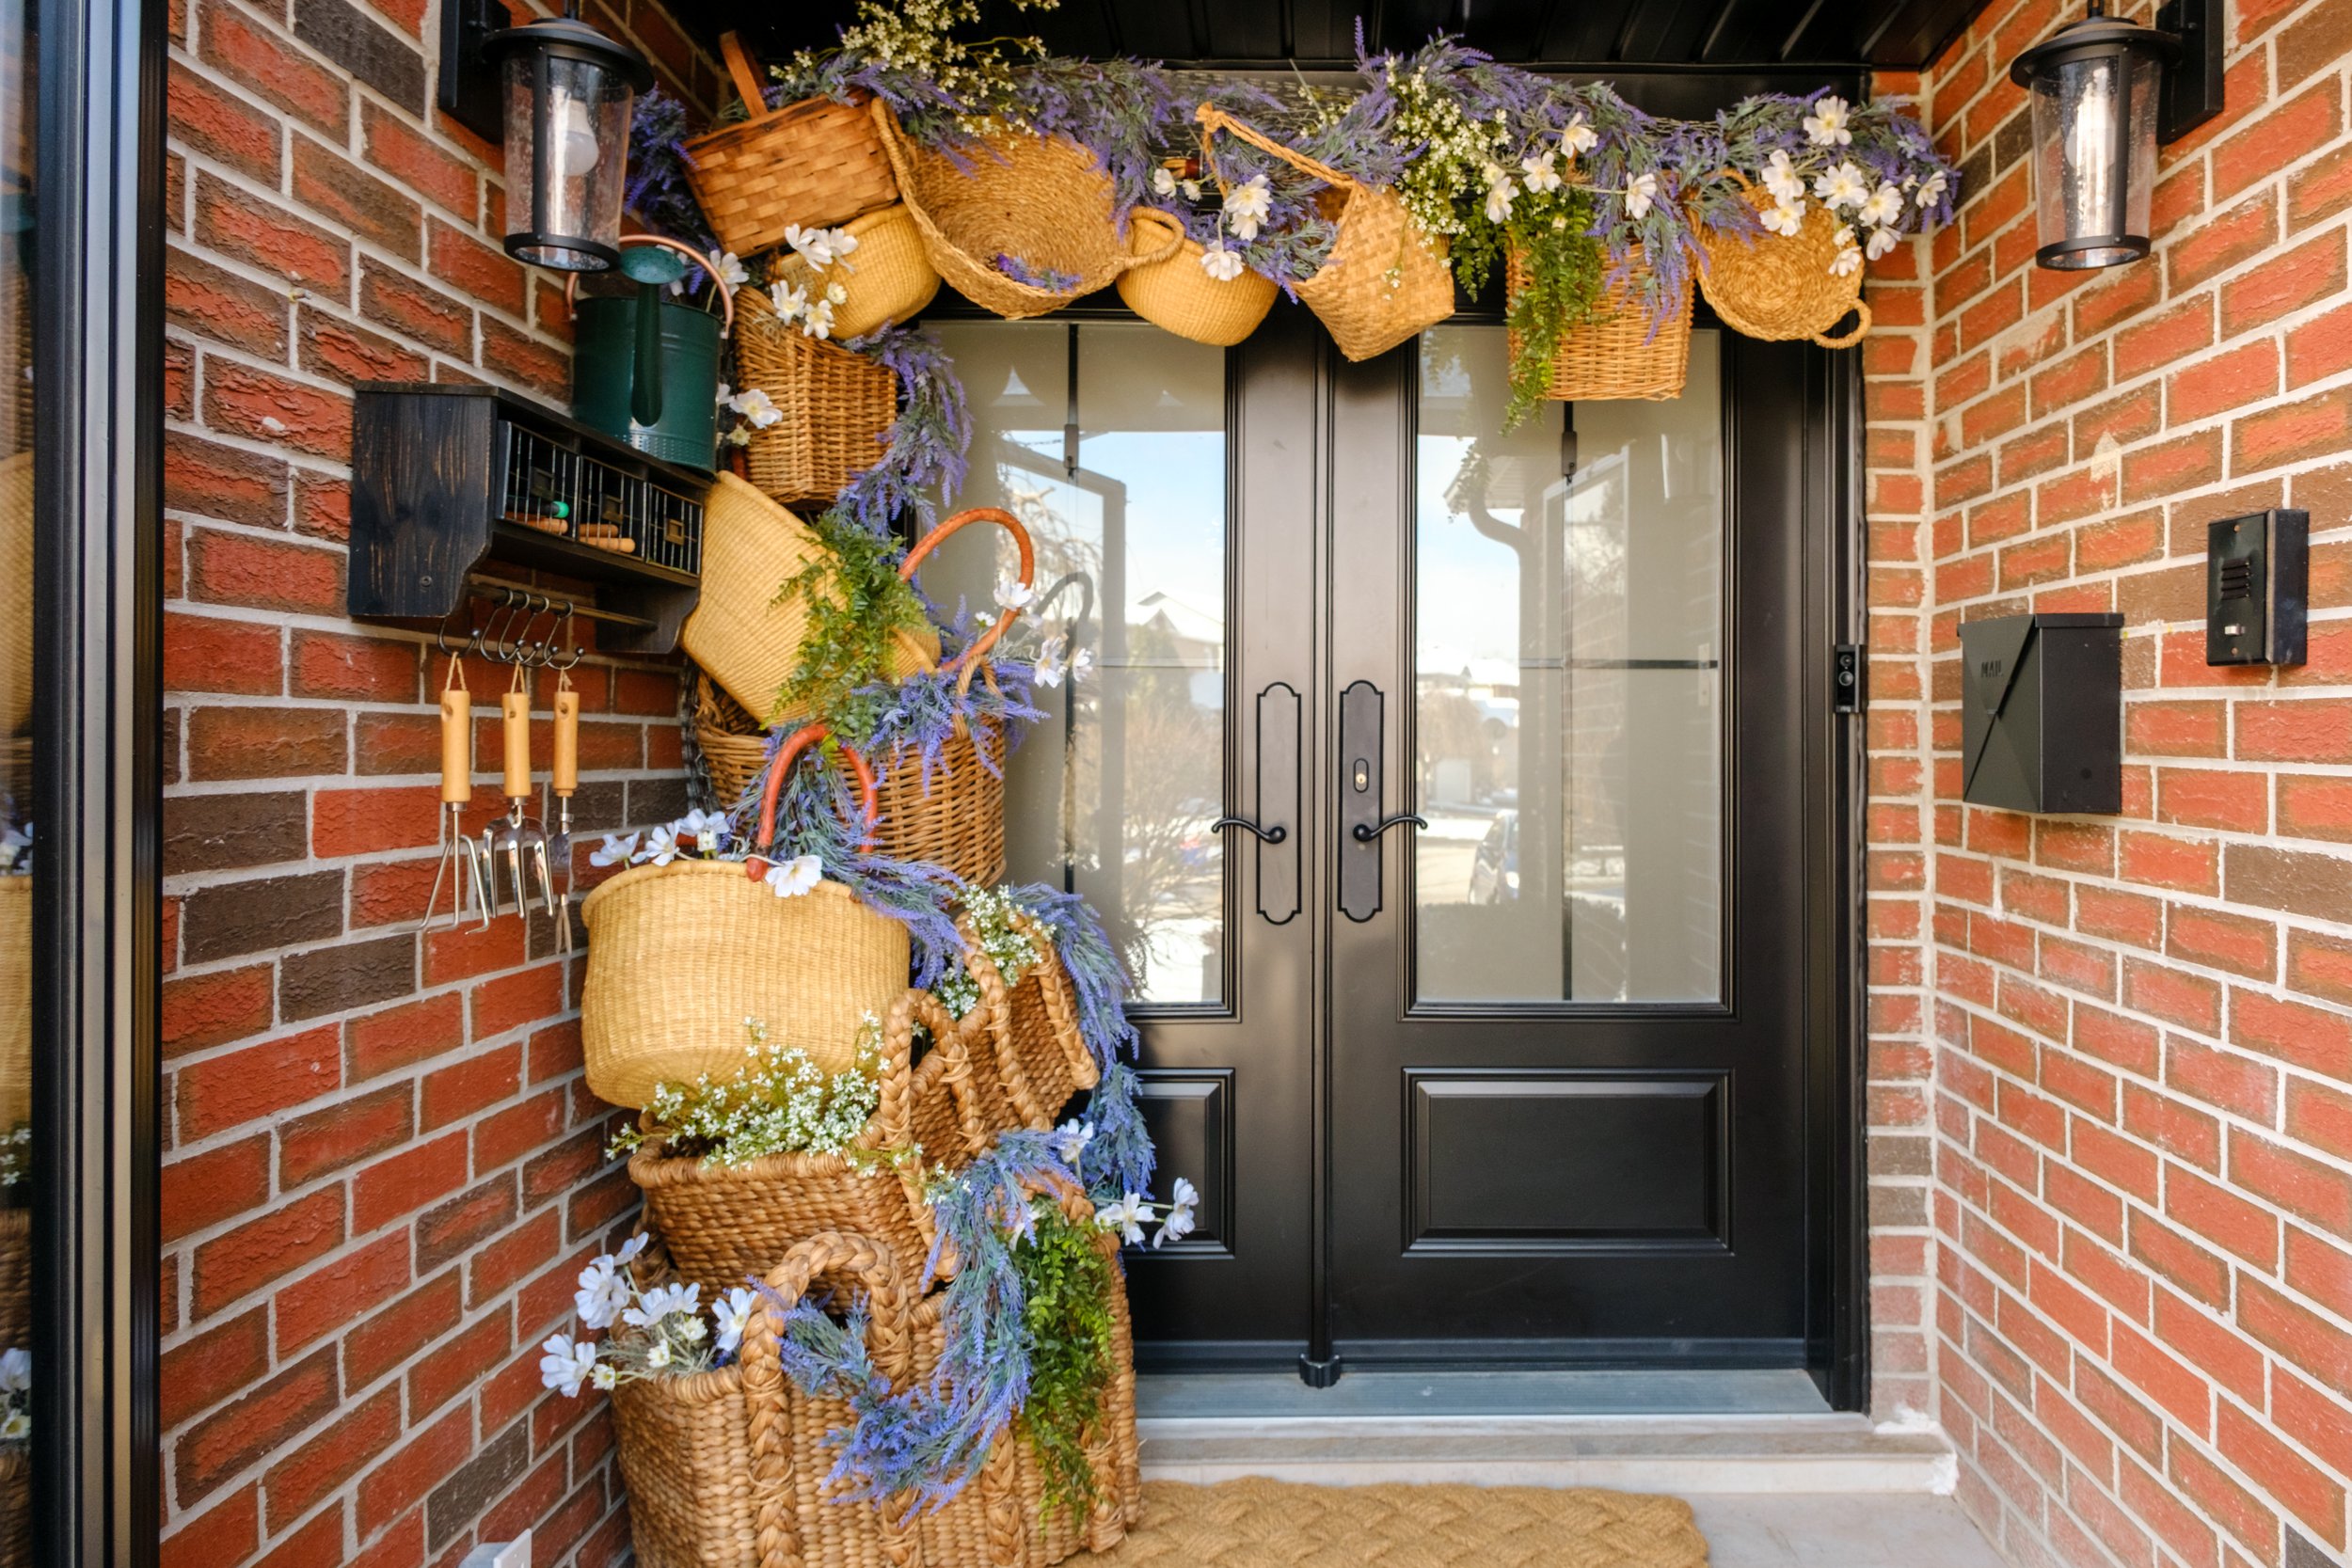

🪴 The Final Result
What you’re left with is:
A layered, textured spring installation
Something that feels cozy, collected, and a little whimsical
And yes… something that looks like the world’s coziest bird Airbnb
But don’t worry—if it’s behind glass doors: The birds can look… but they cannot book.
Tag me @thekwendyhome on any social media platforms so I can see your creations!
Thanks for reading!
W
You can find all the links to what I used here including the faux flowers, welcome mat and some basket recommendations!