

How To Create Easy $1 Paper Bag Snowflakes

Design: thekwendyhome Photography: Janet Kwan
In need of some beautiful, fast, and easy holiday decorations? Well, look no further!
Presenting DIY paper bag snowflakes to get your house in the Christmas spirit! This is a simple and inexpensive way to spruce up your décor.
I was a self-declared paper bag princess last year because I decorated my entire house with paper bag snowflakes! But who can blame me, it's affordable, reusable, and incredibly easy.
High impact, low effort DIYS are my jam but when you put in affordability too, this DIY cannot be beat.

Materials
7 Paper bags (any size)
Scissors
A glue gun
Glue sticks
To display them, you'll need:
Thin gauge wire
Command hooks
*Note: 7 paper bags creates only 1 star, buy according to the amount you need. Smaller paper bags may require 8 depending on the size.
TIP: If you buy different sizes and colours of paper bags you can create a variety of snowflakes without any added effort on your part! Also, use the sharpest scissors you have! Trust me if you don't want blisters!


Step 1: Gluing
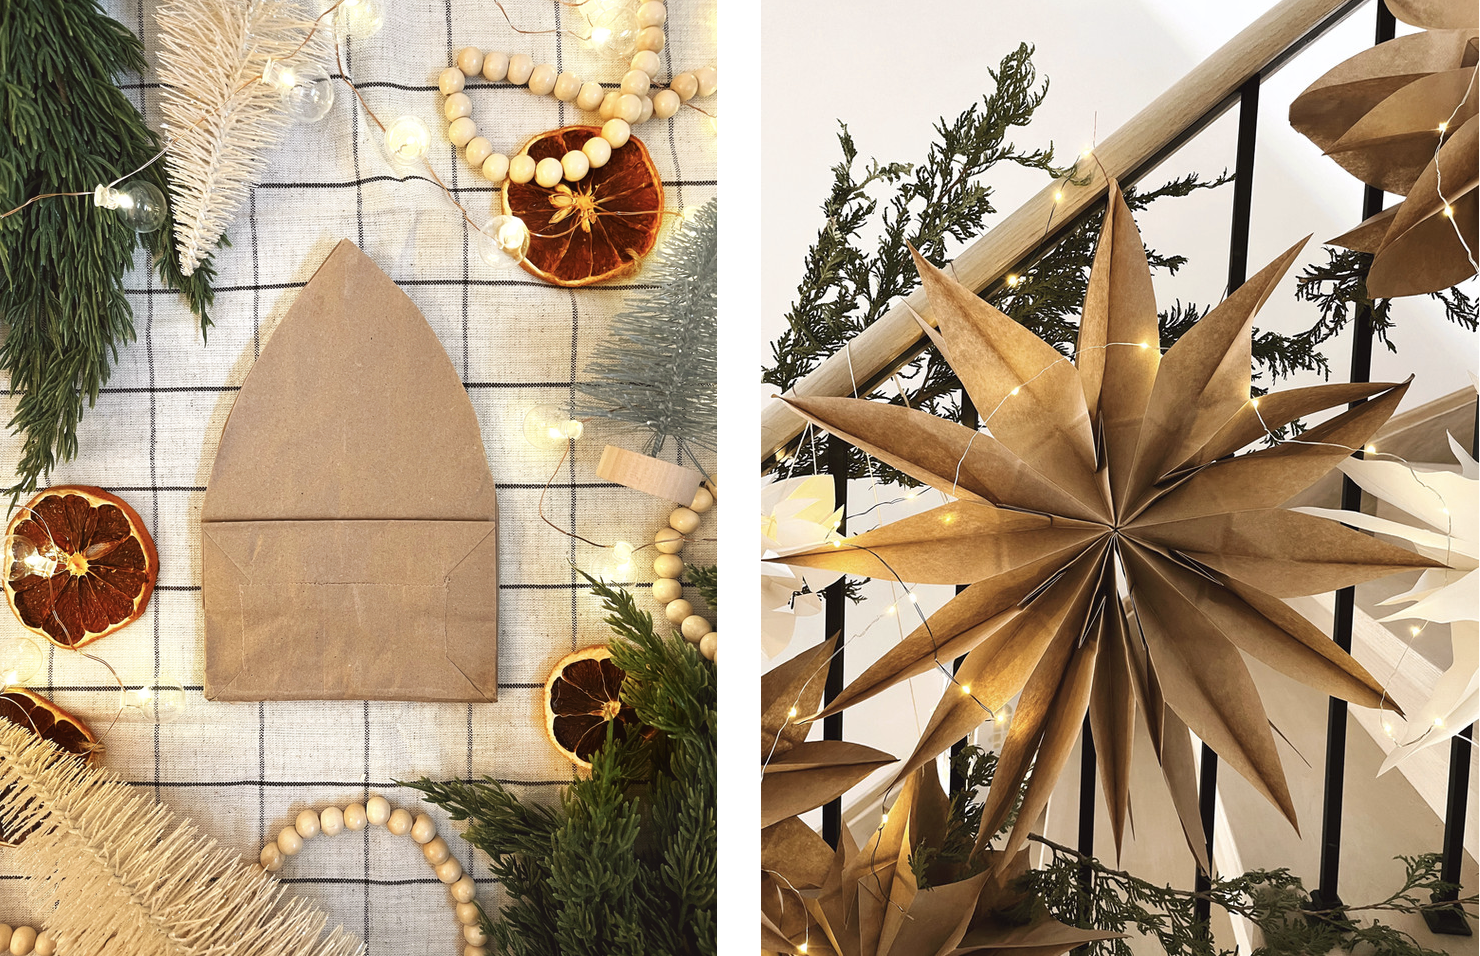
Gather 7 pages and organize them facing the same direction and orientation. Place 1 bag on the left with the bottom side up, and 6 bags with the front facing up like the photo.
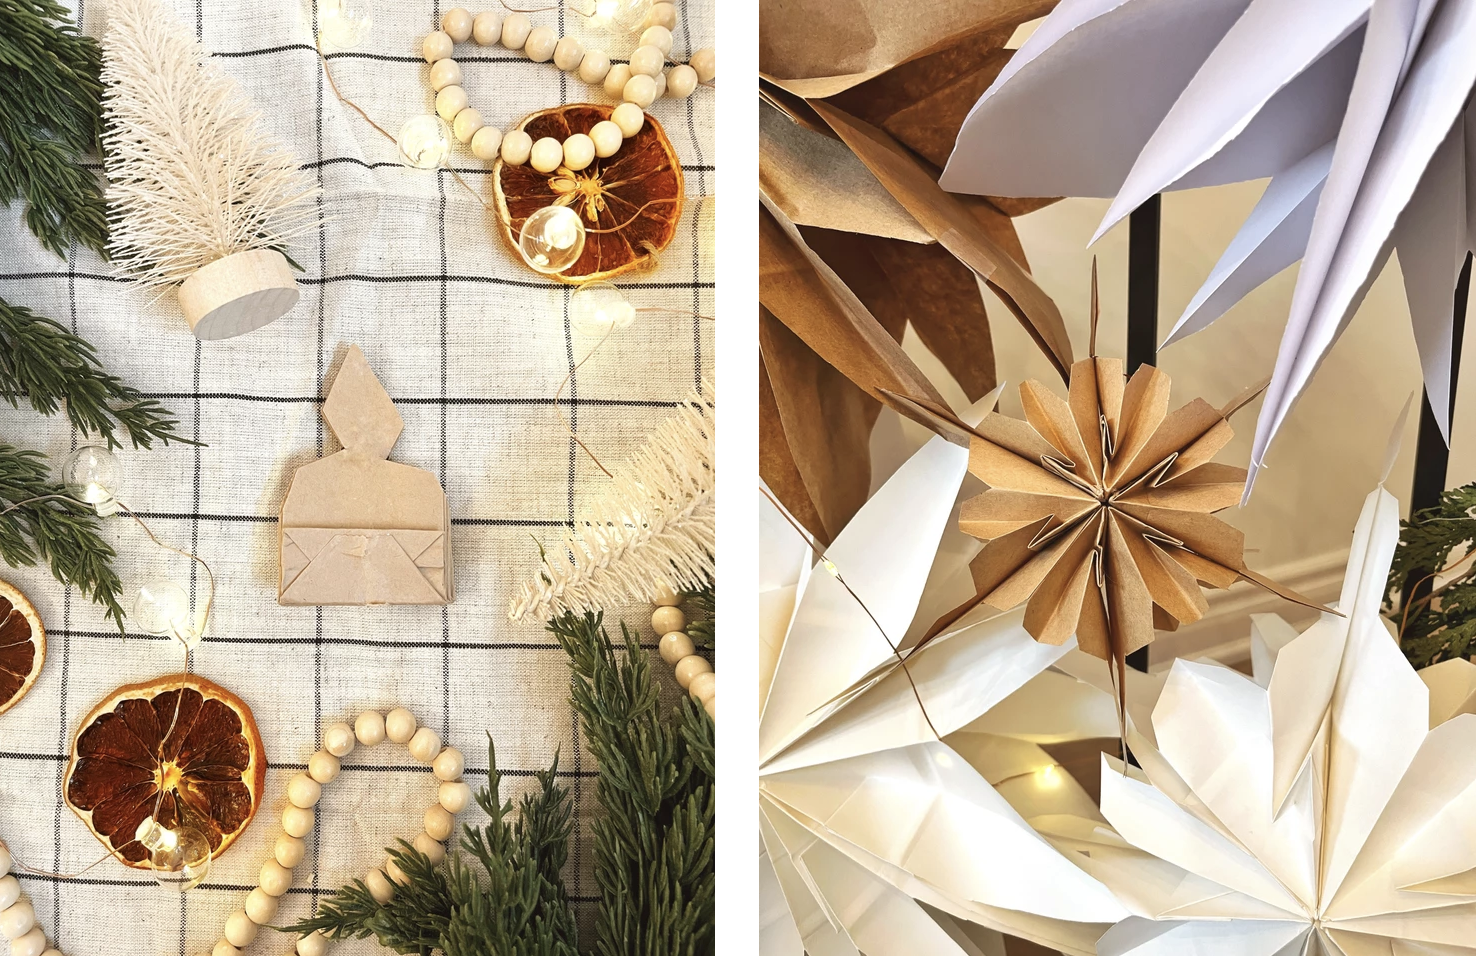
You will be gluing the lift paper bag (bottom side facing up) with your glue gun. Create an upside down T starting from the base. Quickly grab 1 paper bag from the right side (the ones facing up) and align to the left.


Step 2: Snip!
Now time for the fun part! Grab your scissors and begin by cutting a triangle on the top of your glued paper bags.
Avoid going too close near the bottom fold.
Match your paper bags to the image above
If you want more cool patterns on your stars, you can cut triangles, hearts, any shapes on the side of the paper bags above the fold of the paper bag. It will appear like this picture!
Now you will have a stack of triangle shaped paper bags like so.

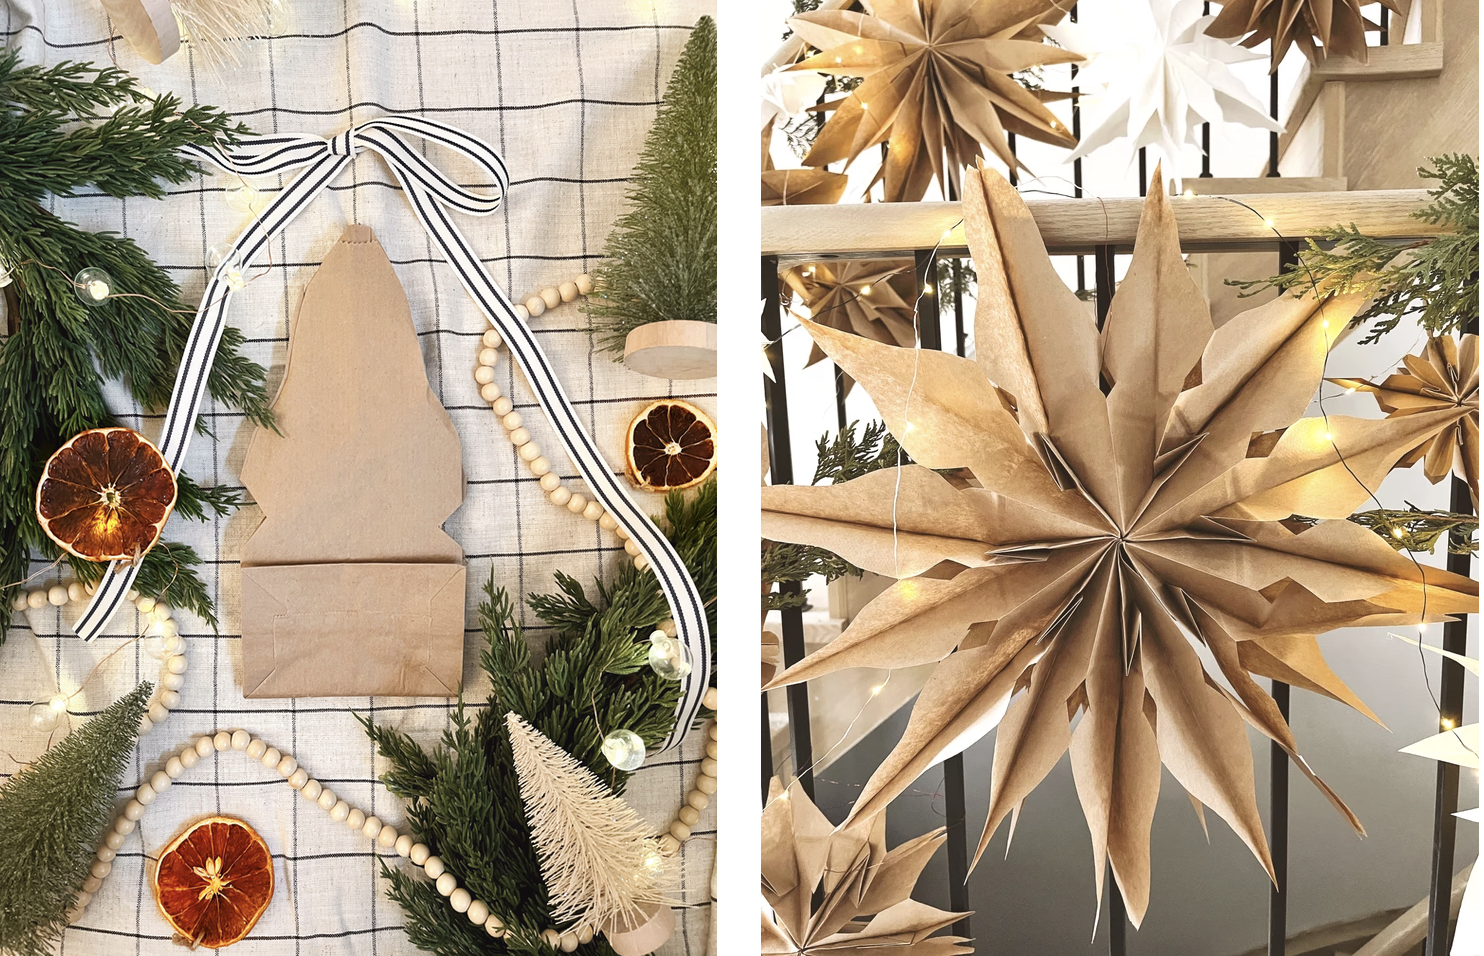
Step 3: The Magic Happens
Now for the fun part! Glue one side of your star for the last time and unravel!
*Note: I suggest testing the star by unfolding the shape to examine if it requires more paper bags to fill the shape. Smaller paper bags will most likely require more.
TIP: If you use paper clips to put them together, you can reuse it without damaging it next year!
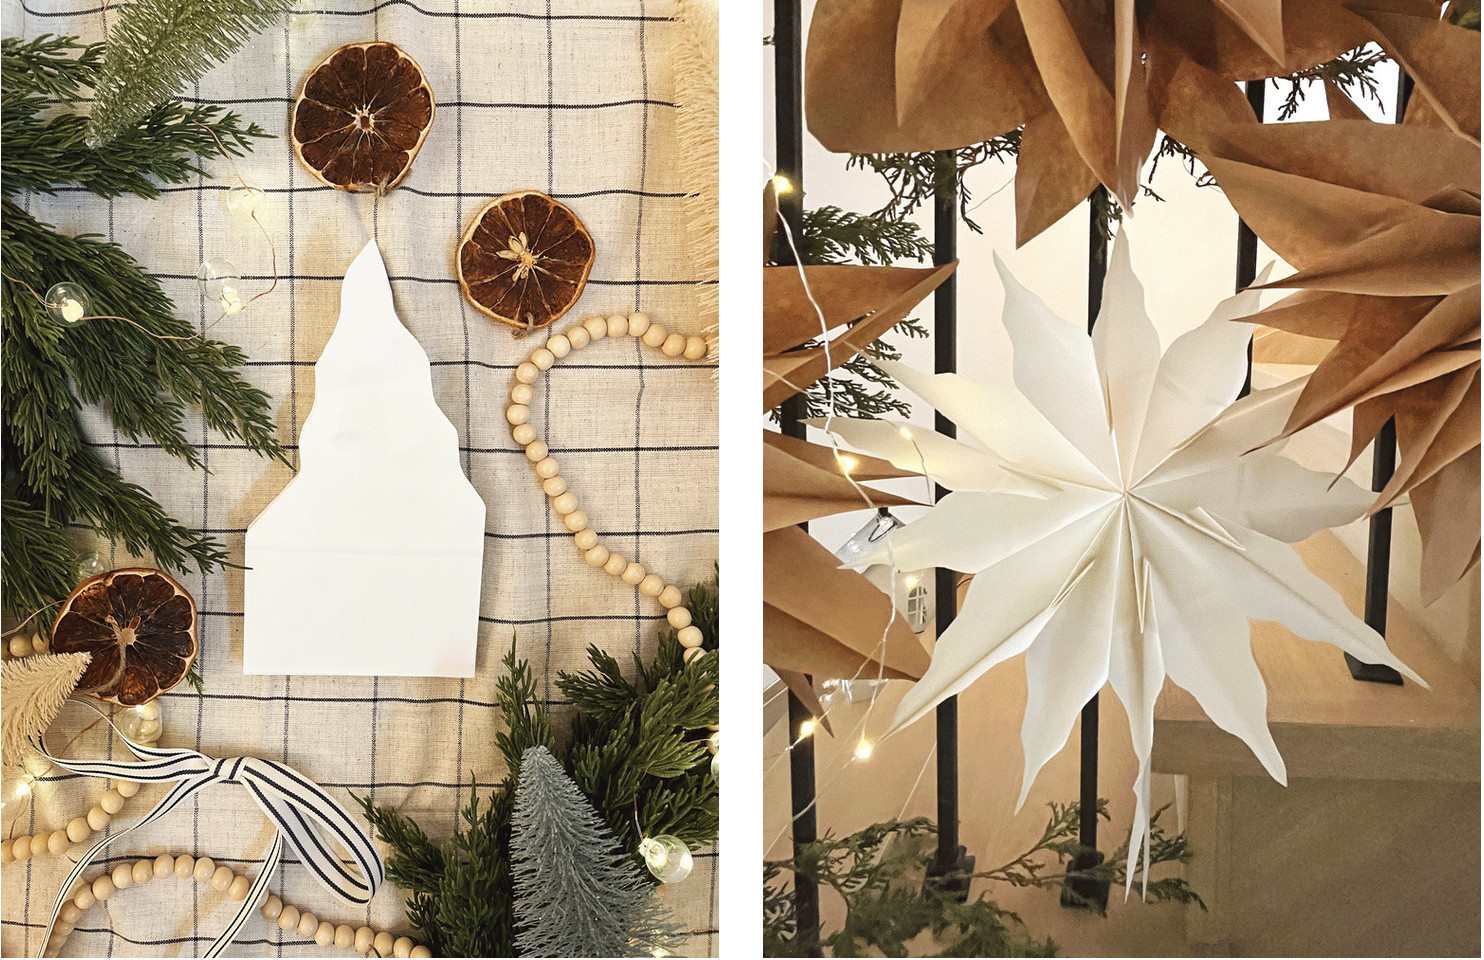
Templates
Here are some of the cut out patterns I used to achieve the design!
TIP: Make sure to cut a sharp point at the tip of the paper bag to ensure a pointy star if that is the look you are going for.
Check out the ways we used paper bag snowflakes last year!
I loved using it as a garland over the fireplace, displayed over windows, draped over the staircase all with the help of some strategically placed Command hooks and thin gauge wire!
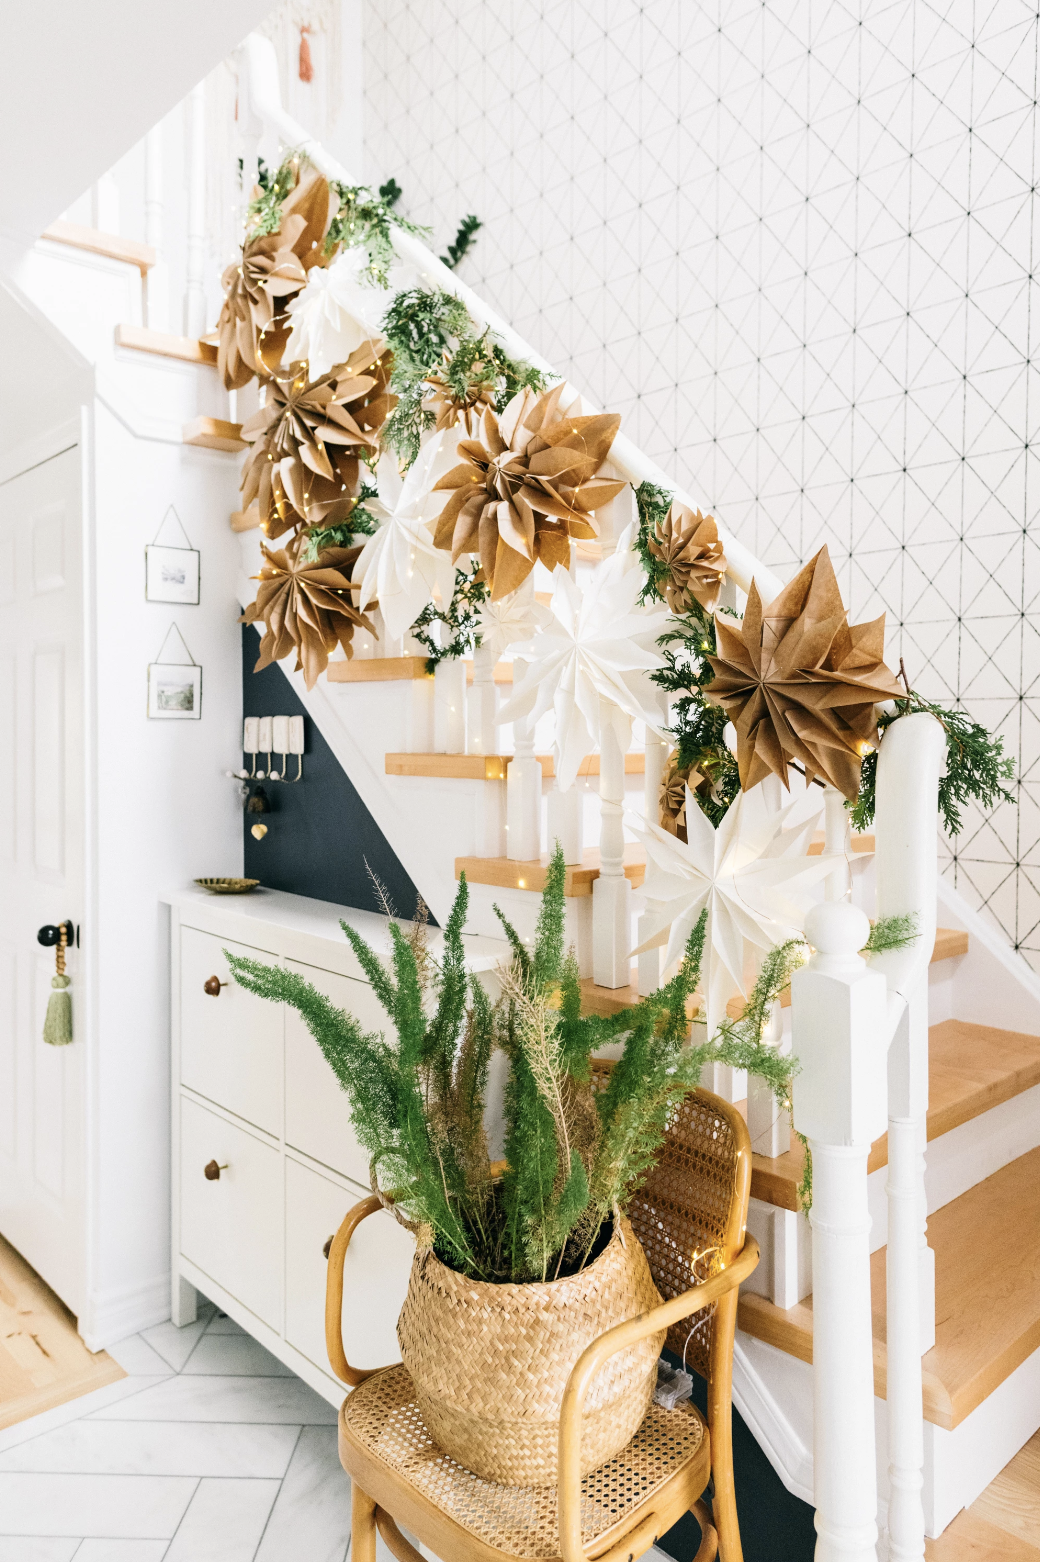

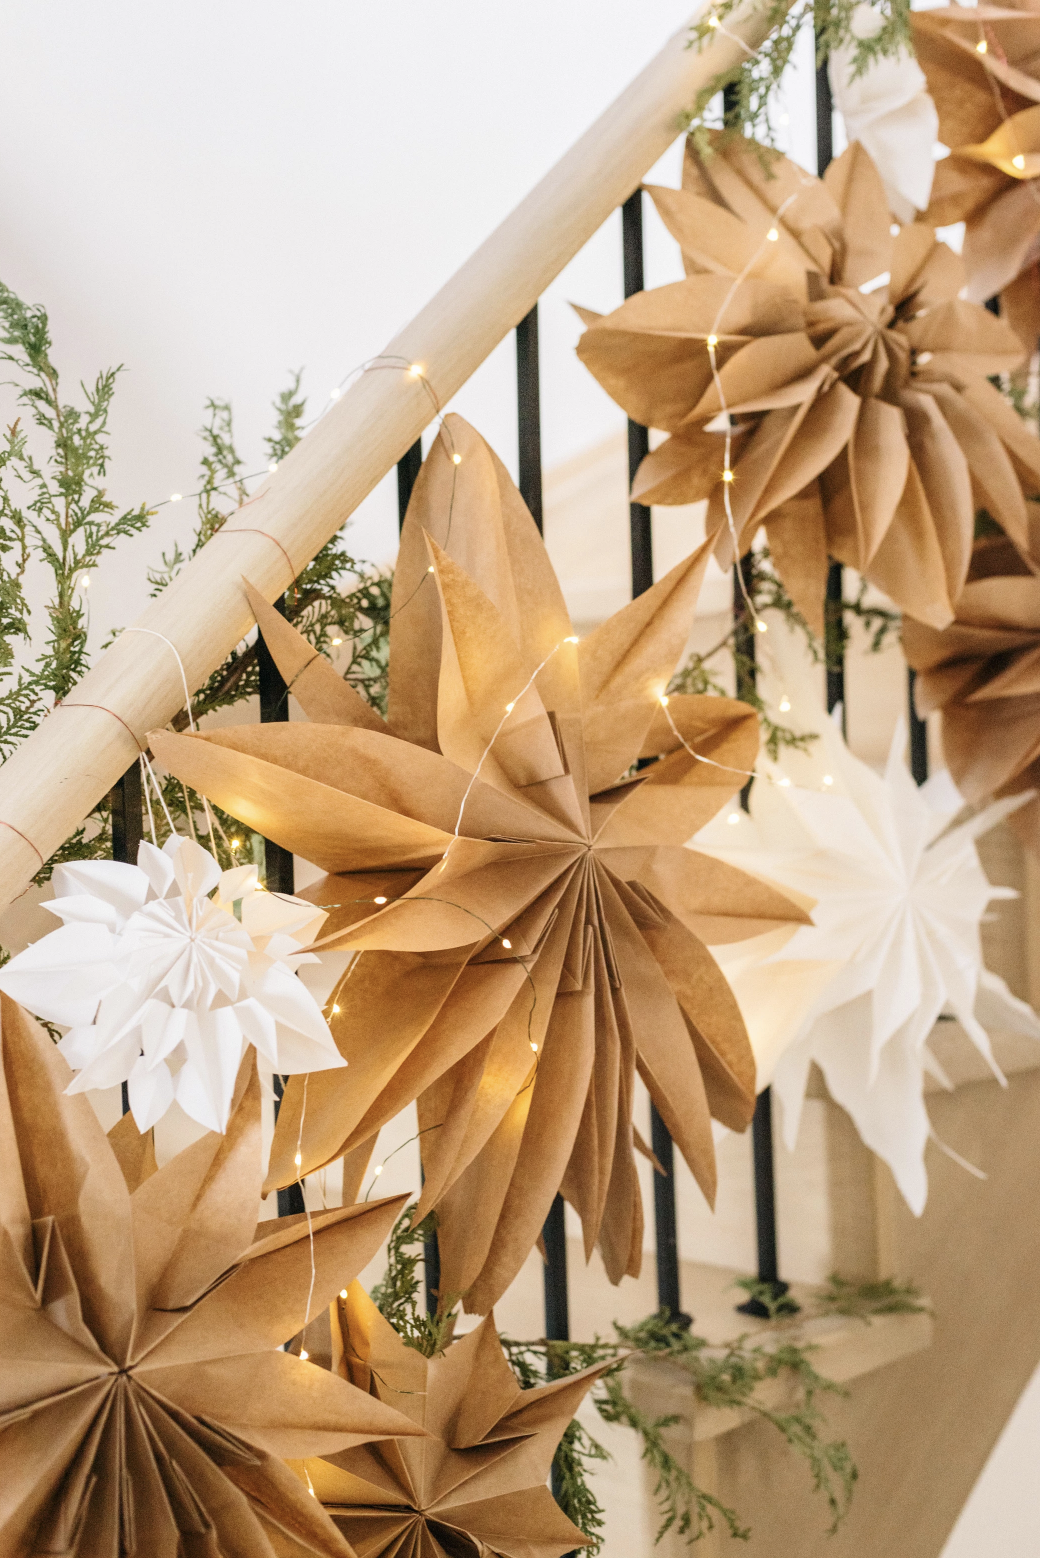
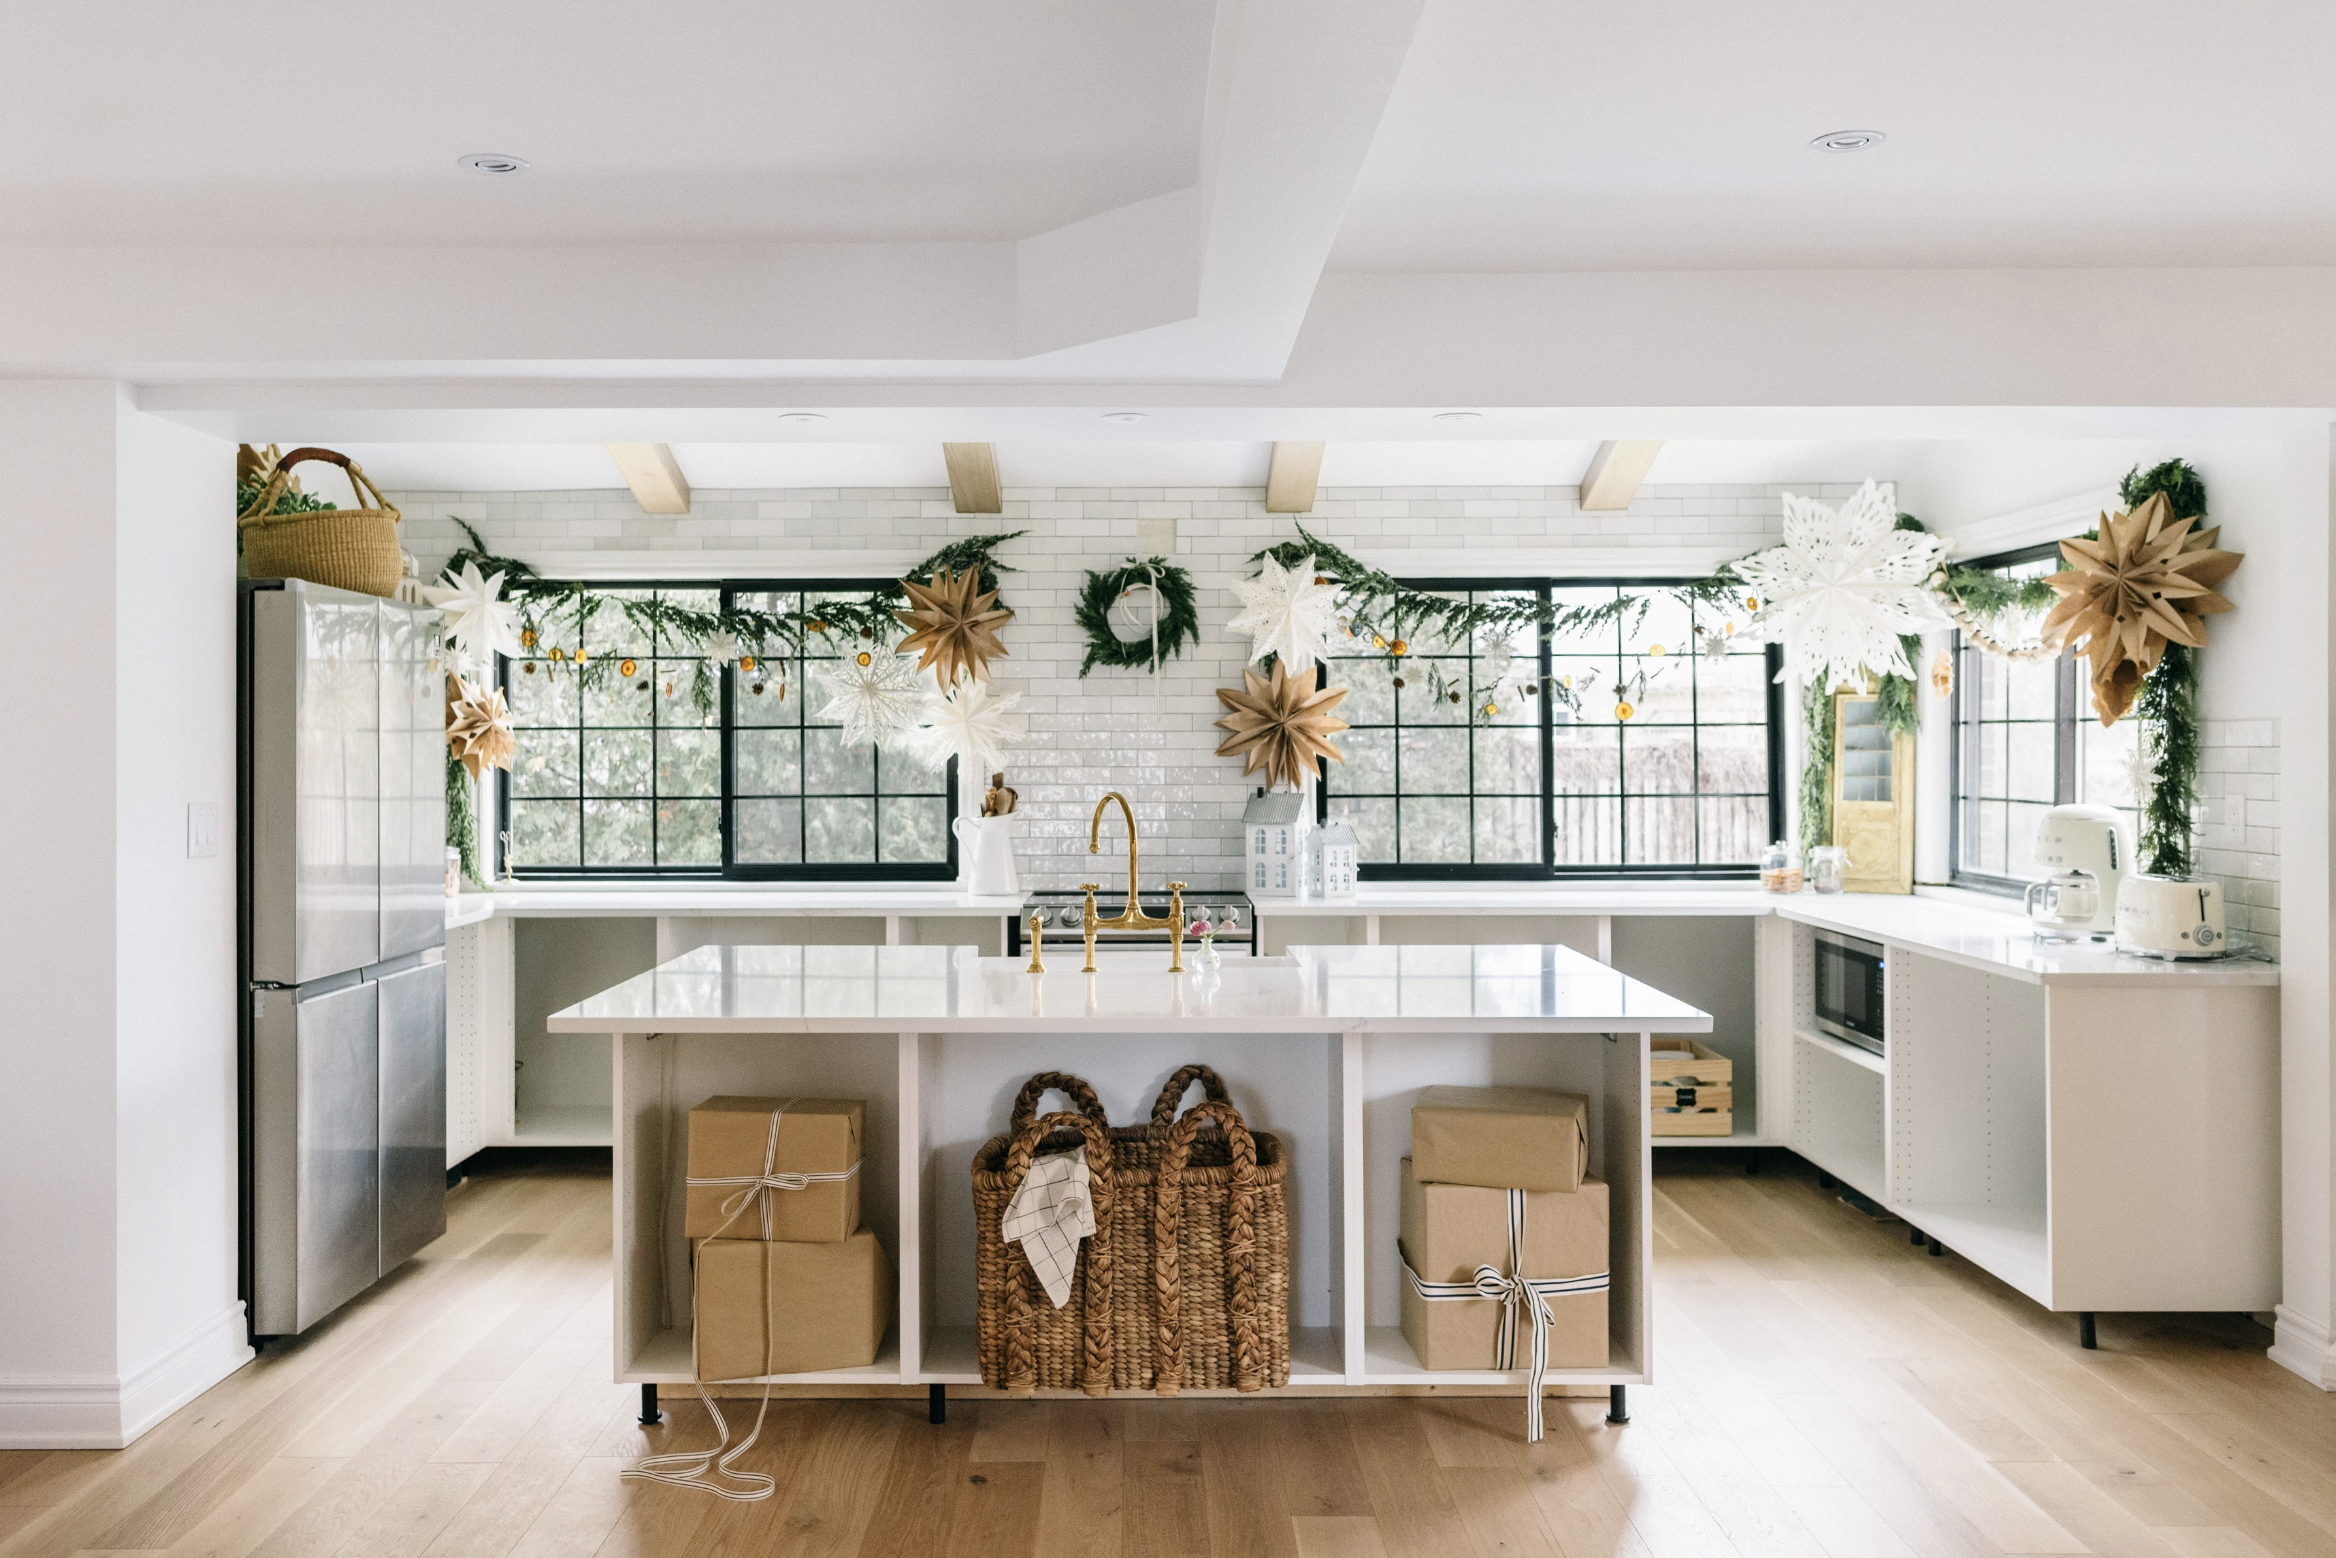
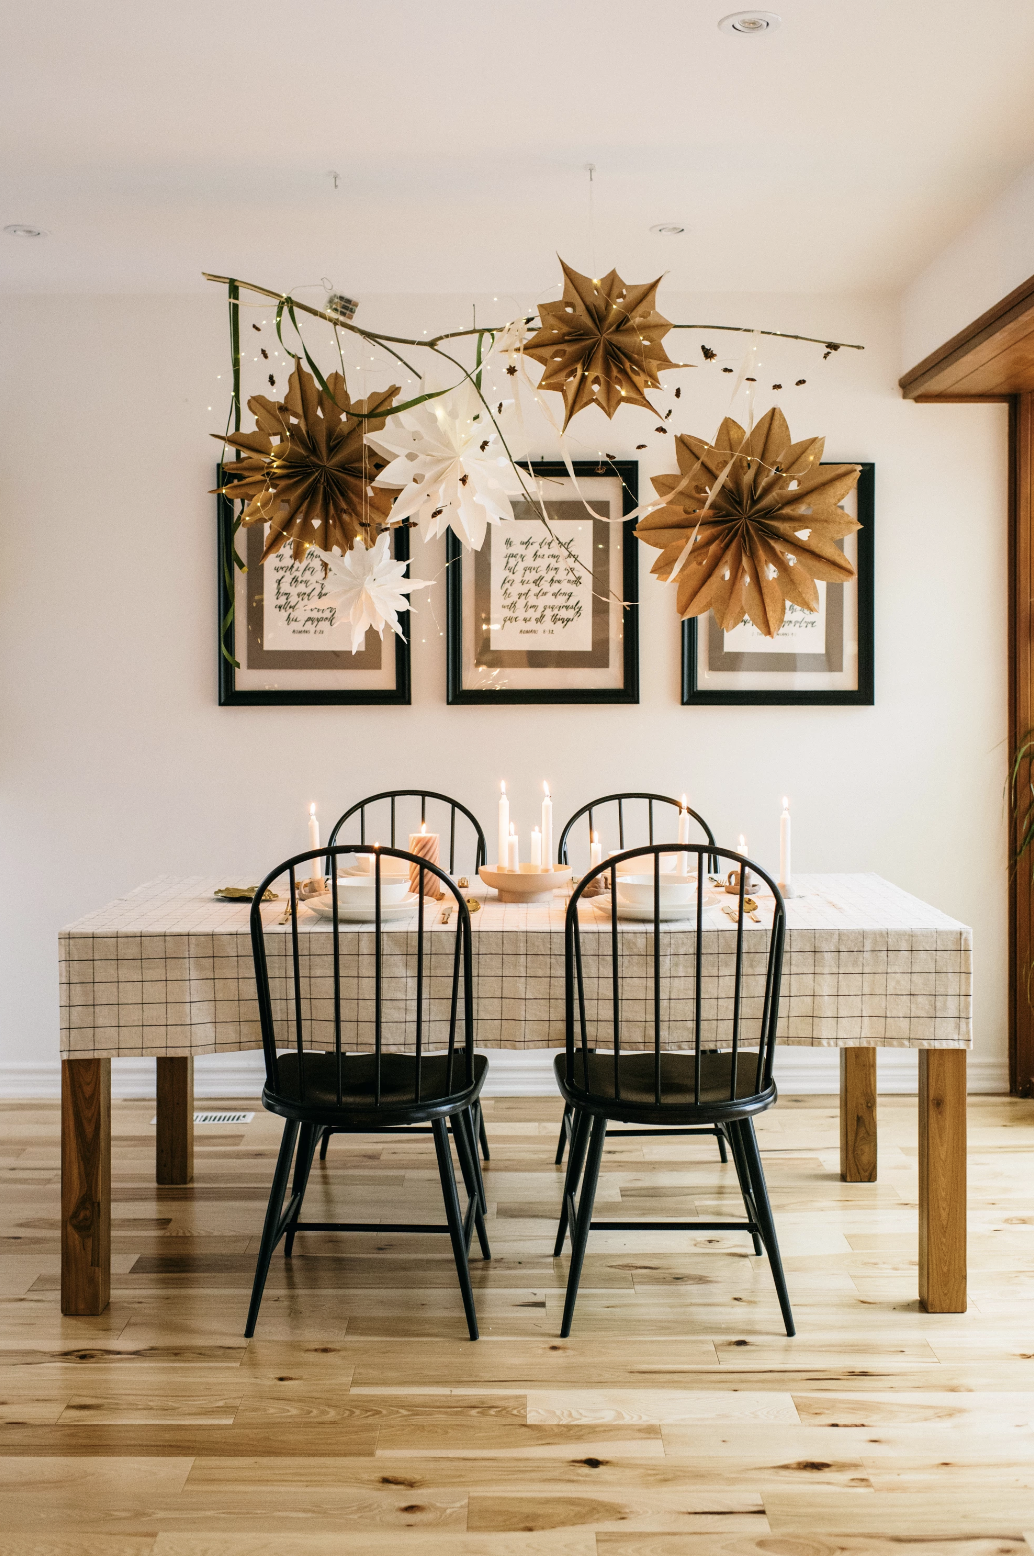
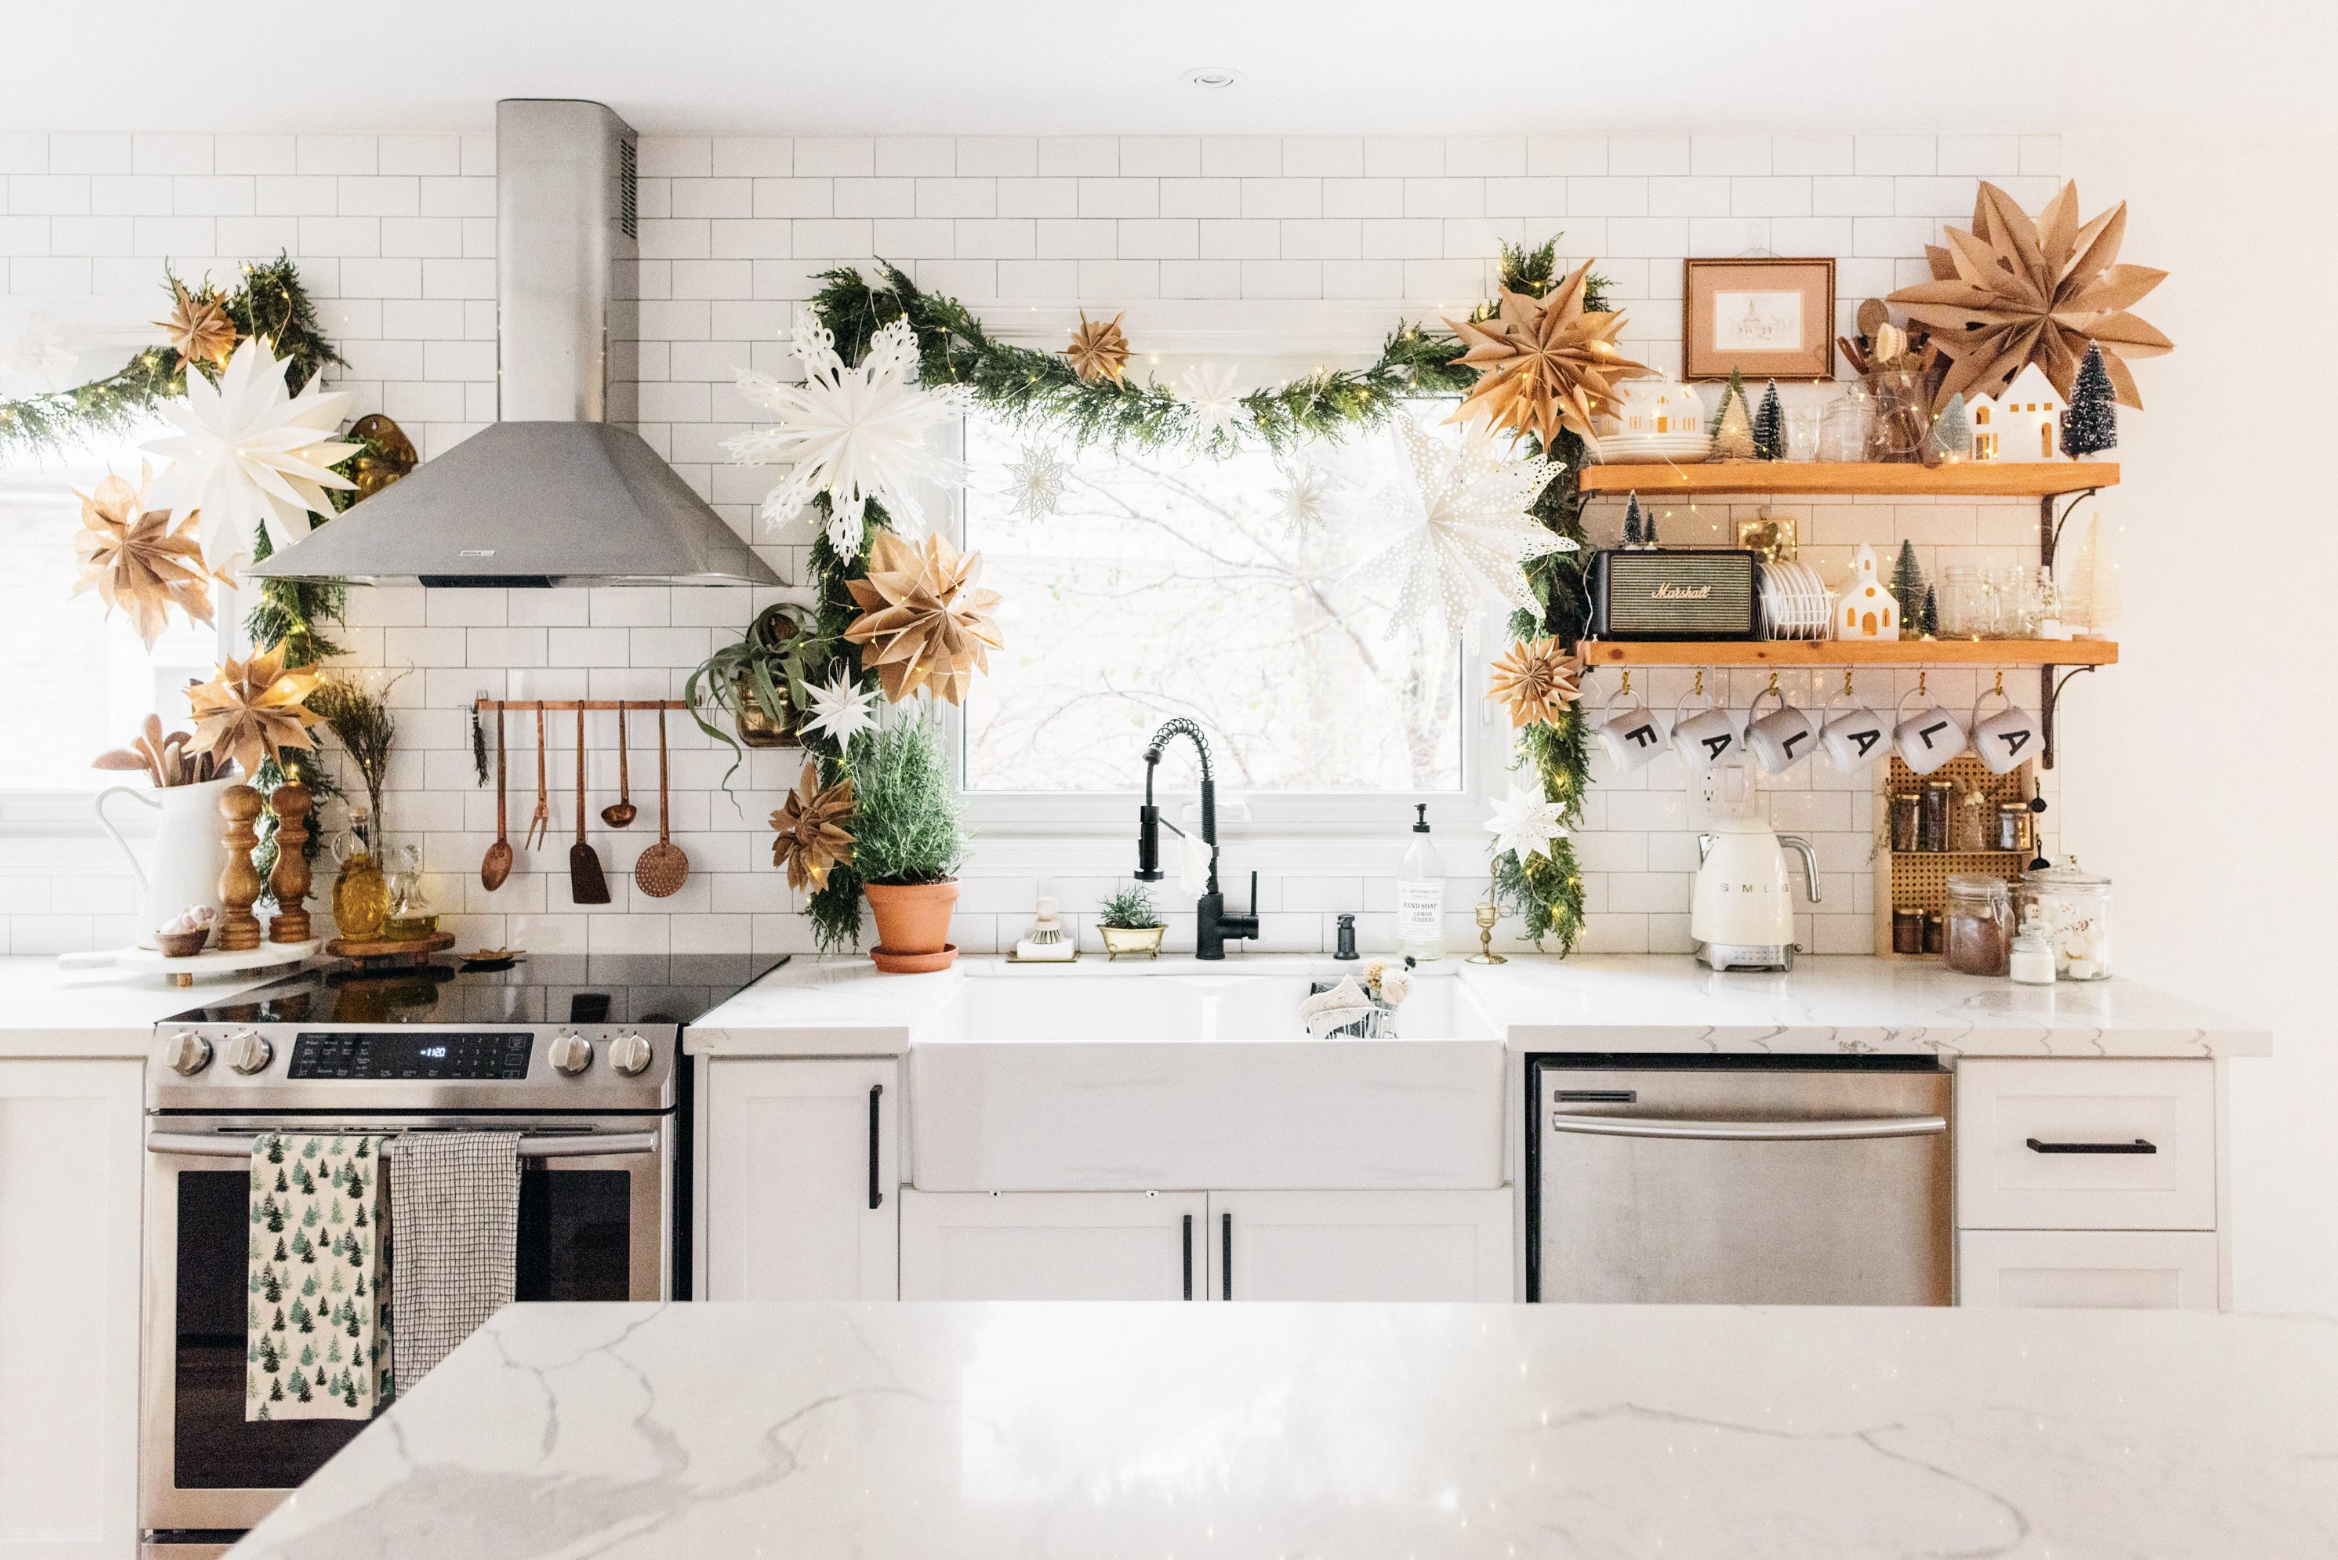
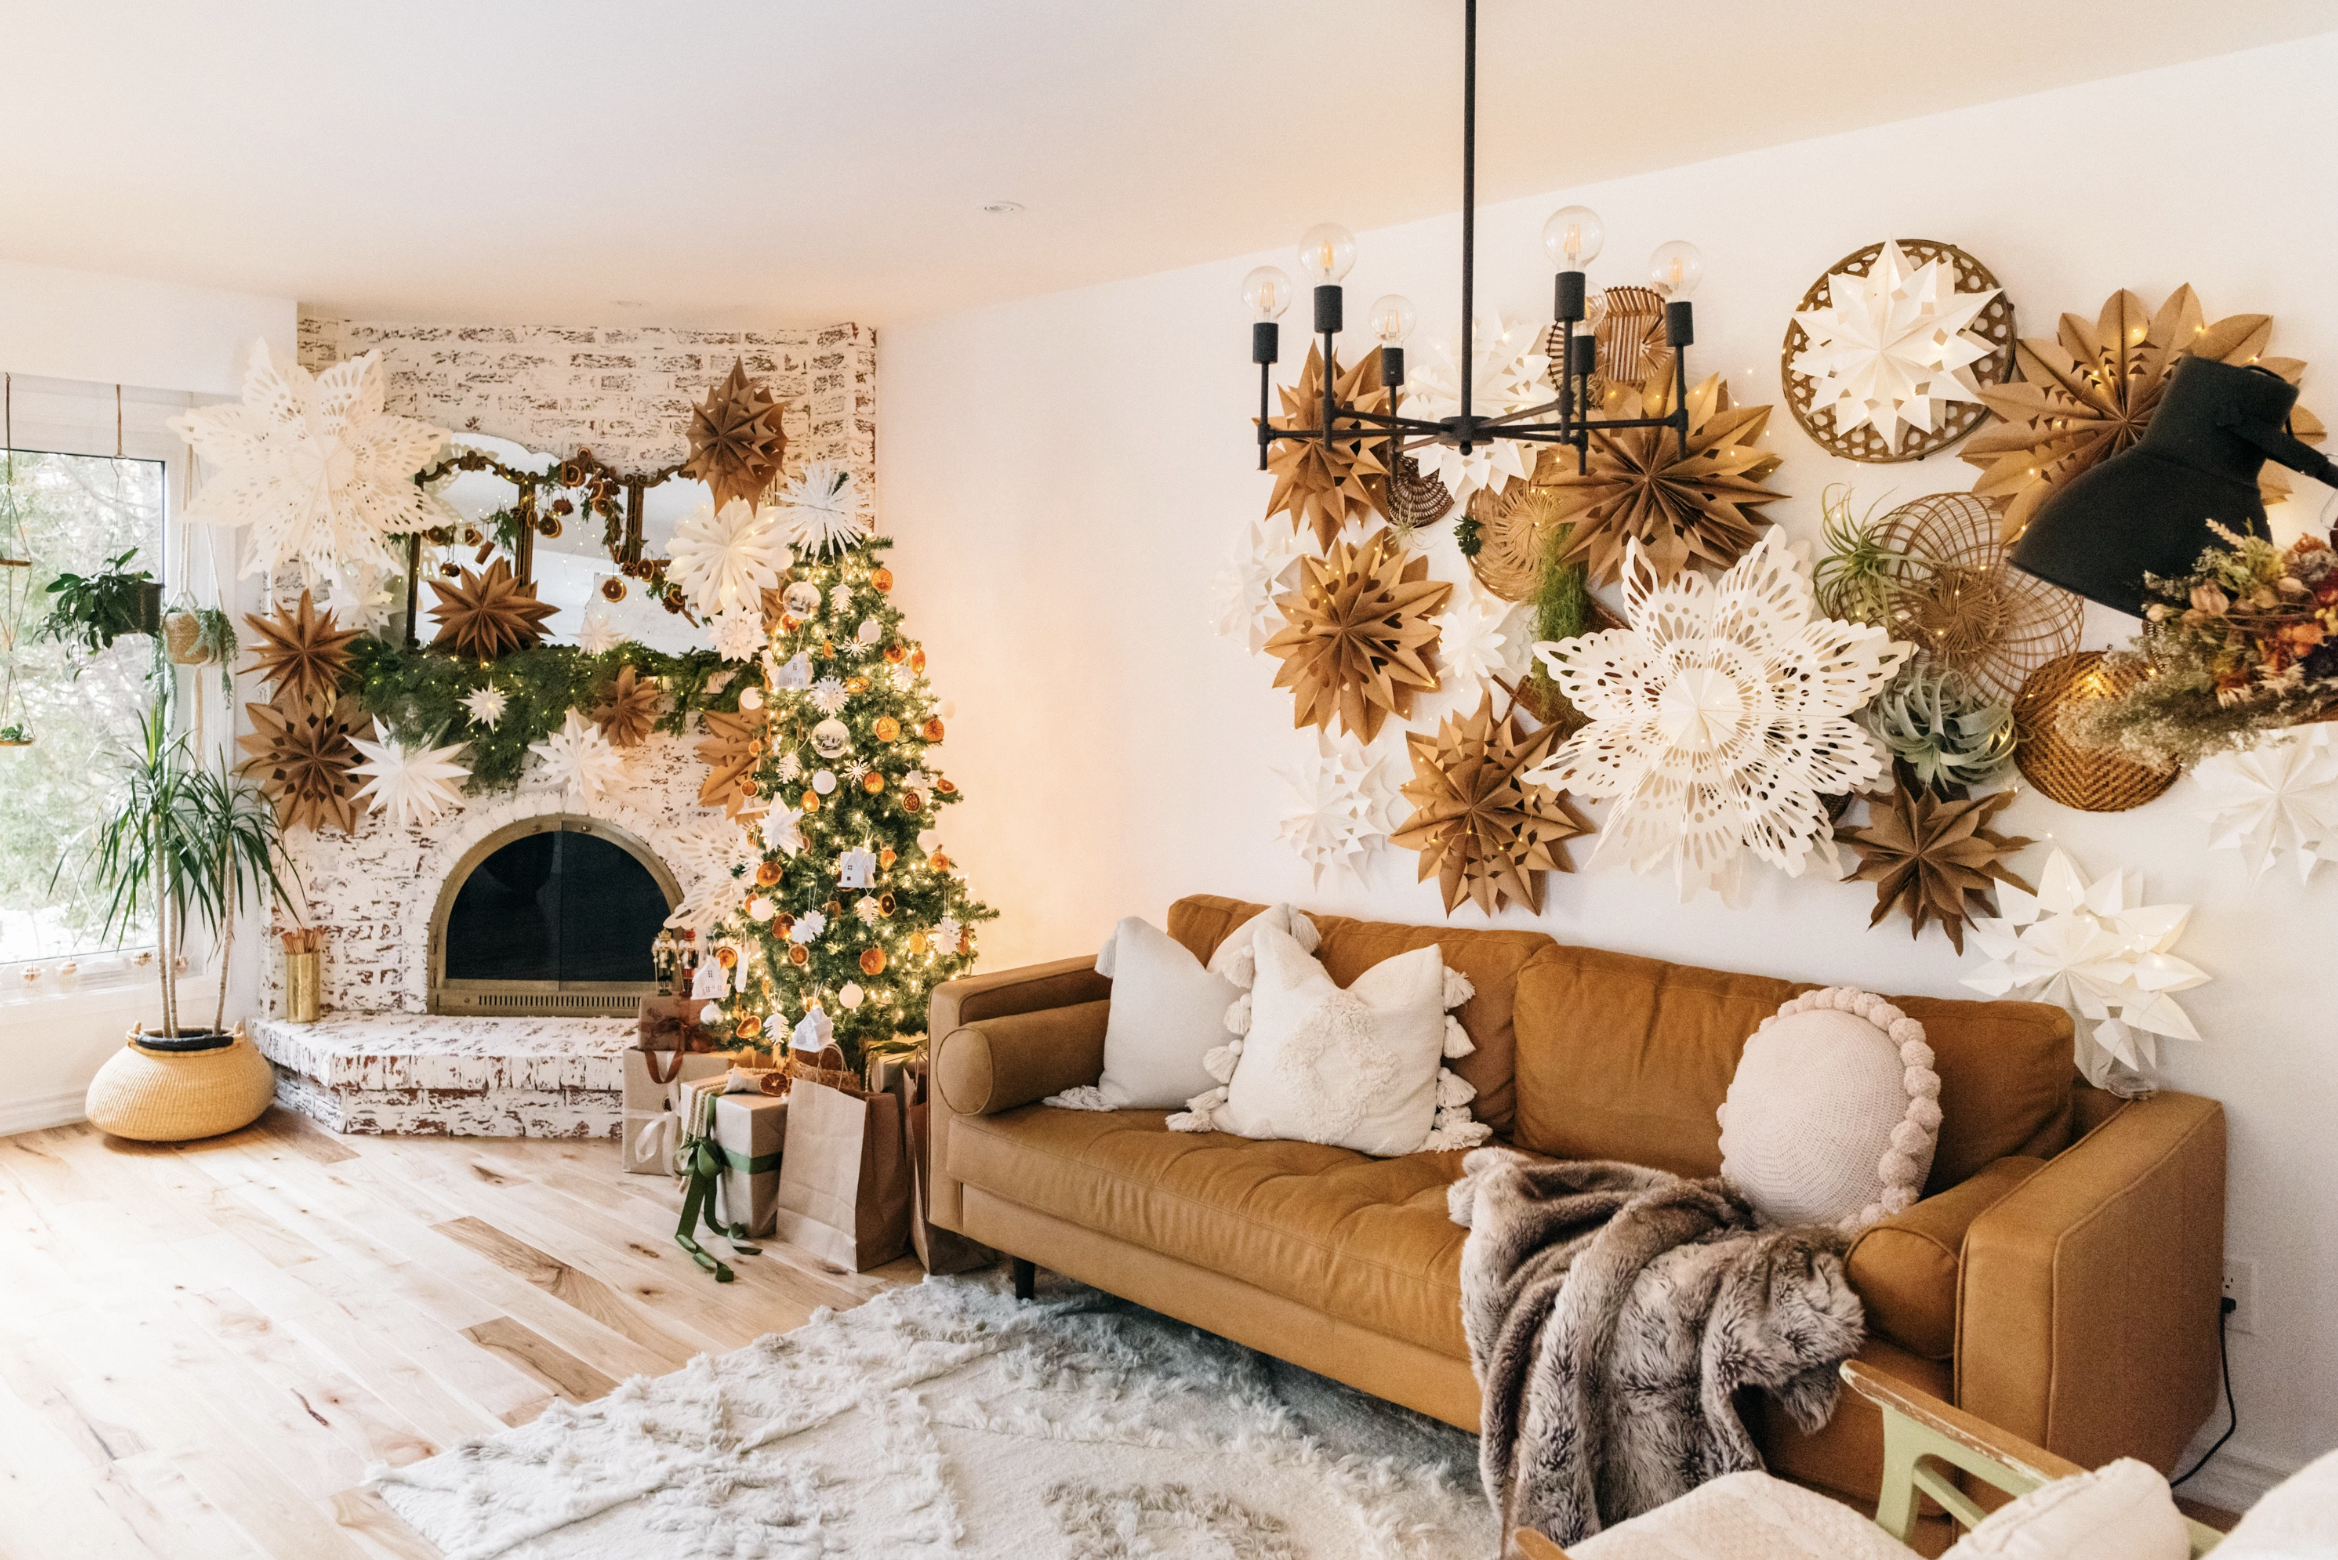
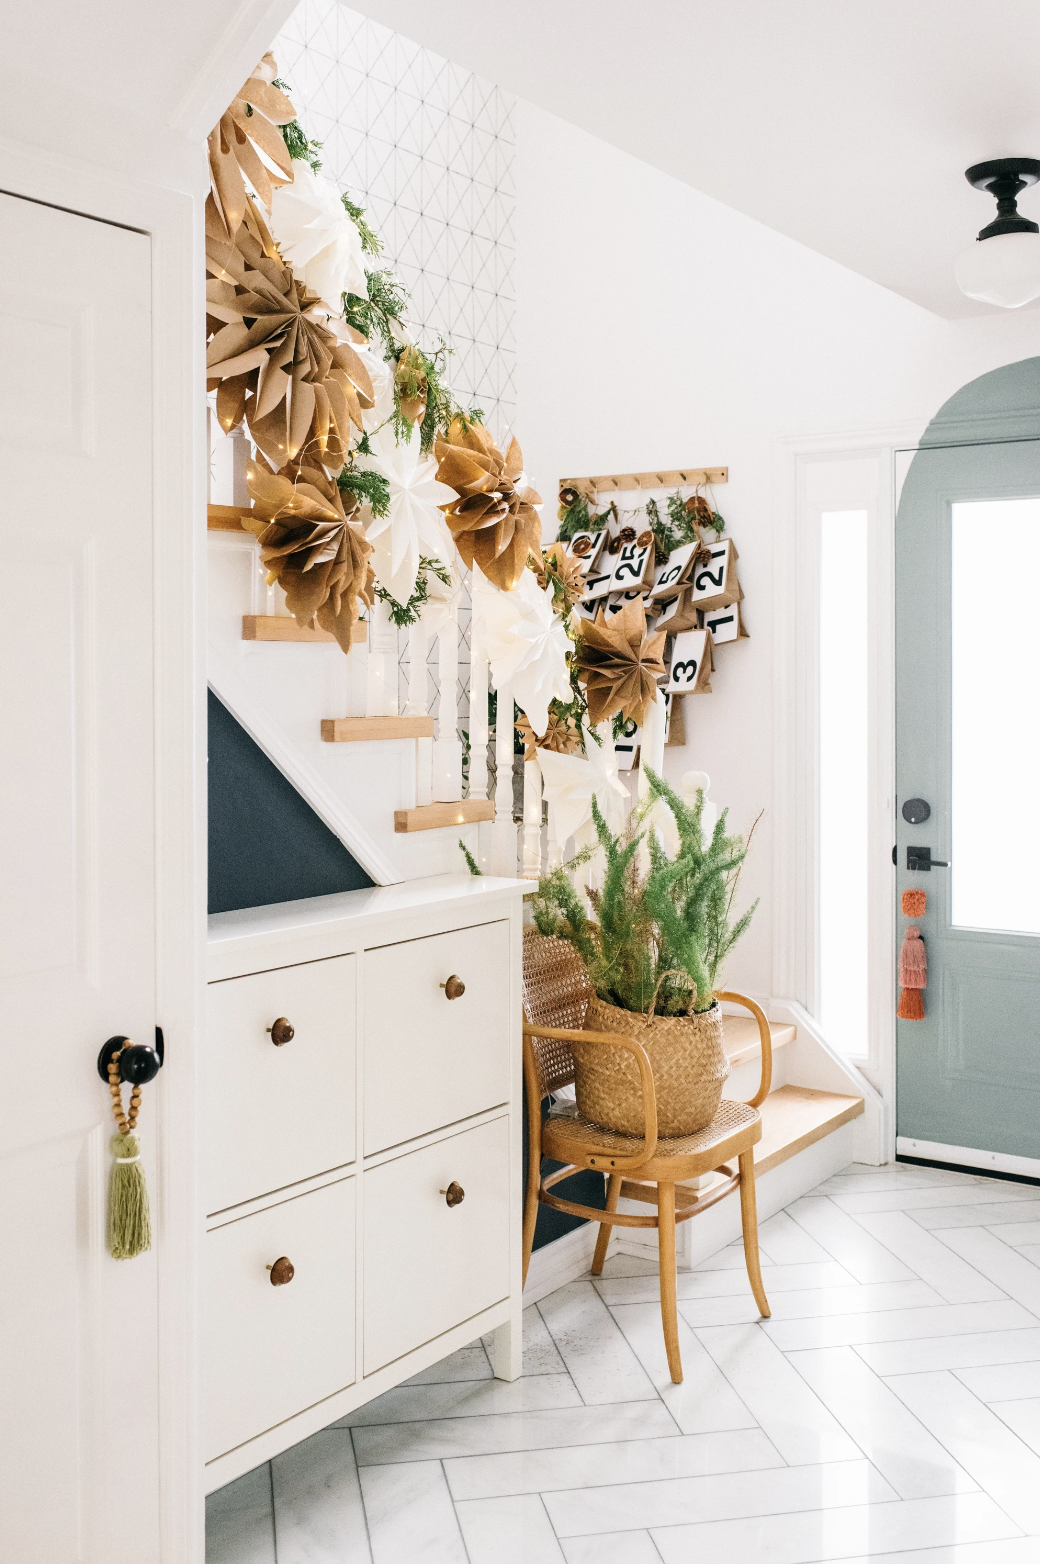
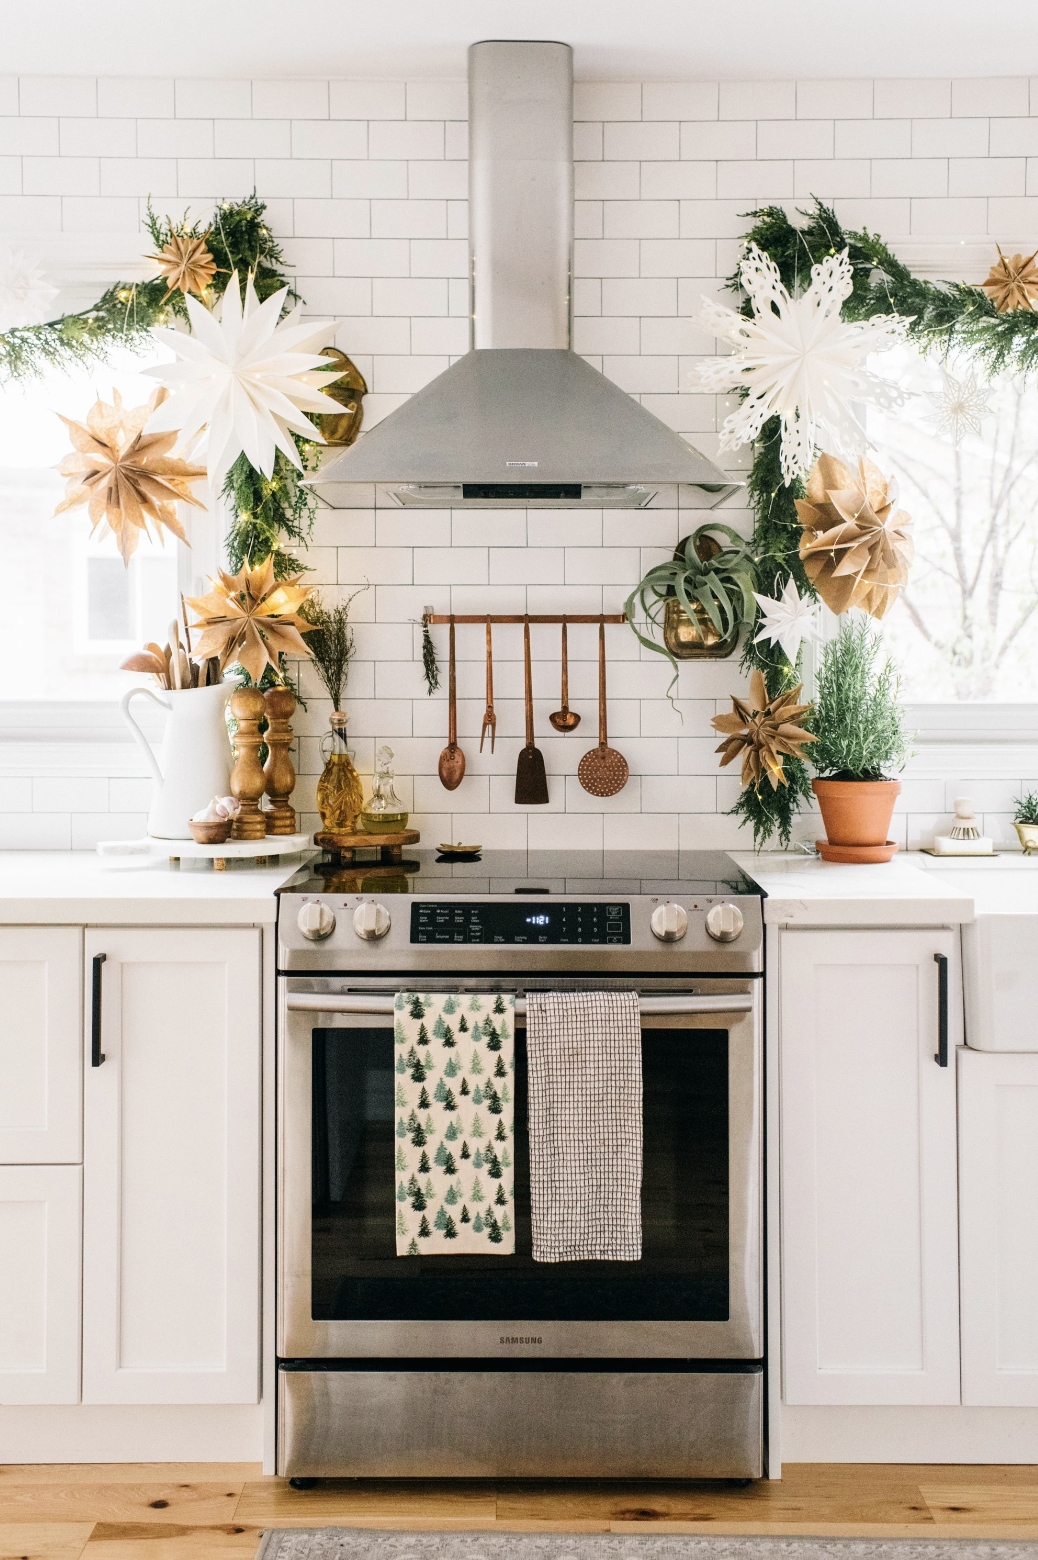
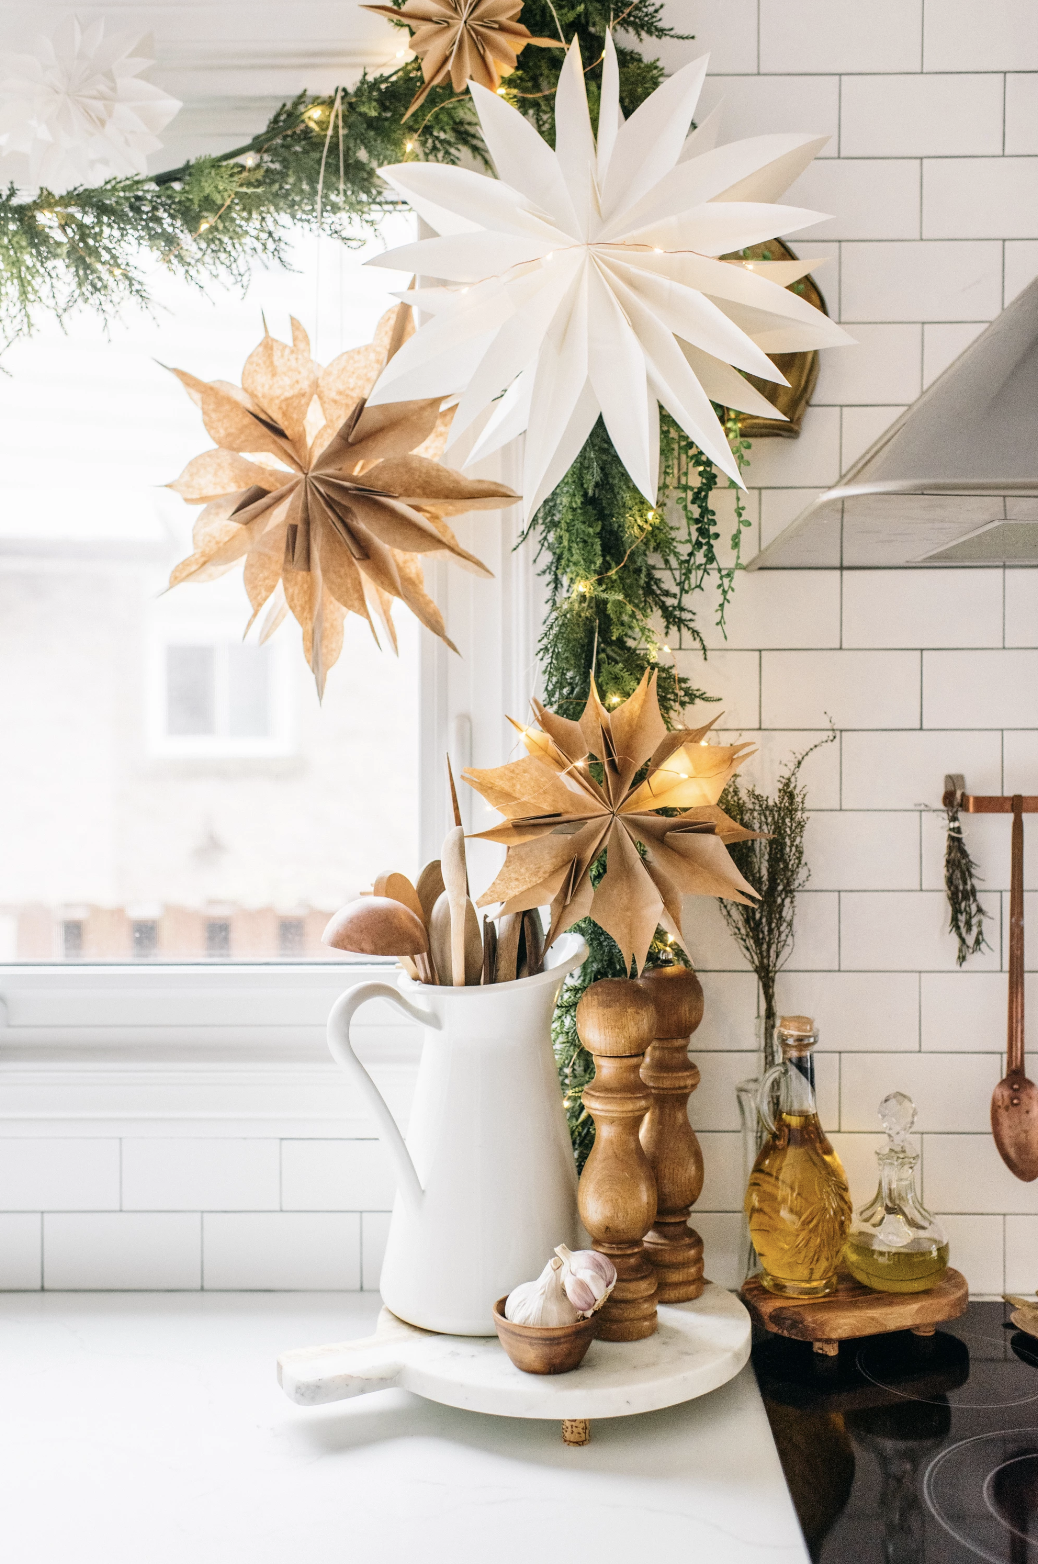
This was the snowflake blizzard I had in thekwendyhome 2.0, all captured by @janetkwan
I absolutely loved our Christmas decor last year. I hope you make it "snow" in your home this year too!
Thanks for reading and happy crafting!
Love,