

How To DIY Easy $1 Paper Bag Snowflakes
In need of some beautiful, fast, and easy holiday decorations? Well, look no further!
I improved my paper bag snowflake tutorial with a more intricate design. You can choose to do make with white or regular brown paper lunch bags or even predesigned ones! High impact, low effort DIYS are my jam, but when you put in affordability too, this DIY cannot be beat.

Materials
7 Paper bags (any size)
Scissors
Glue gun
Glue sticks
Tape (optional)
To display:
Thin gauge wire or fishing wire
Command hooks (optional)
Paper clip (optional)
Mangets (optional)
*Note: 7 paper bags creates only 1 star. Buy according to the amount you need. Smaller paper bags may require 8 depending on the size.


Step 1
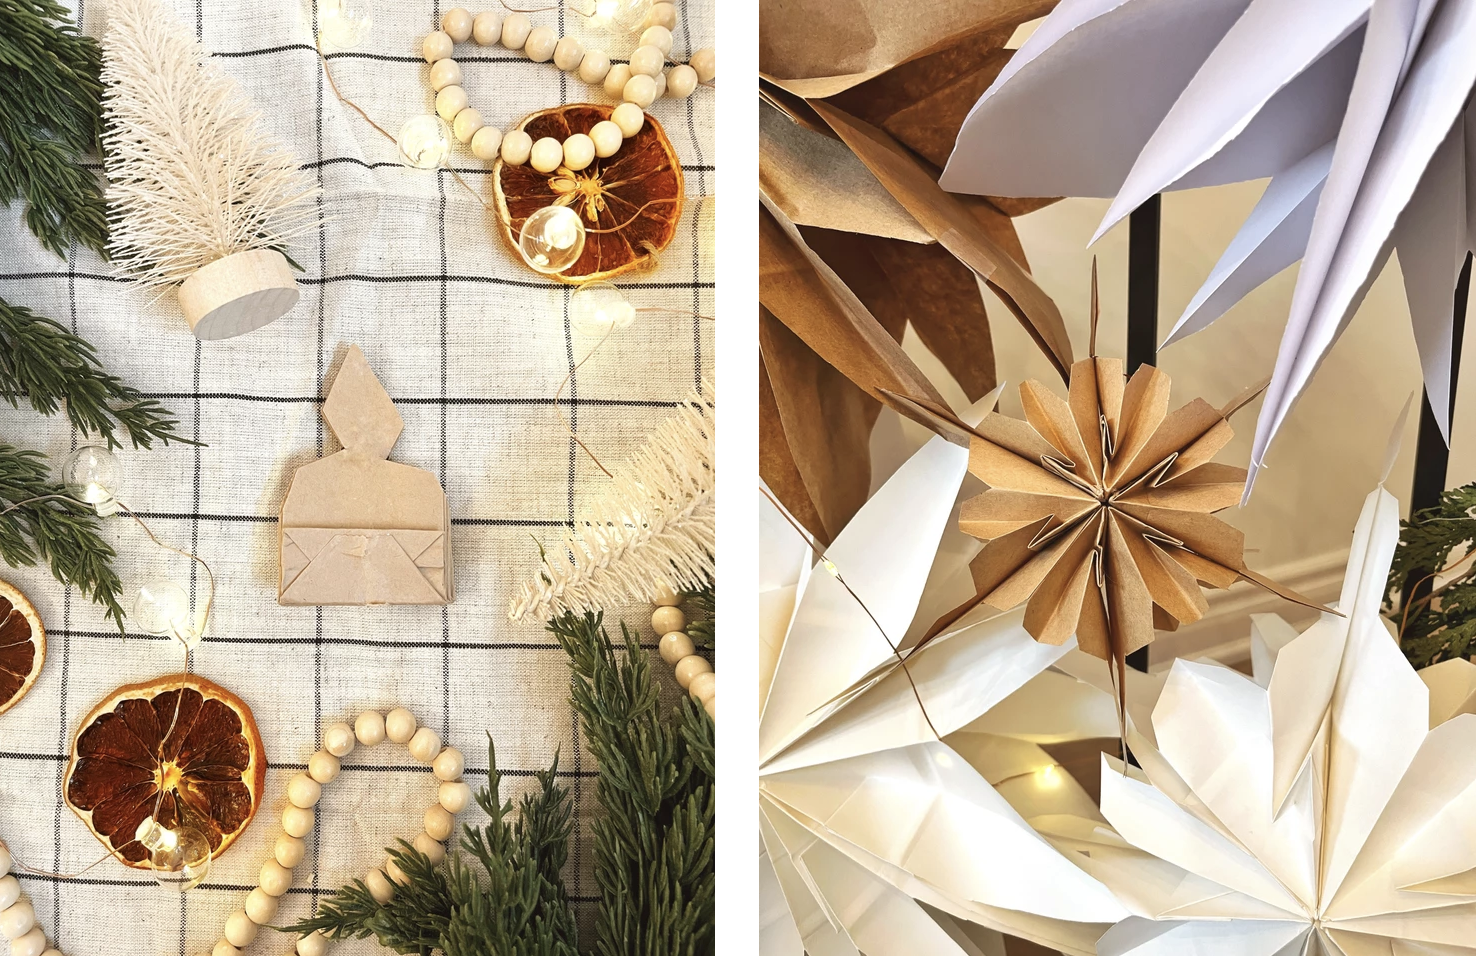
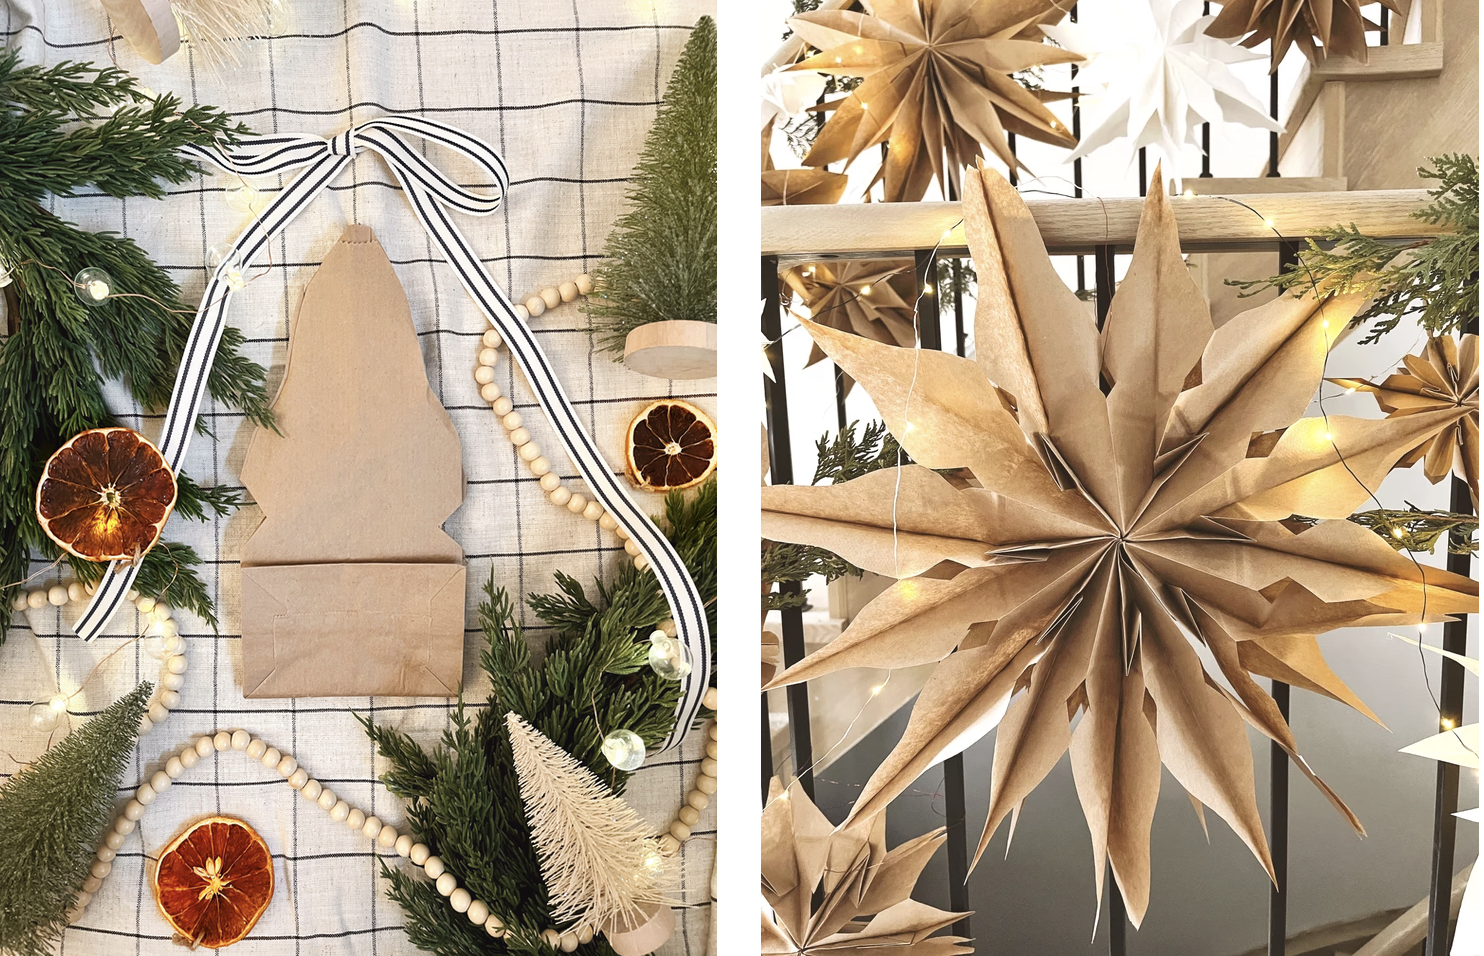
You’ll need seven paper bags. Glue the paper bags together as shown. The first bead of glue should be on the base of your paper bag. Then run another bead of glue down the middle of your bag in the form of a T.
TIP
I like to layer and glue three or 2 bags at a time. This would ease your hands during the cutting and hold punching phase.
Step 2
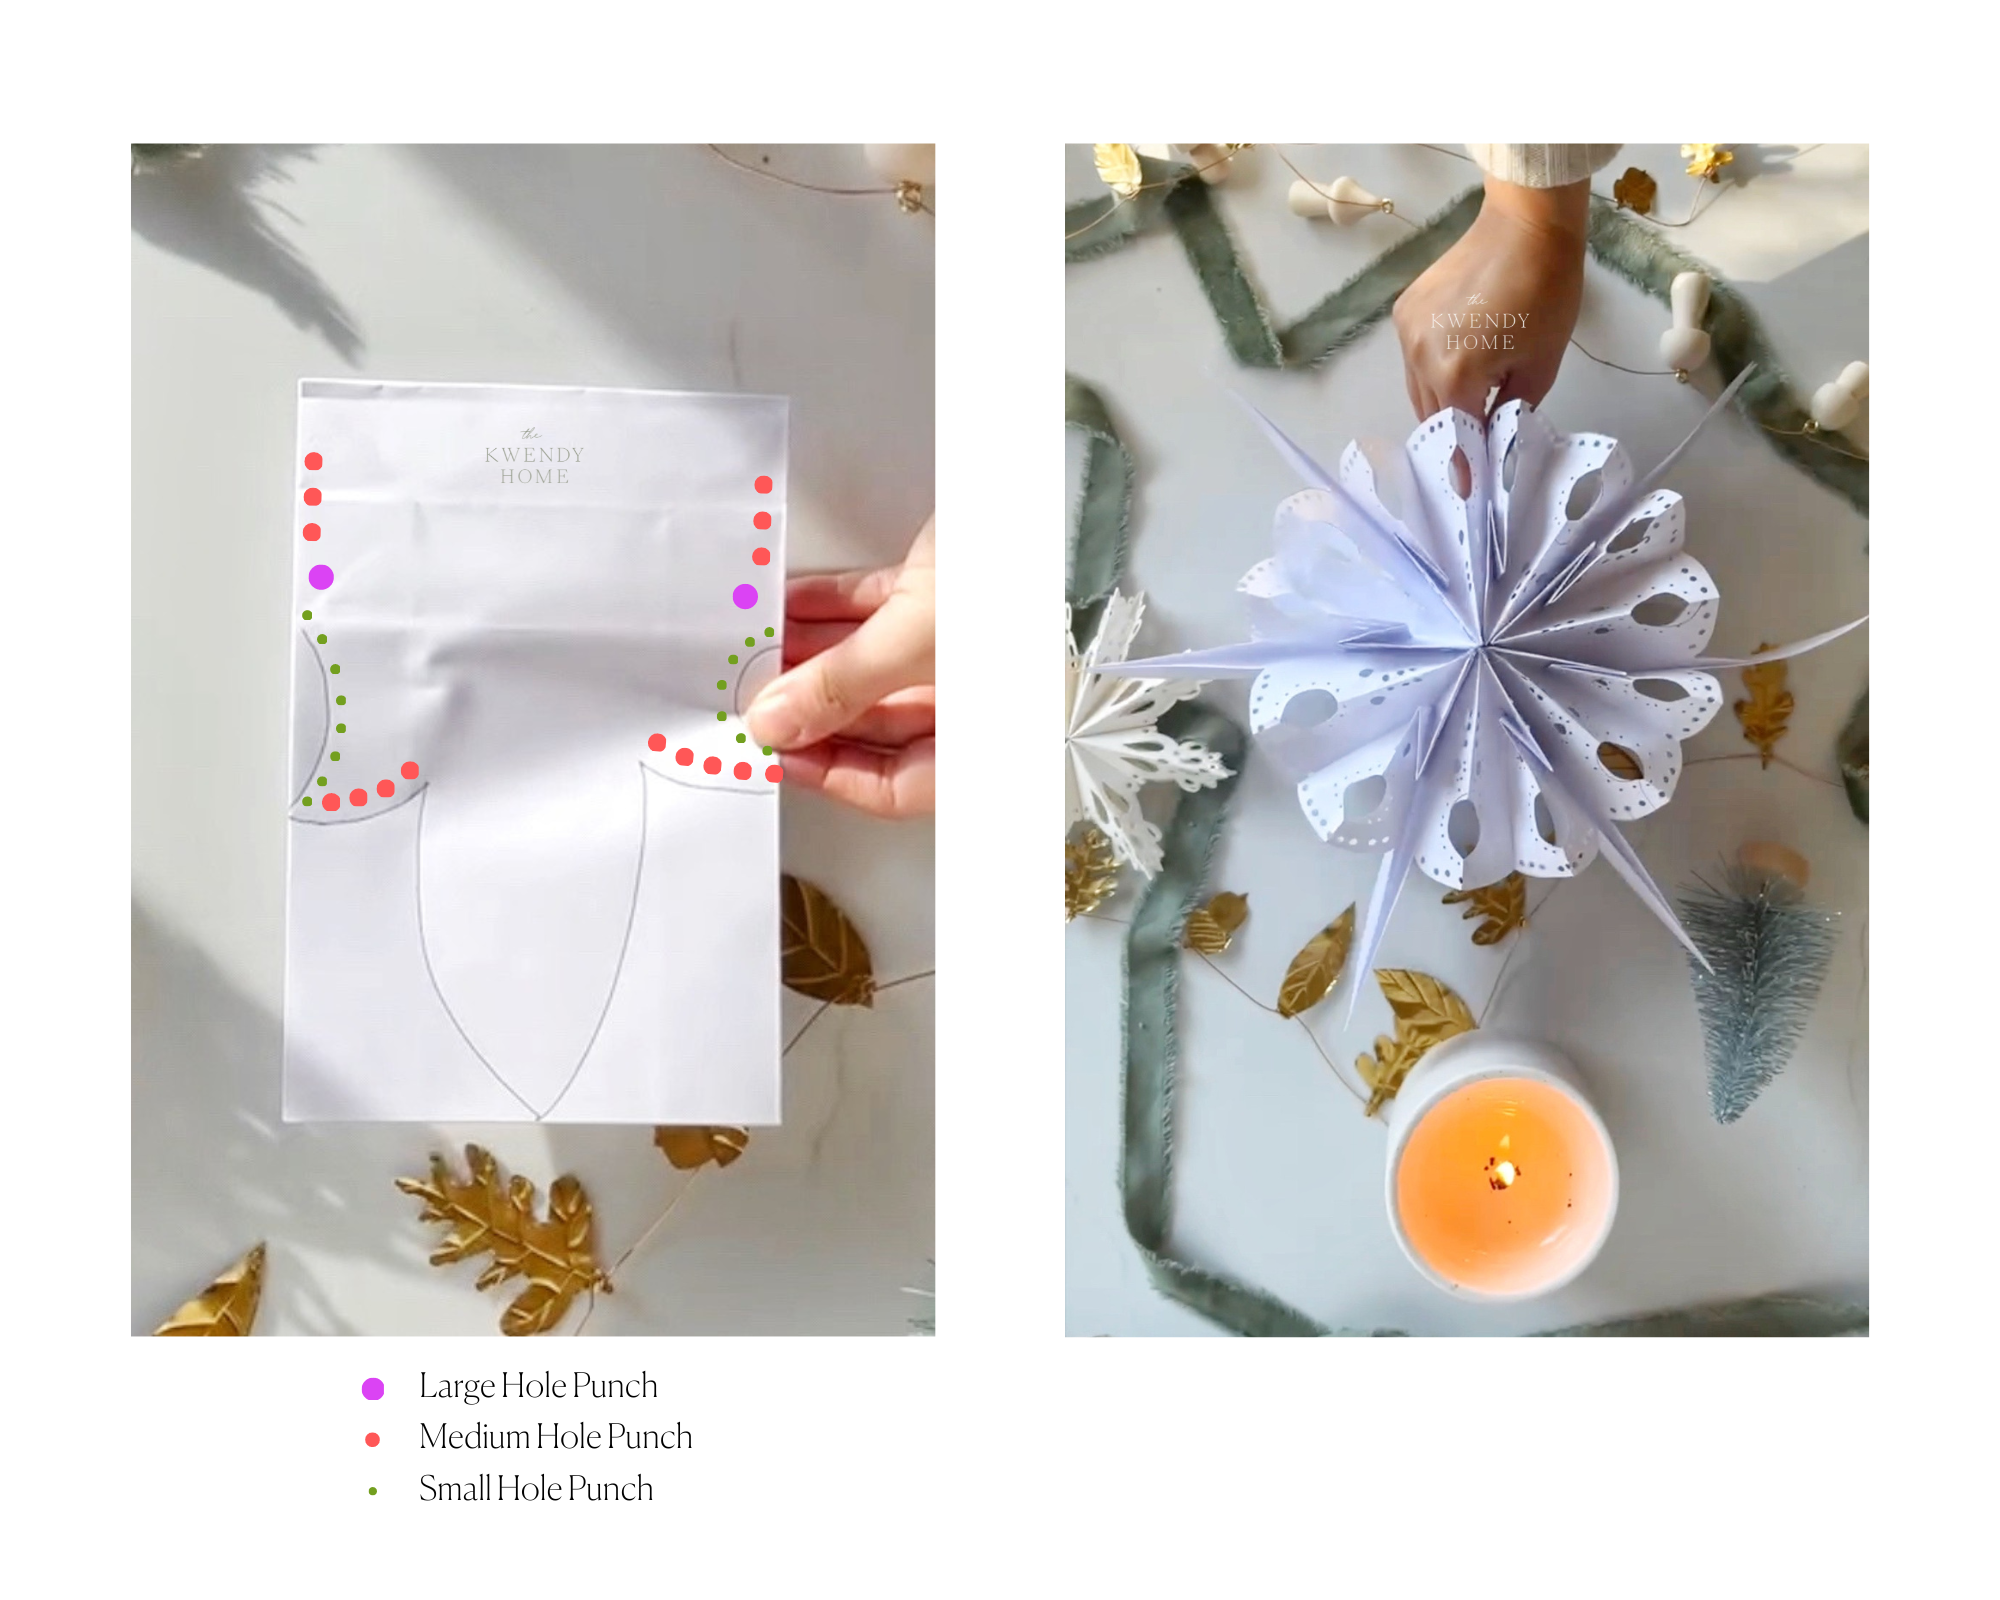
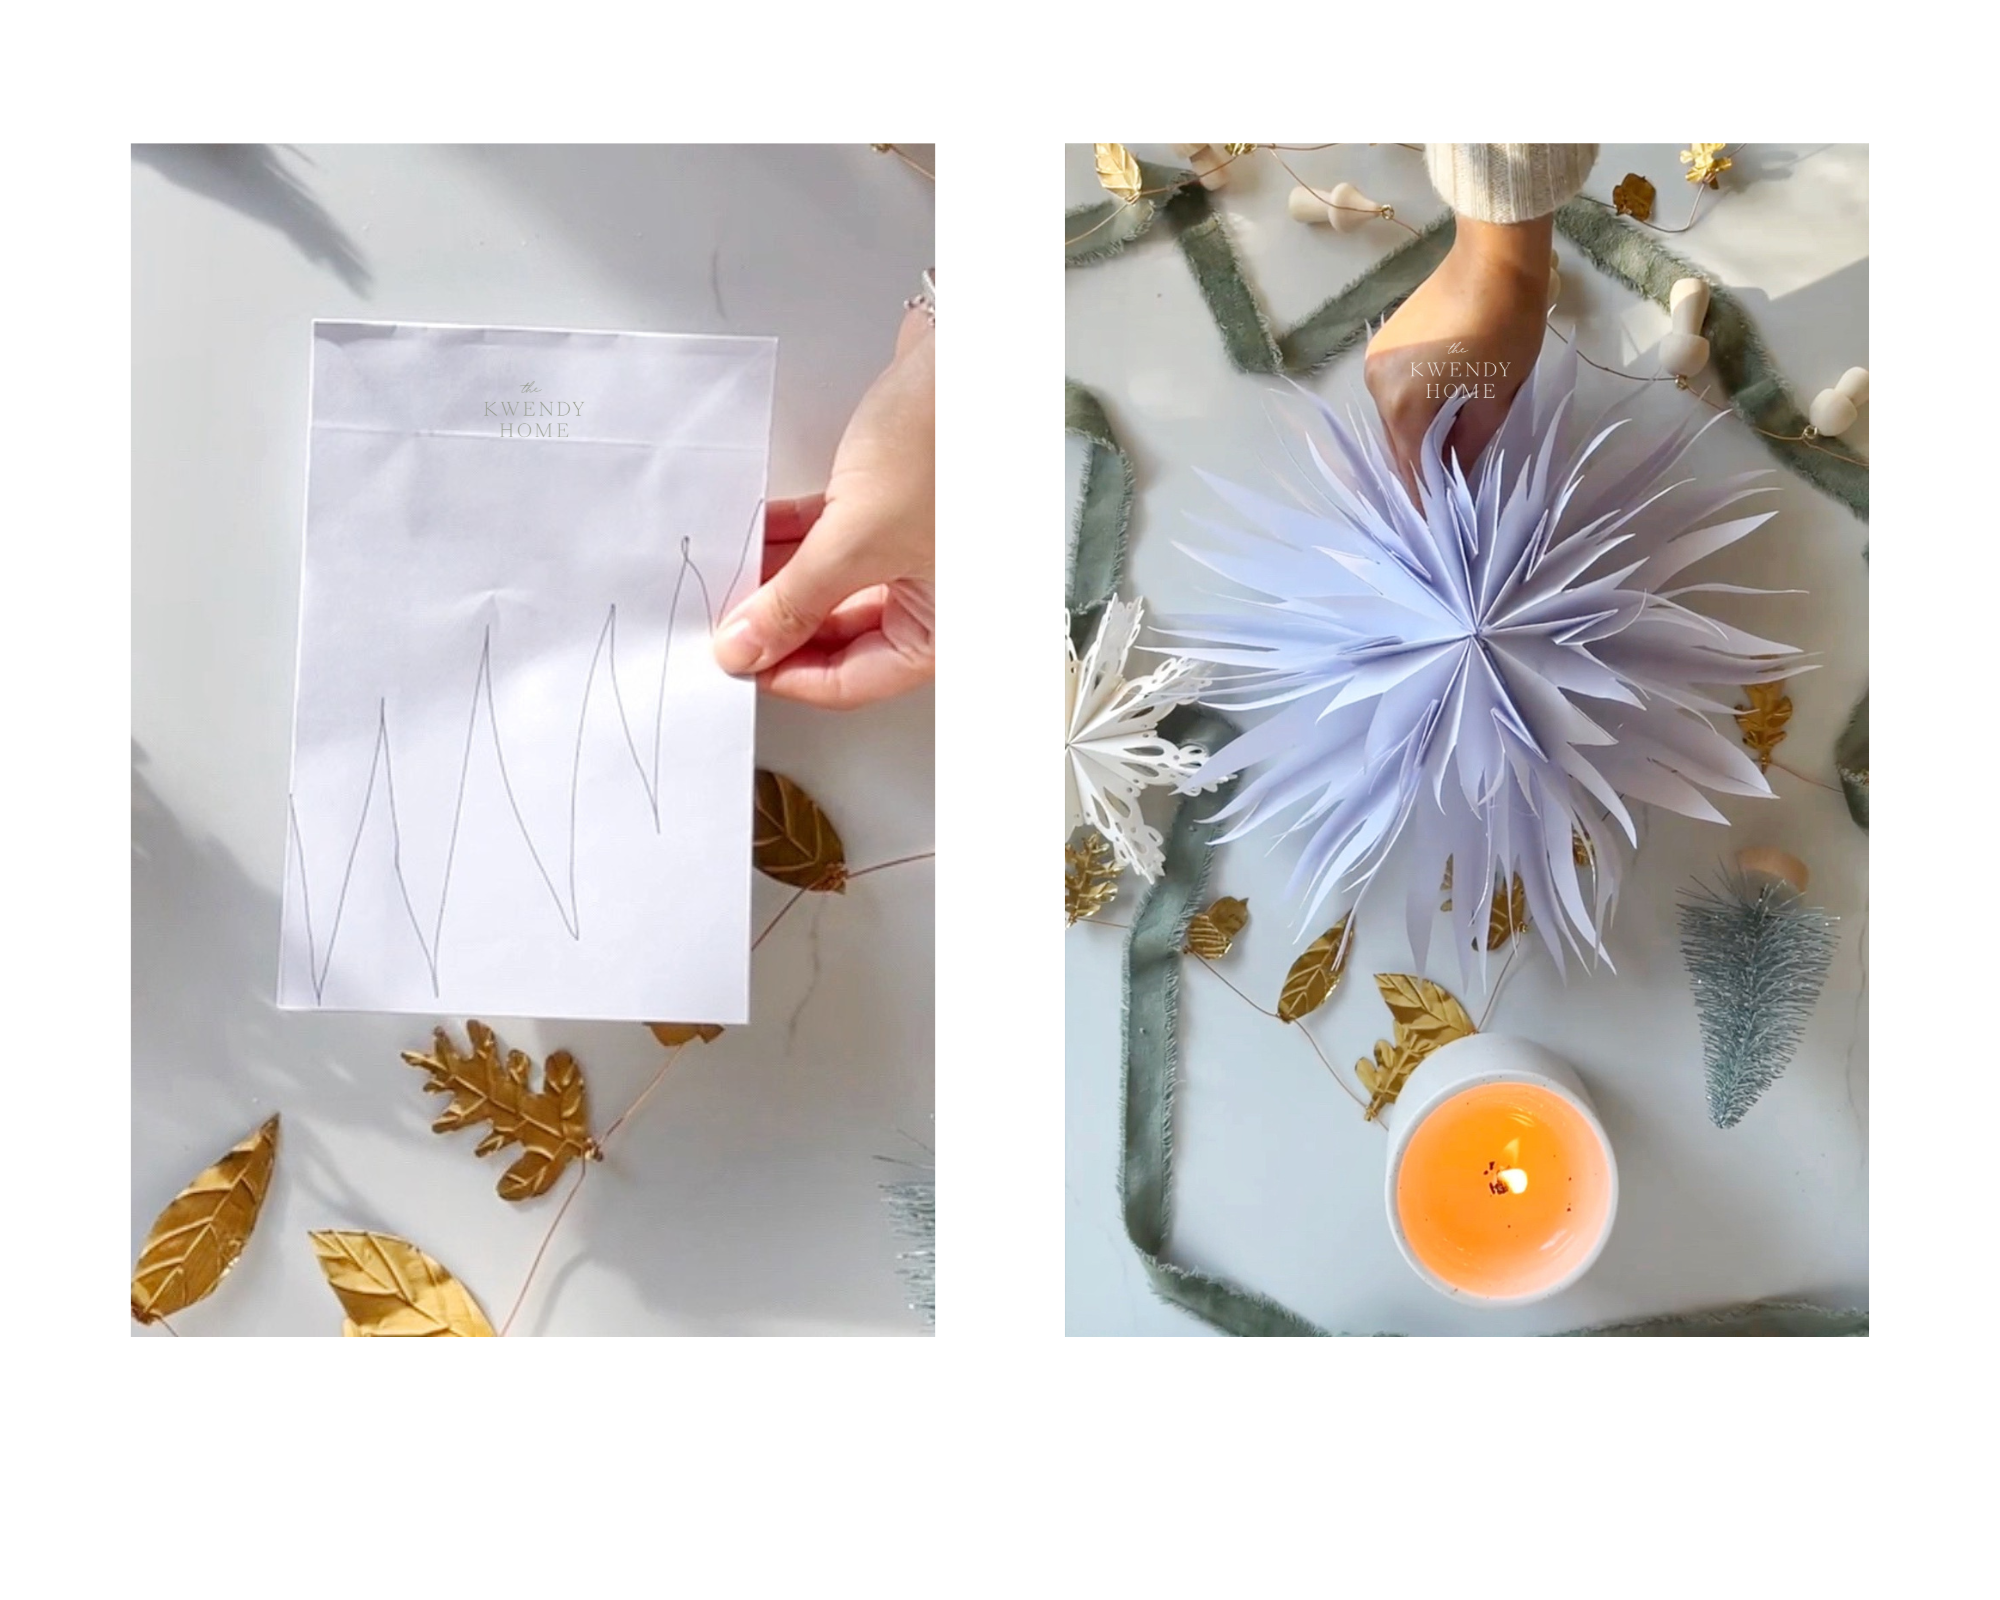
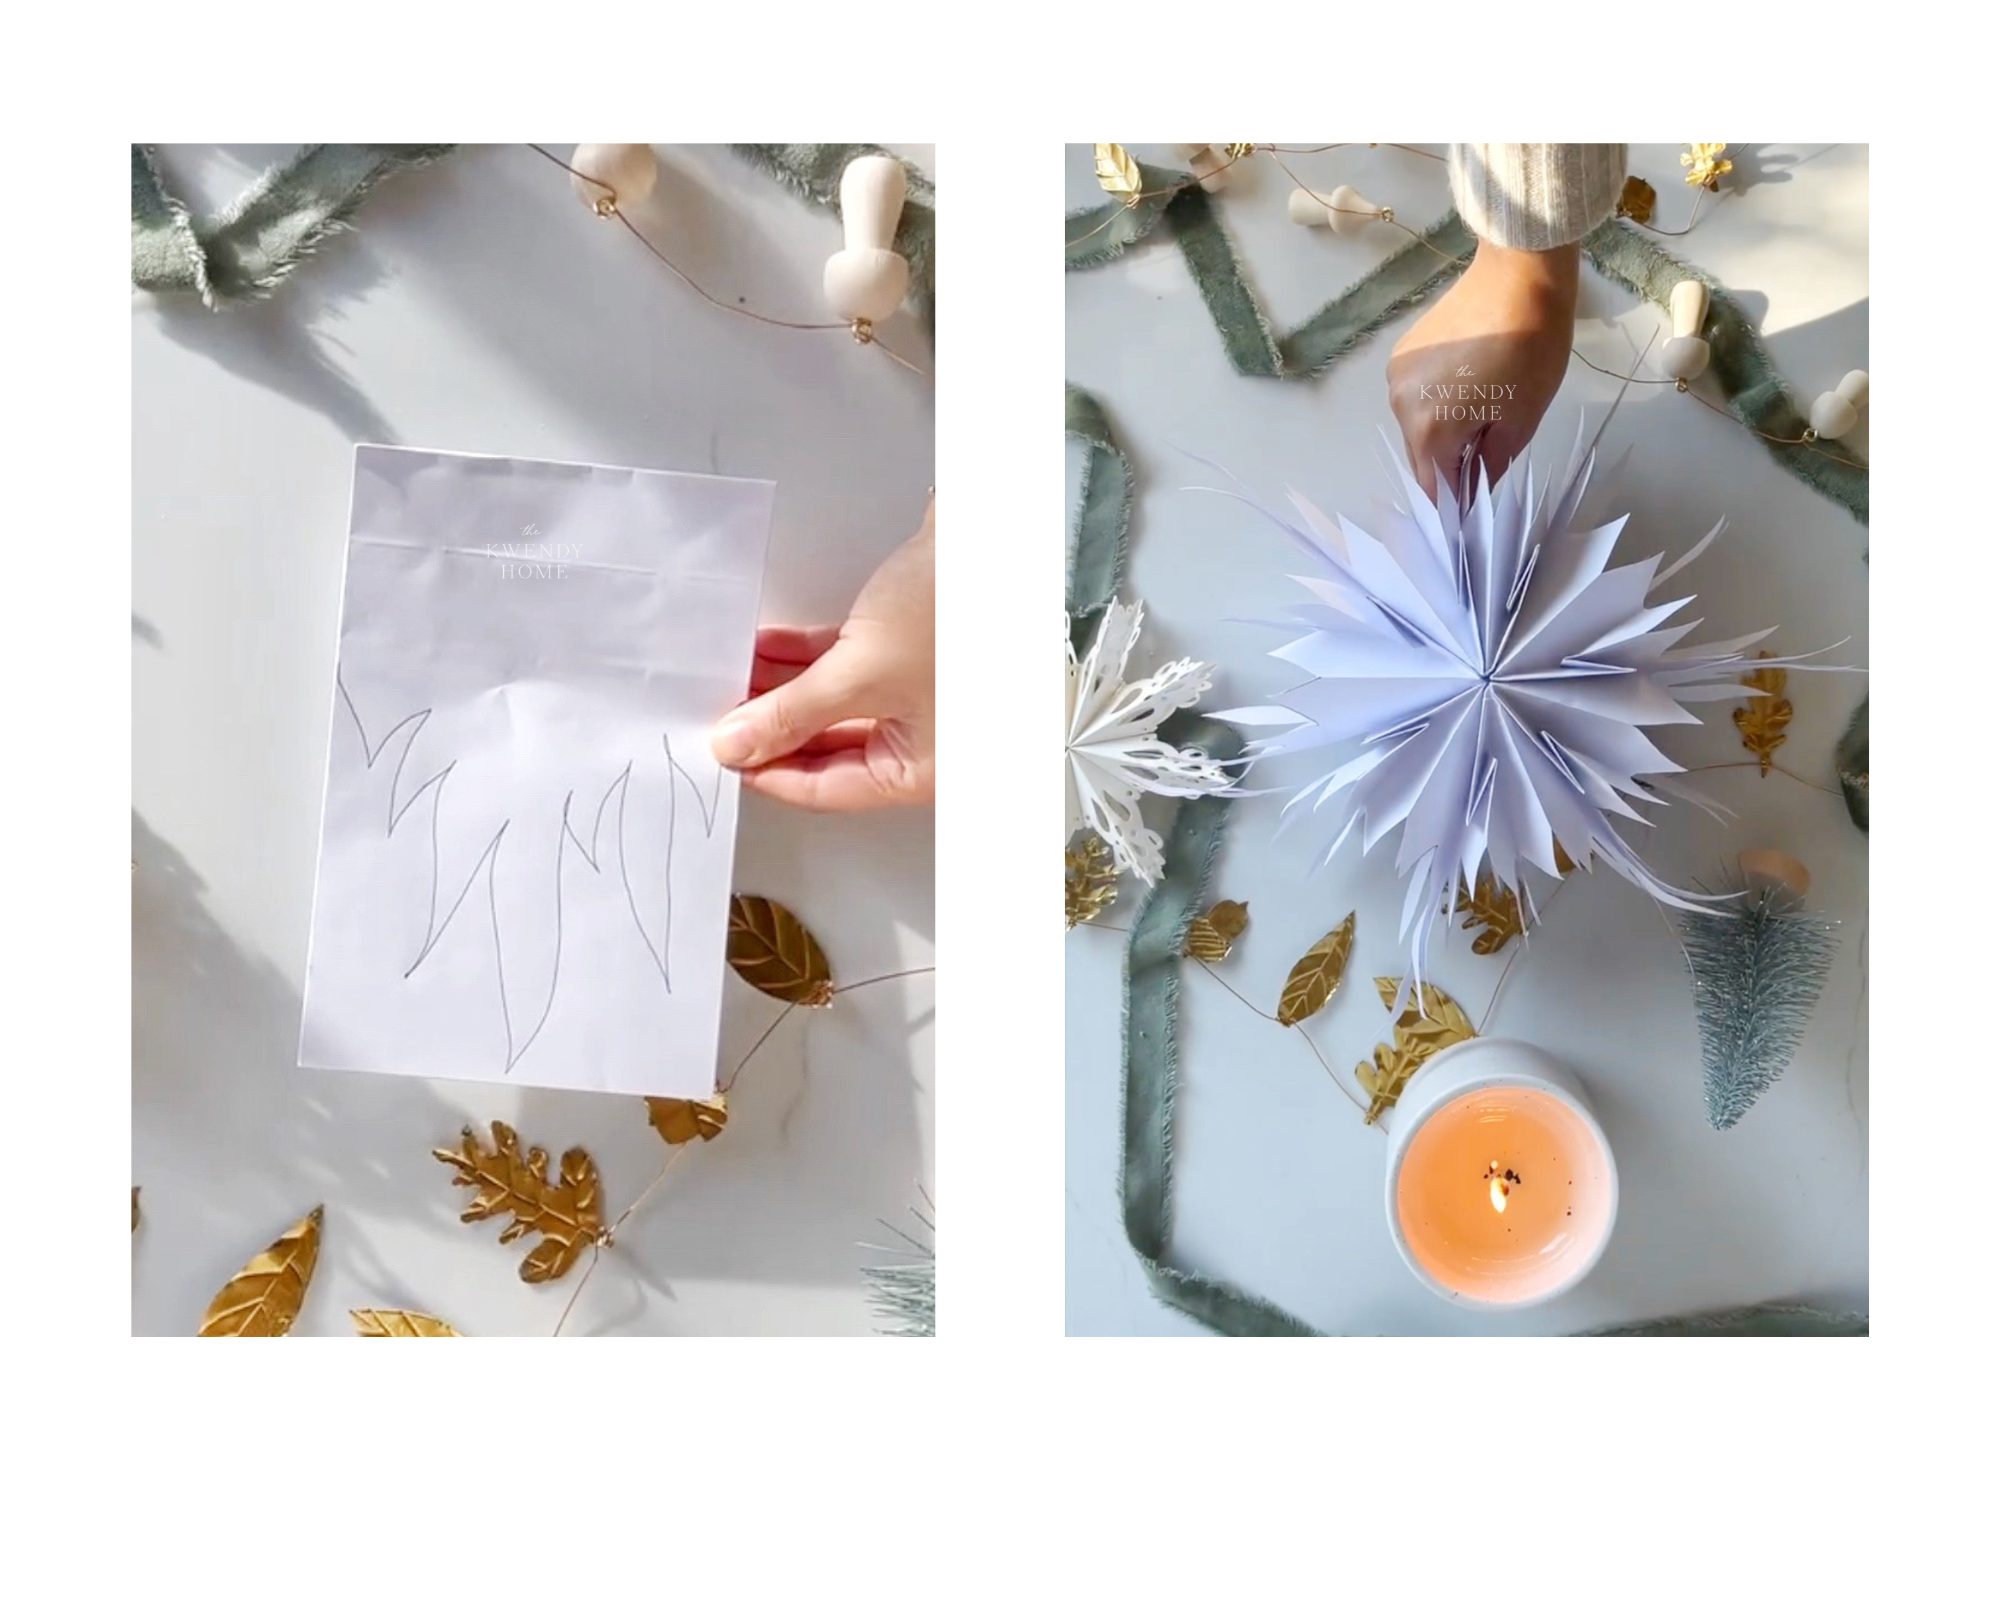
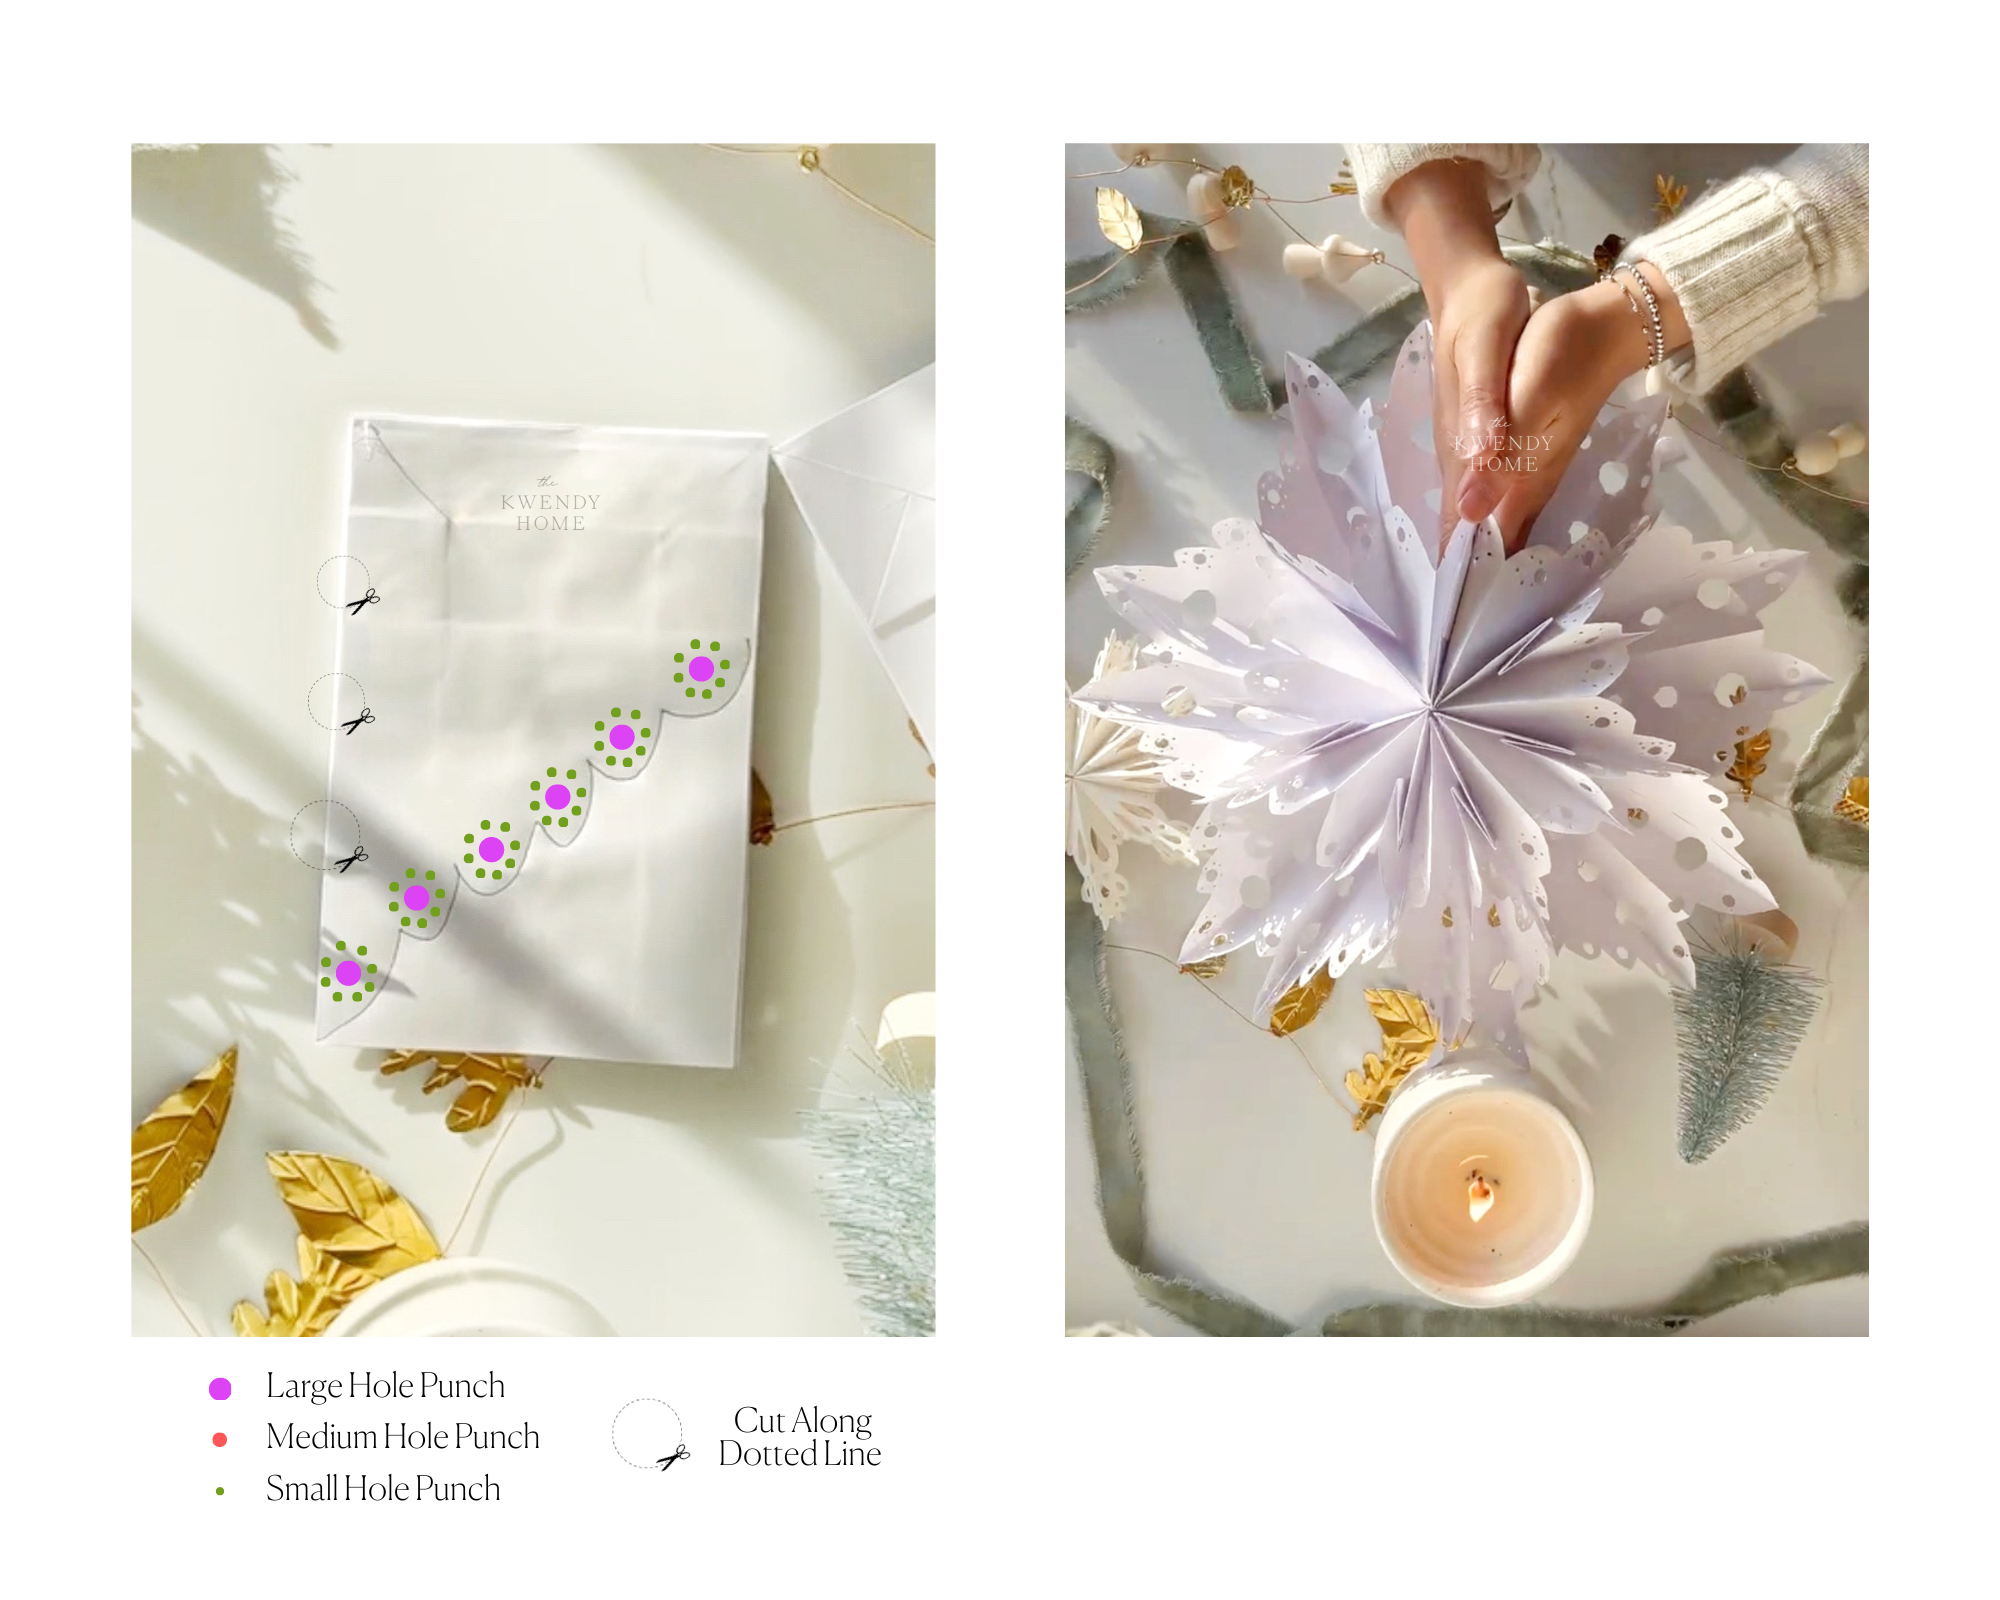
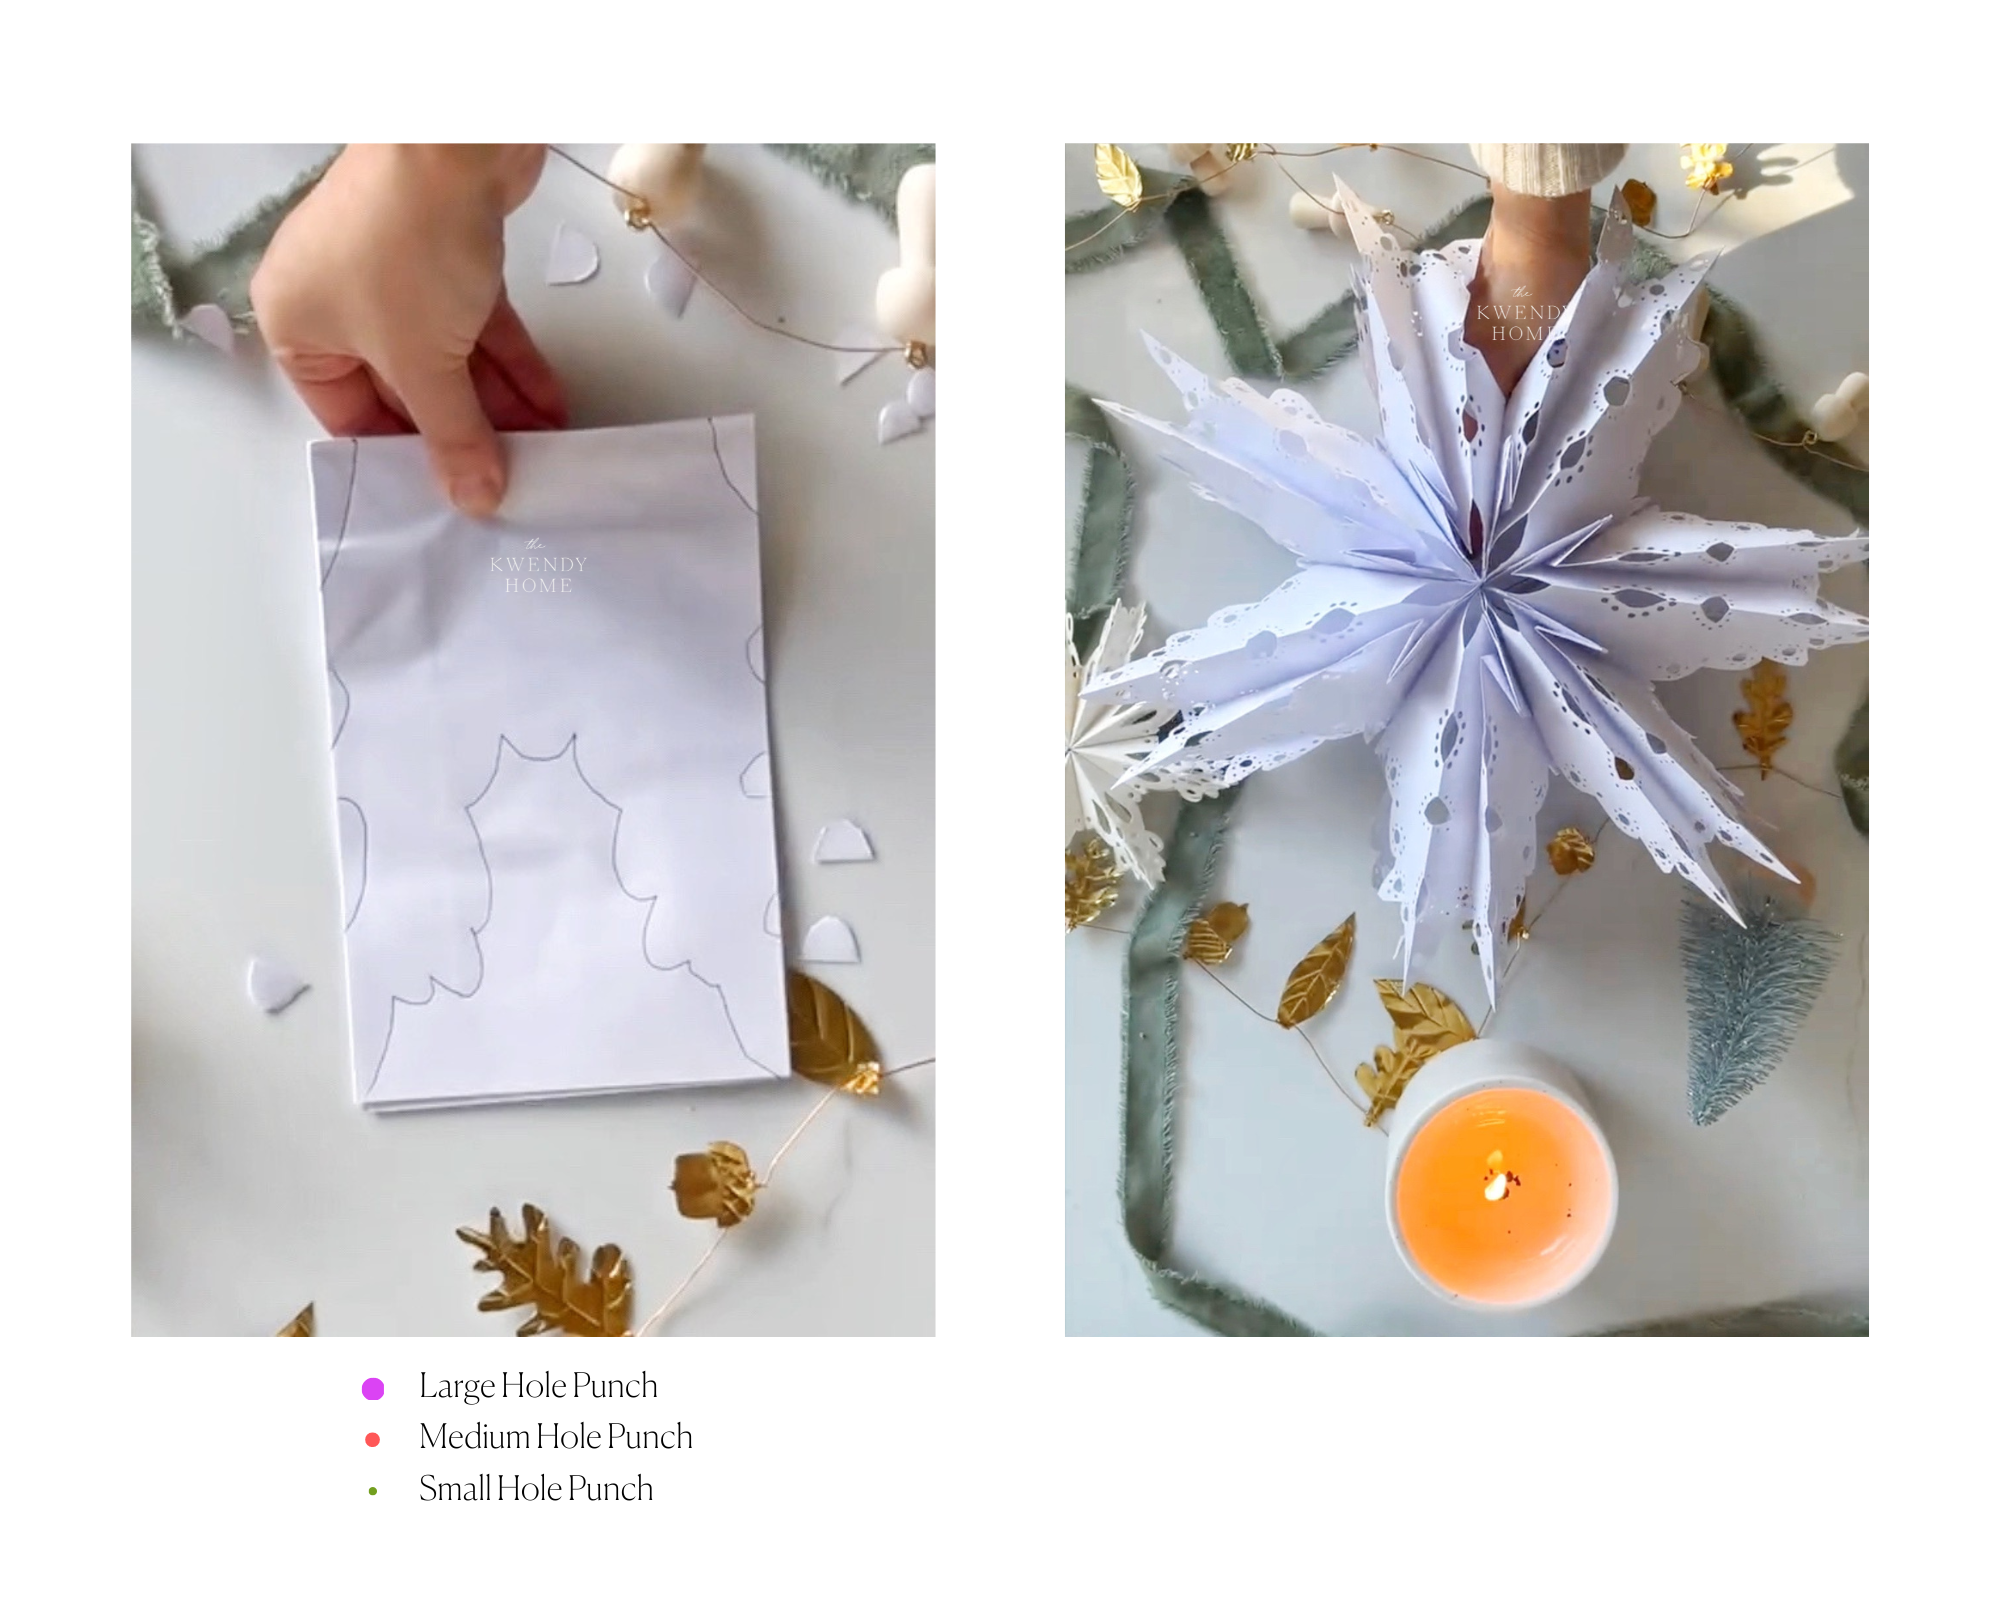
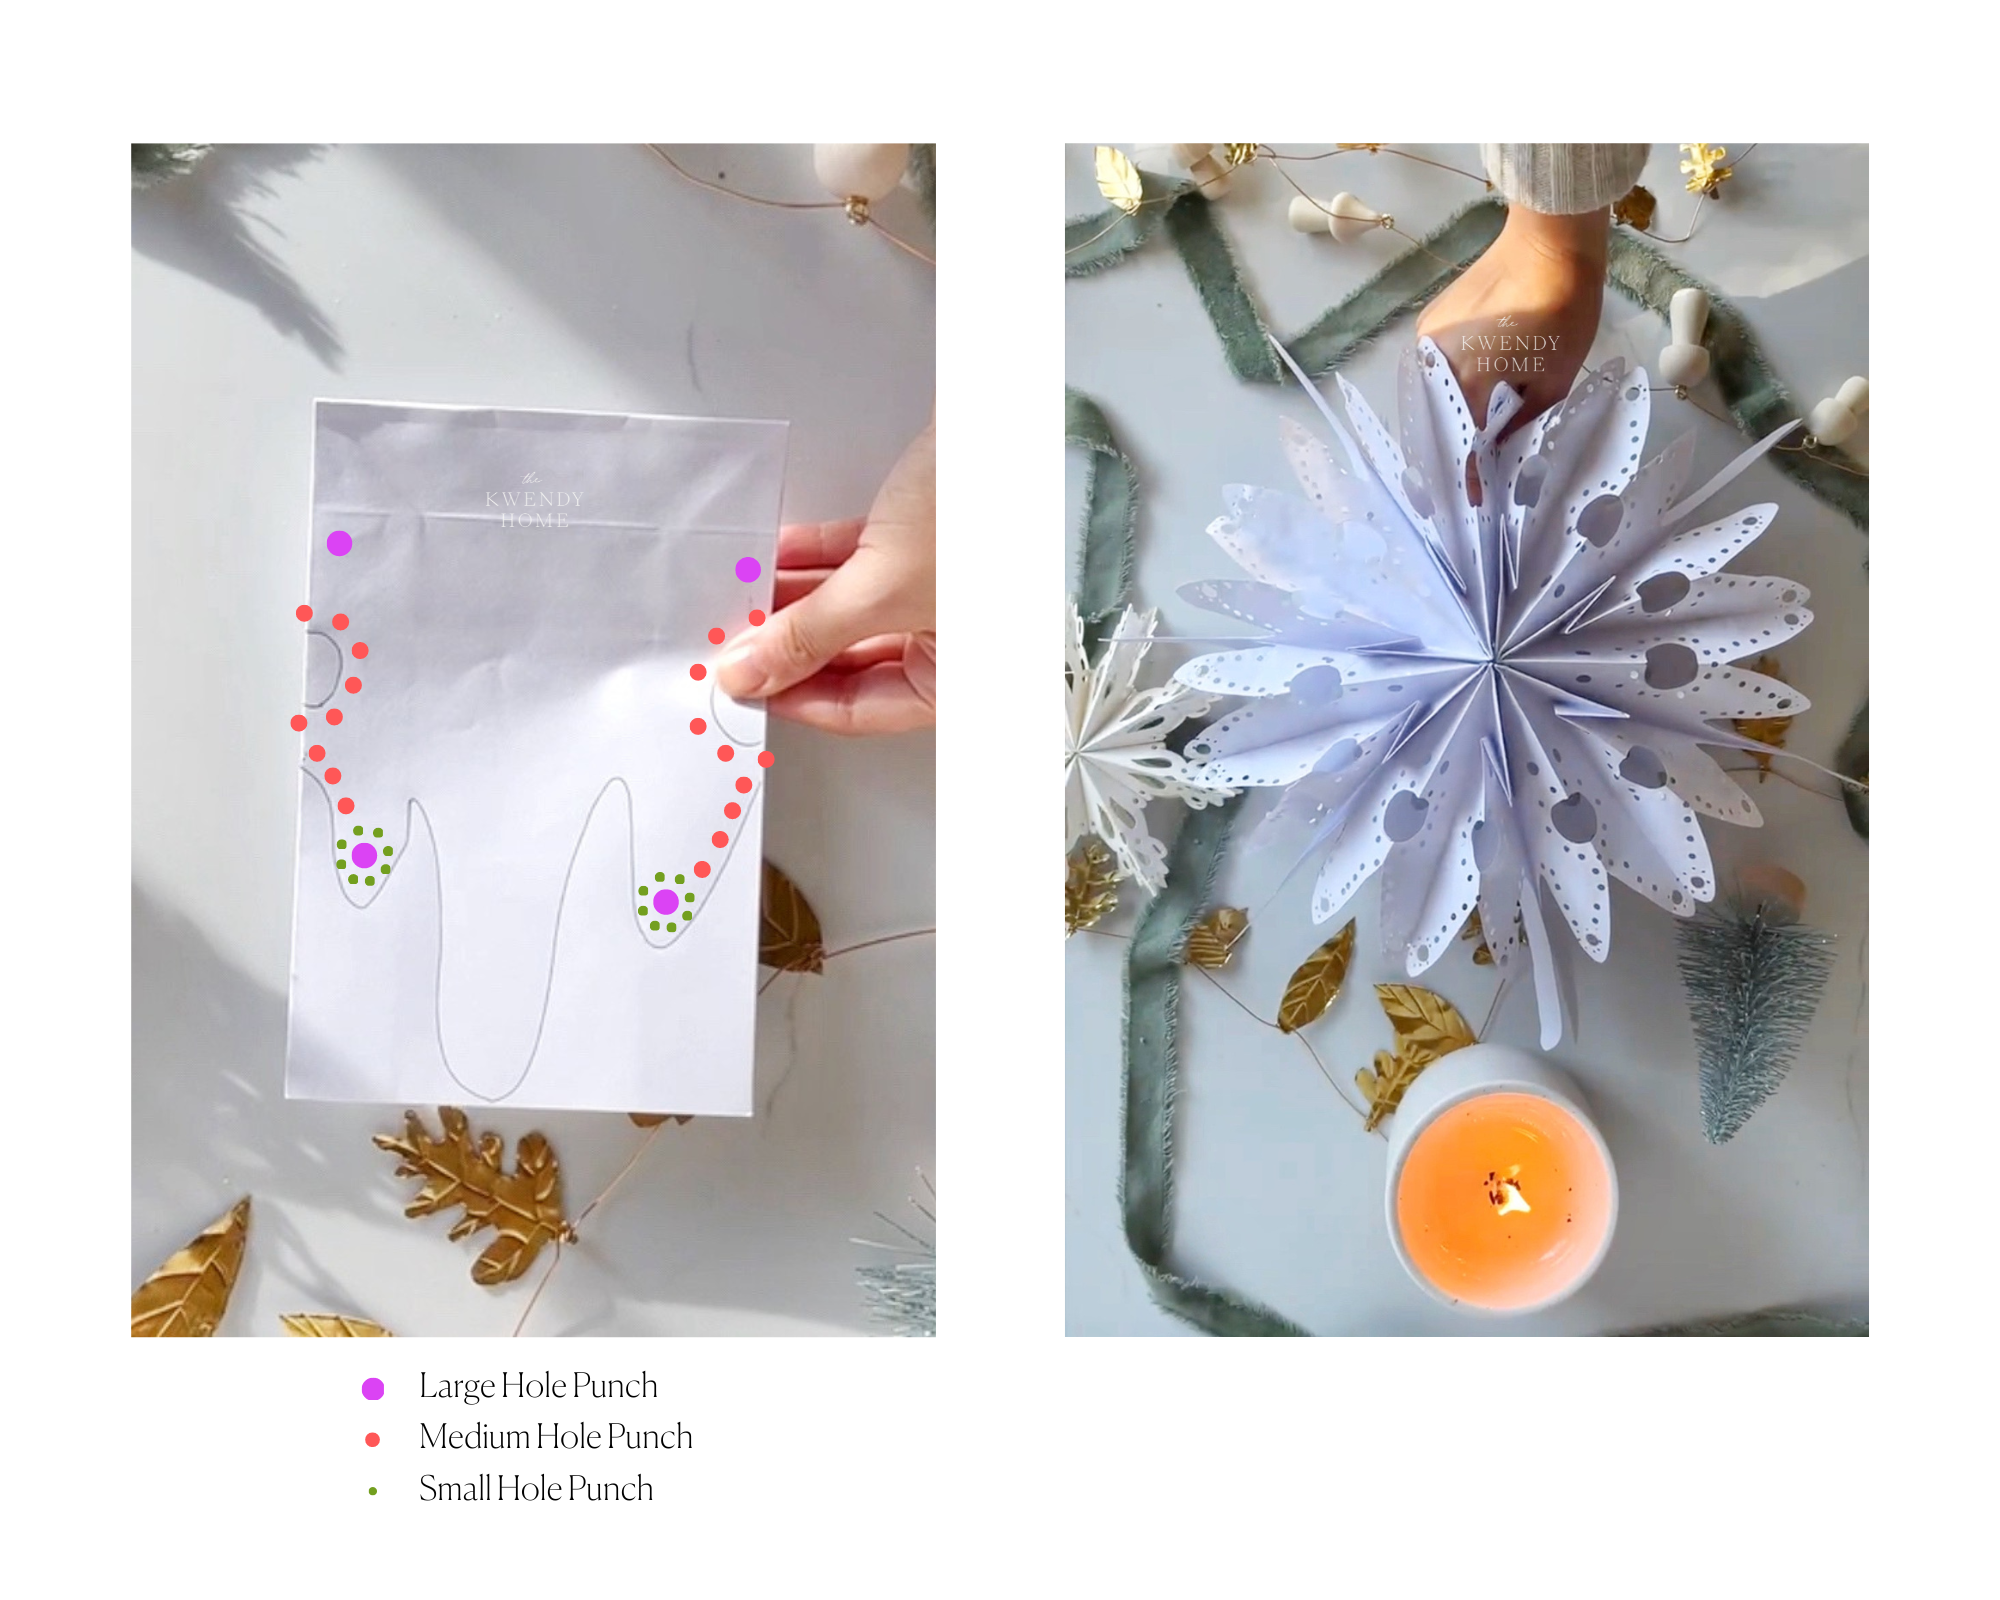
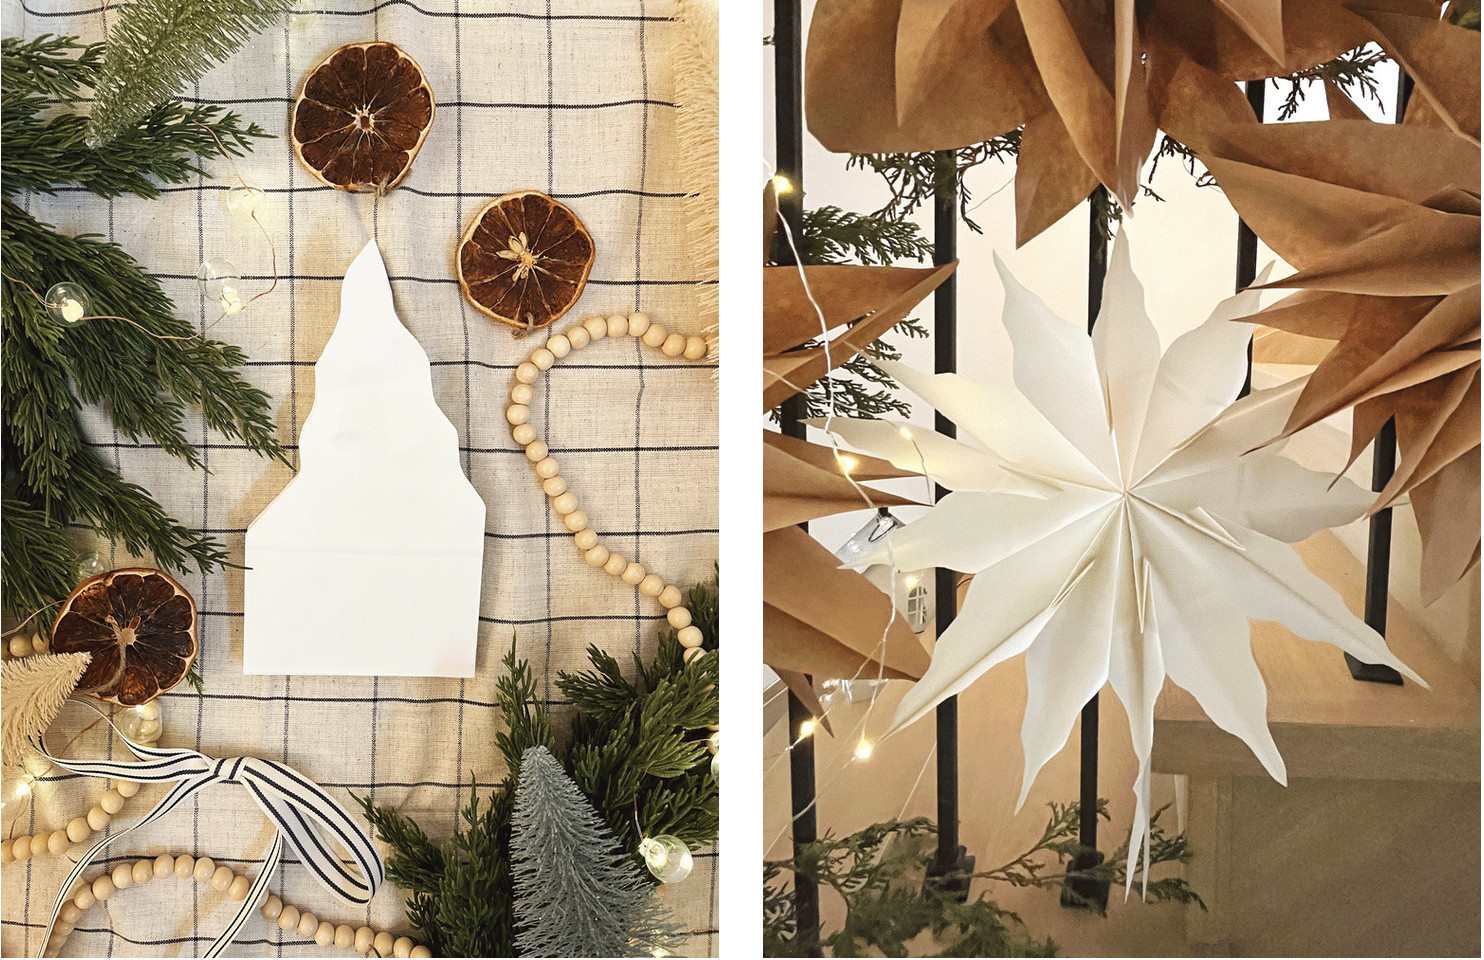
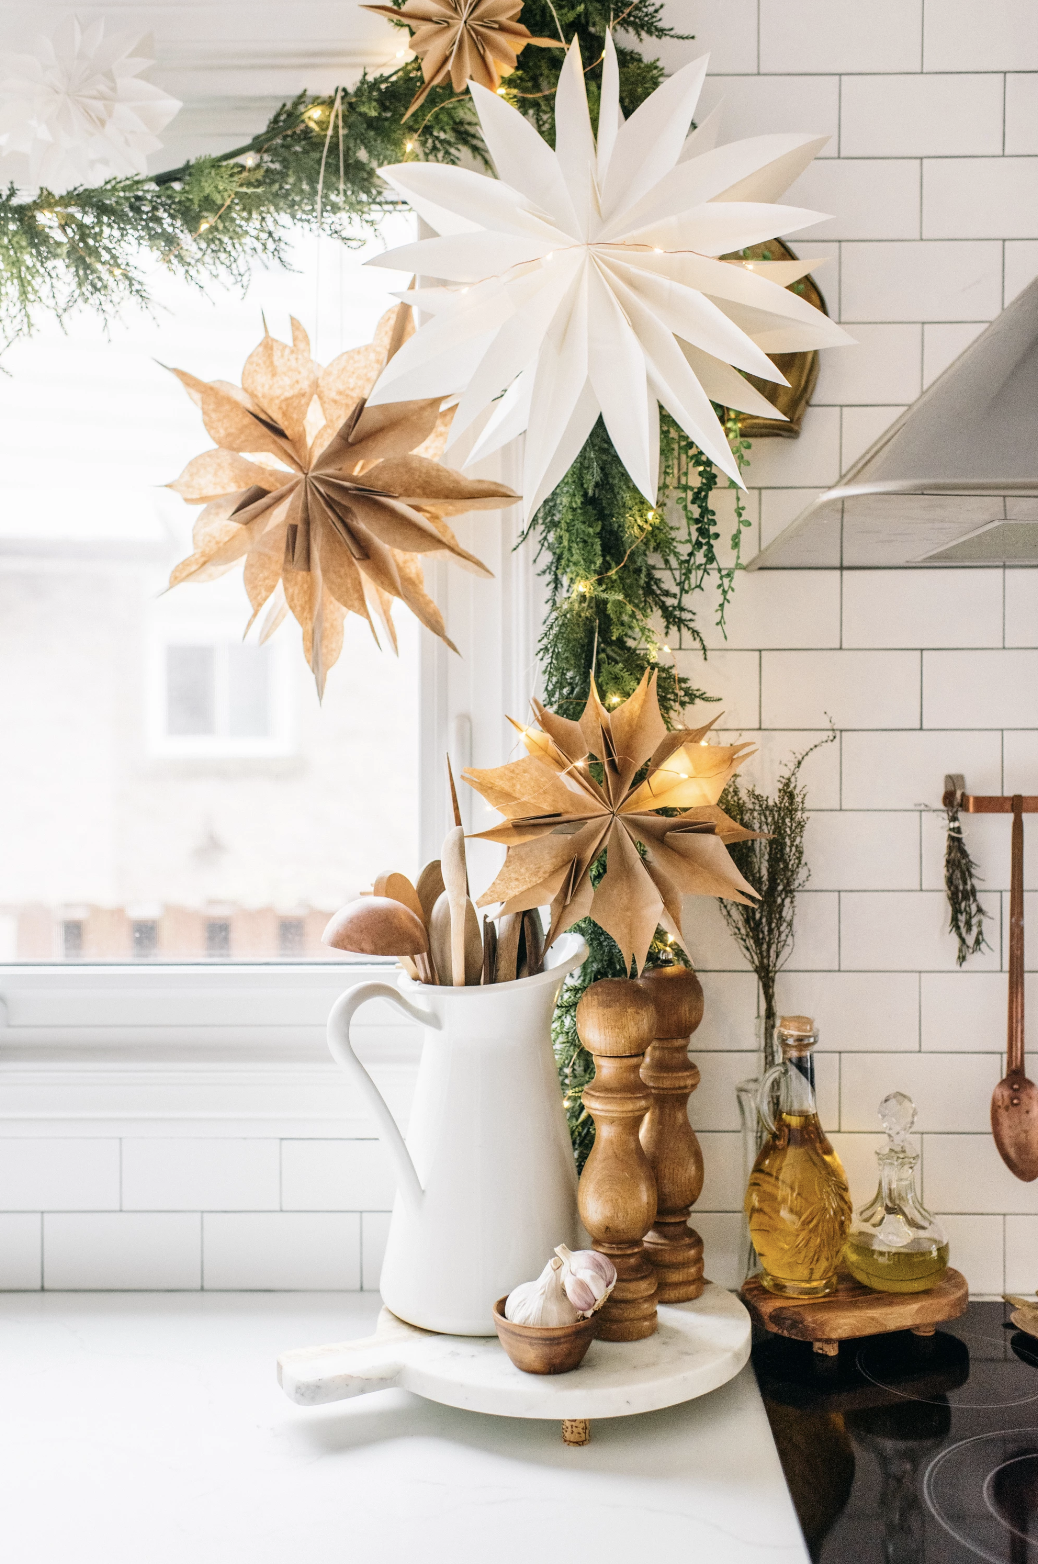
Draw your design. Remember, the base or thicker side, will be the centre of your snowflake!
TIP
For more intricate patterns, include triangles, hearts or any shapes on the side of the paper bags above the fold of the paper bag. For another layer, include different sized shapes! Change up your design by making the the design more curvy or edgy. Experiment with your own designs or try out the templates below!

Step 3
Cut out your snowflake design!
TIP
I like to cut out the overall shape first then do the smaller details.
Use the sharpest scissors you have!
Use a single hole puncher to save time on cutting many small circles! I used three sing hole puncher of different sizes variety and create delicate layers. Again, save your hands by cutting and hole punching at most two or three layers at a time!


Step 4
Glue and stack all your layers to match one another. After you have all the layers glued, unravel and tape or glue remaining end!
*Note: I suggest testing the star by unfolding the shape to examine if it requires more paper bags to fill the shape. Smaller paper bags will most likely require more.
TIP
You can reuse it without damaging during setup and storage for years to come using paper clip or magnets instead of tape or glue!
Templates
Here are some of the cut out patterns I used to achieve the design!
TIP: Make sure to cut a sharp point at the tip of the paper bag to ensure a pointy star if that is the look you are going for.
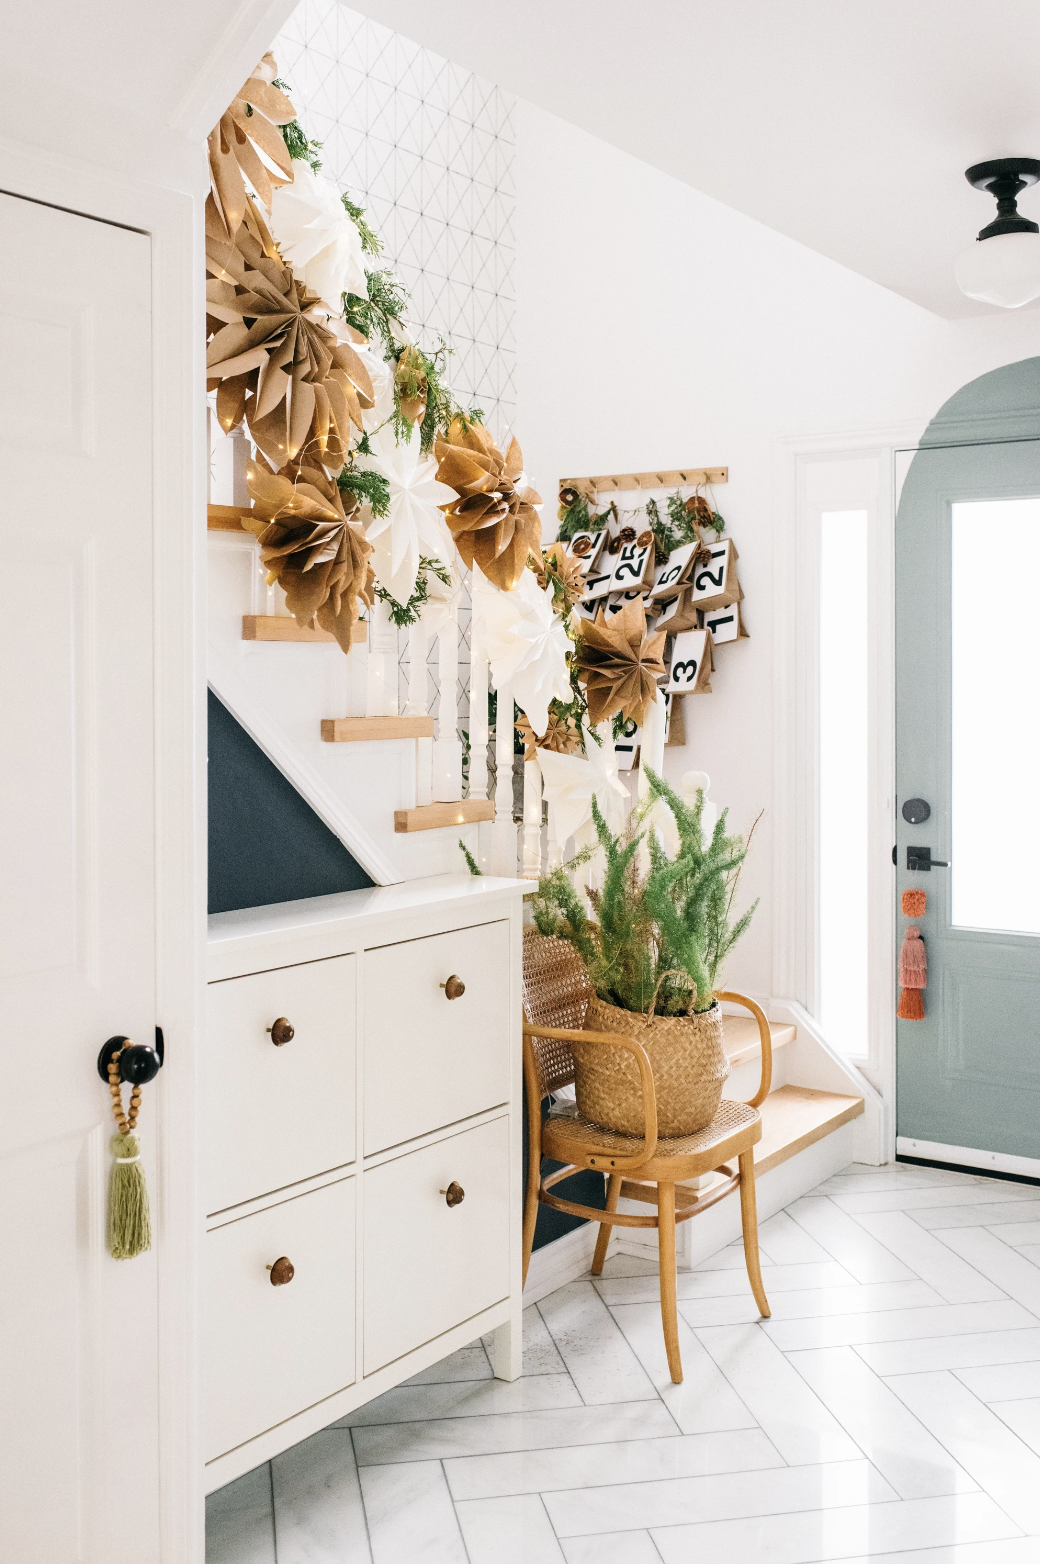
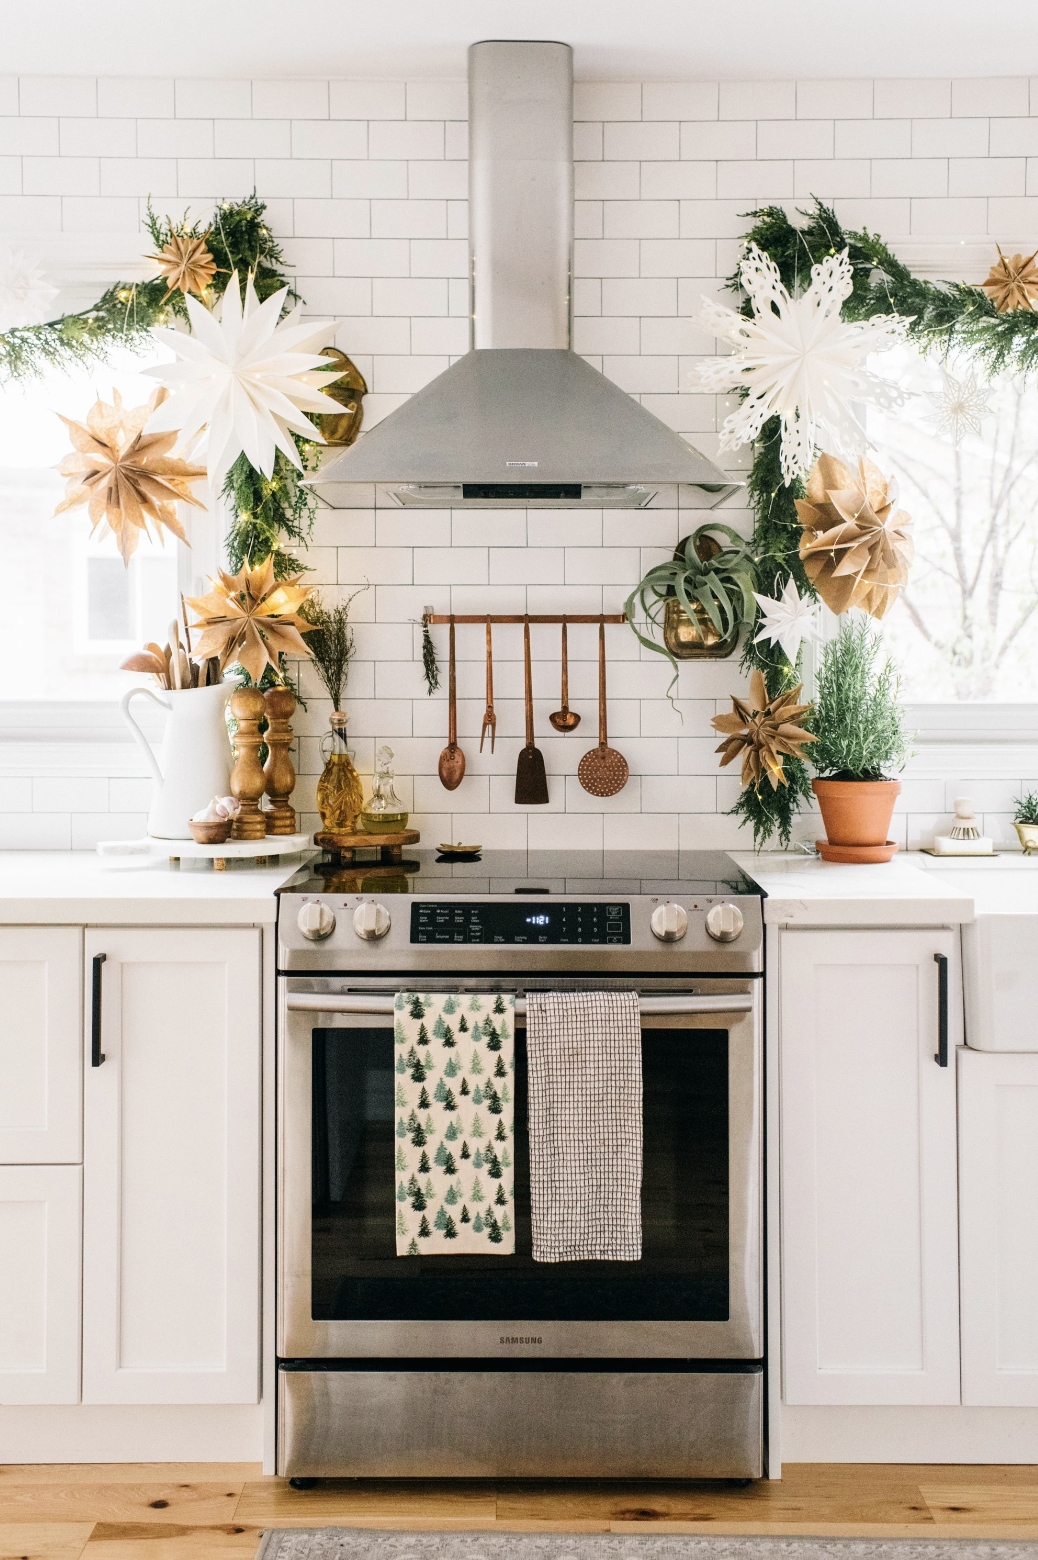
Check out the ways we used paper bag snowflakes in previous years!
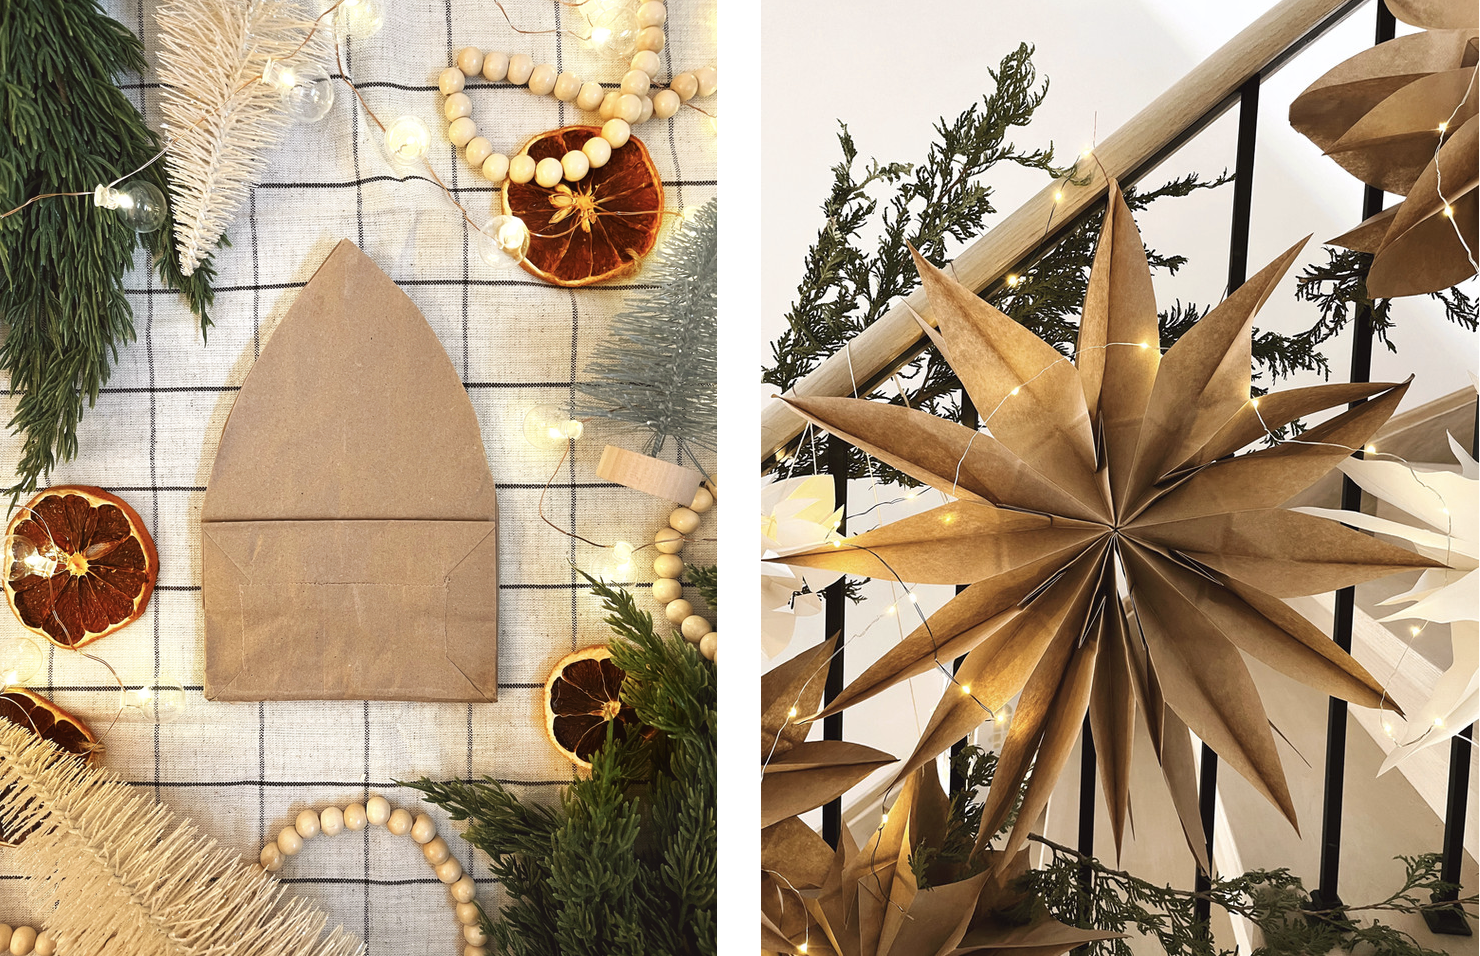
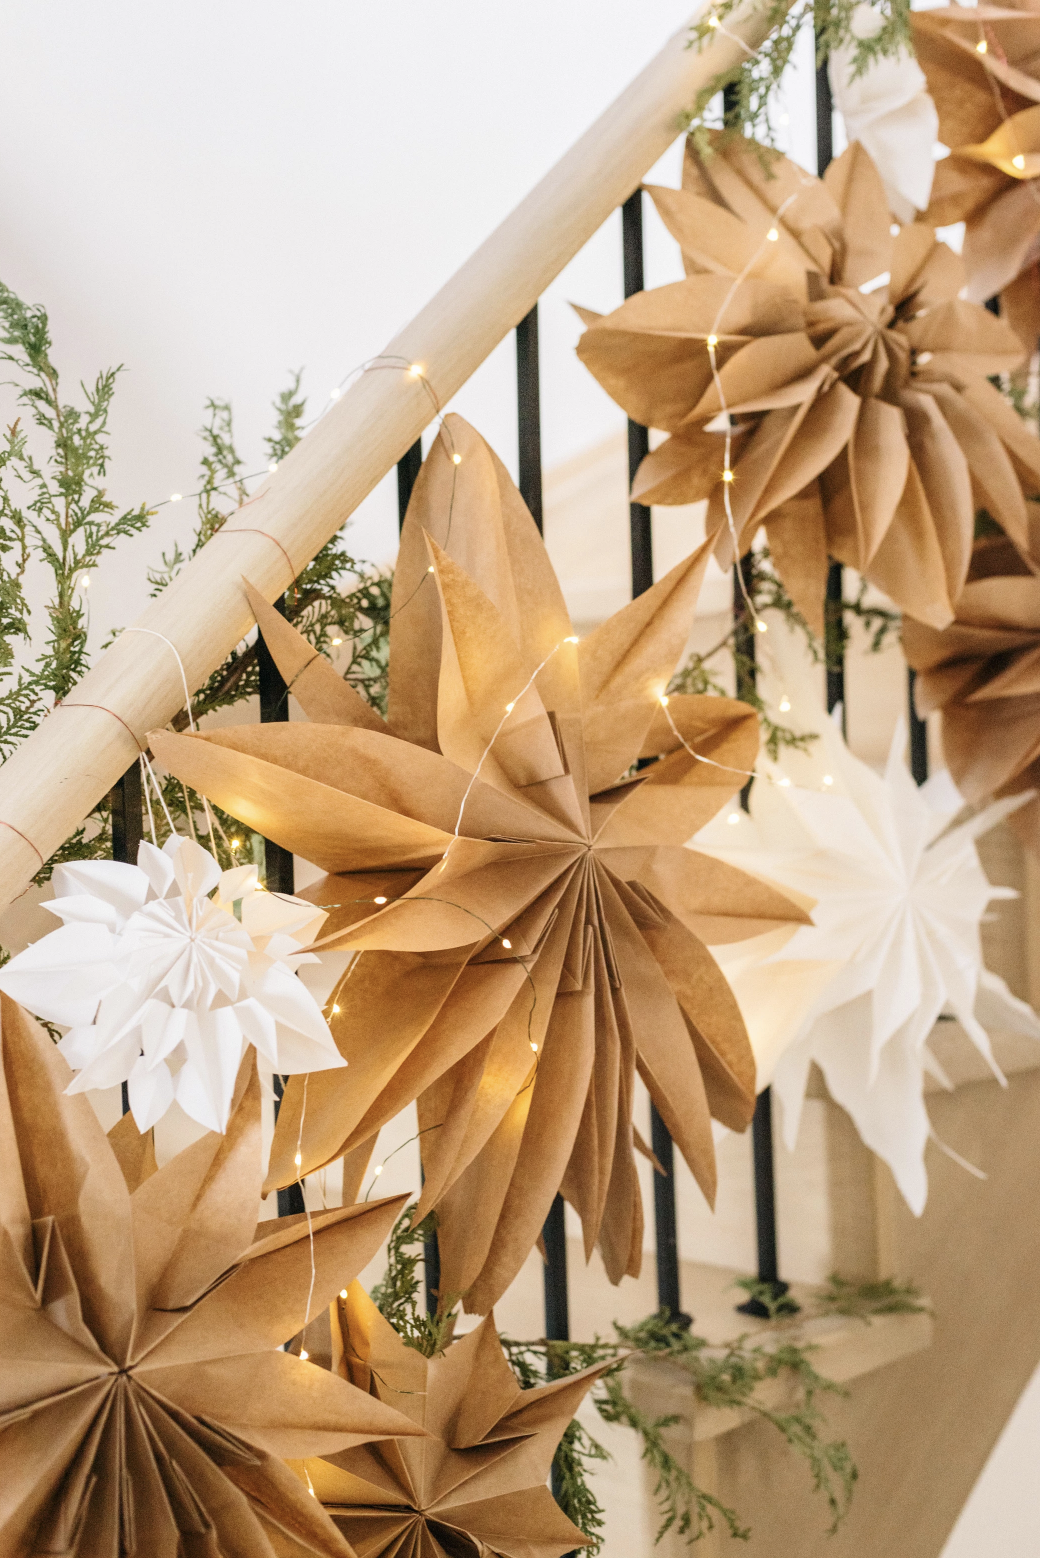
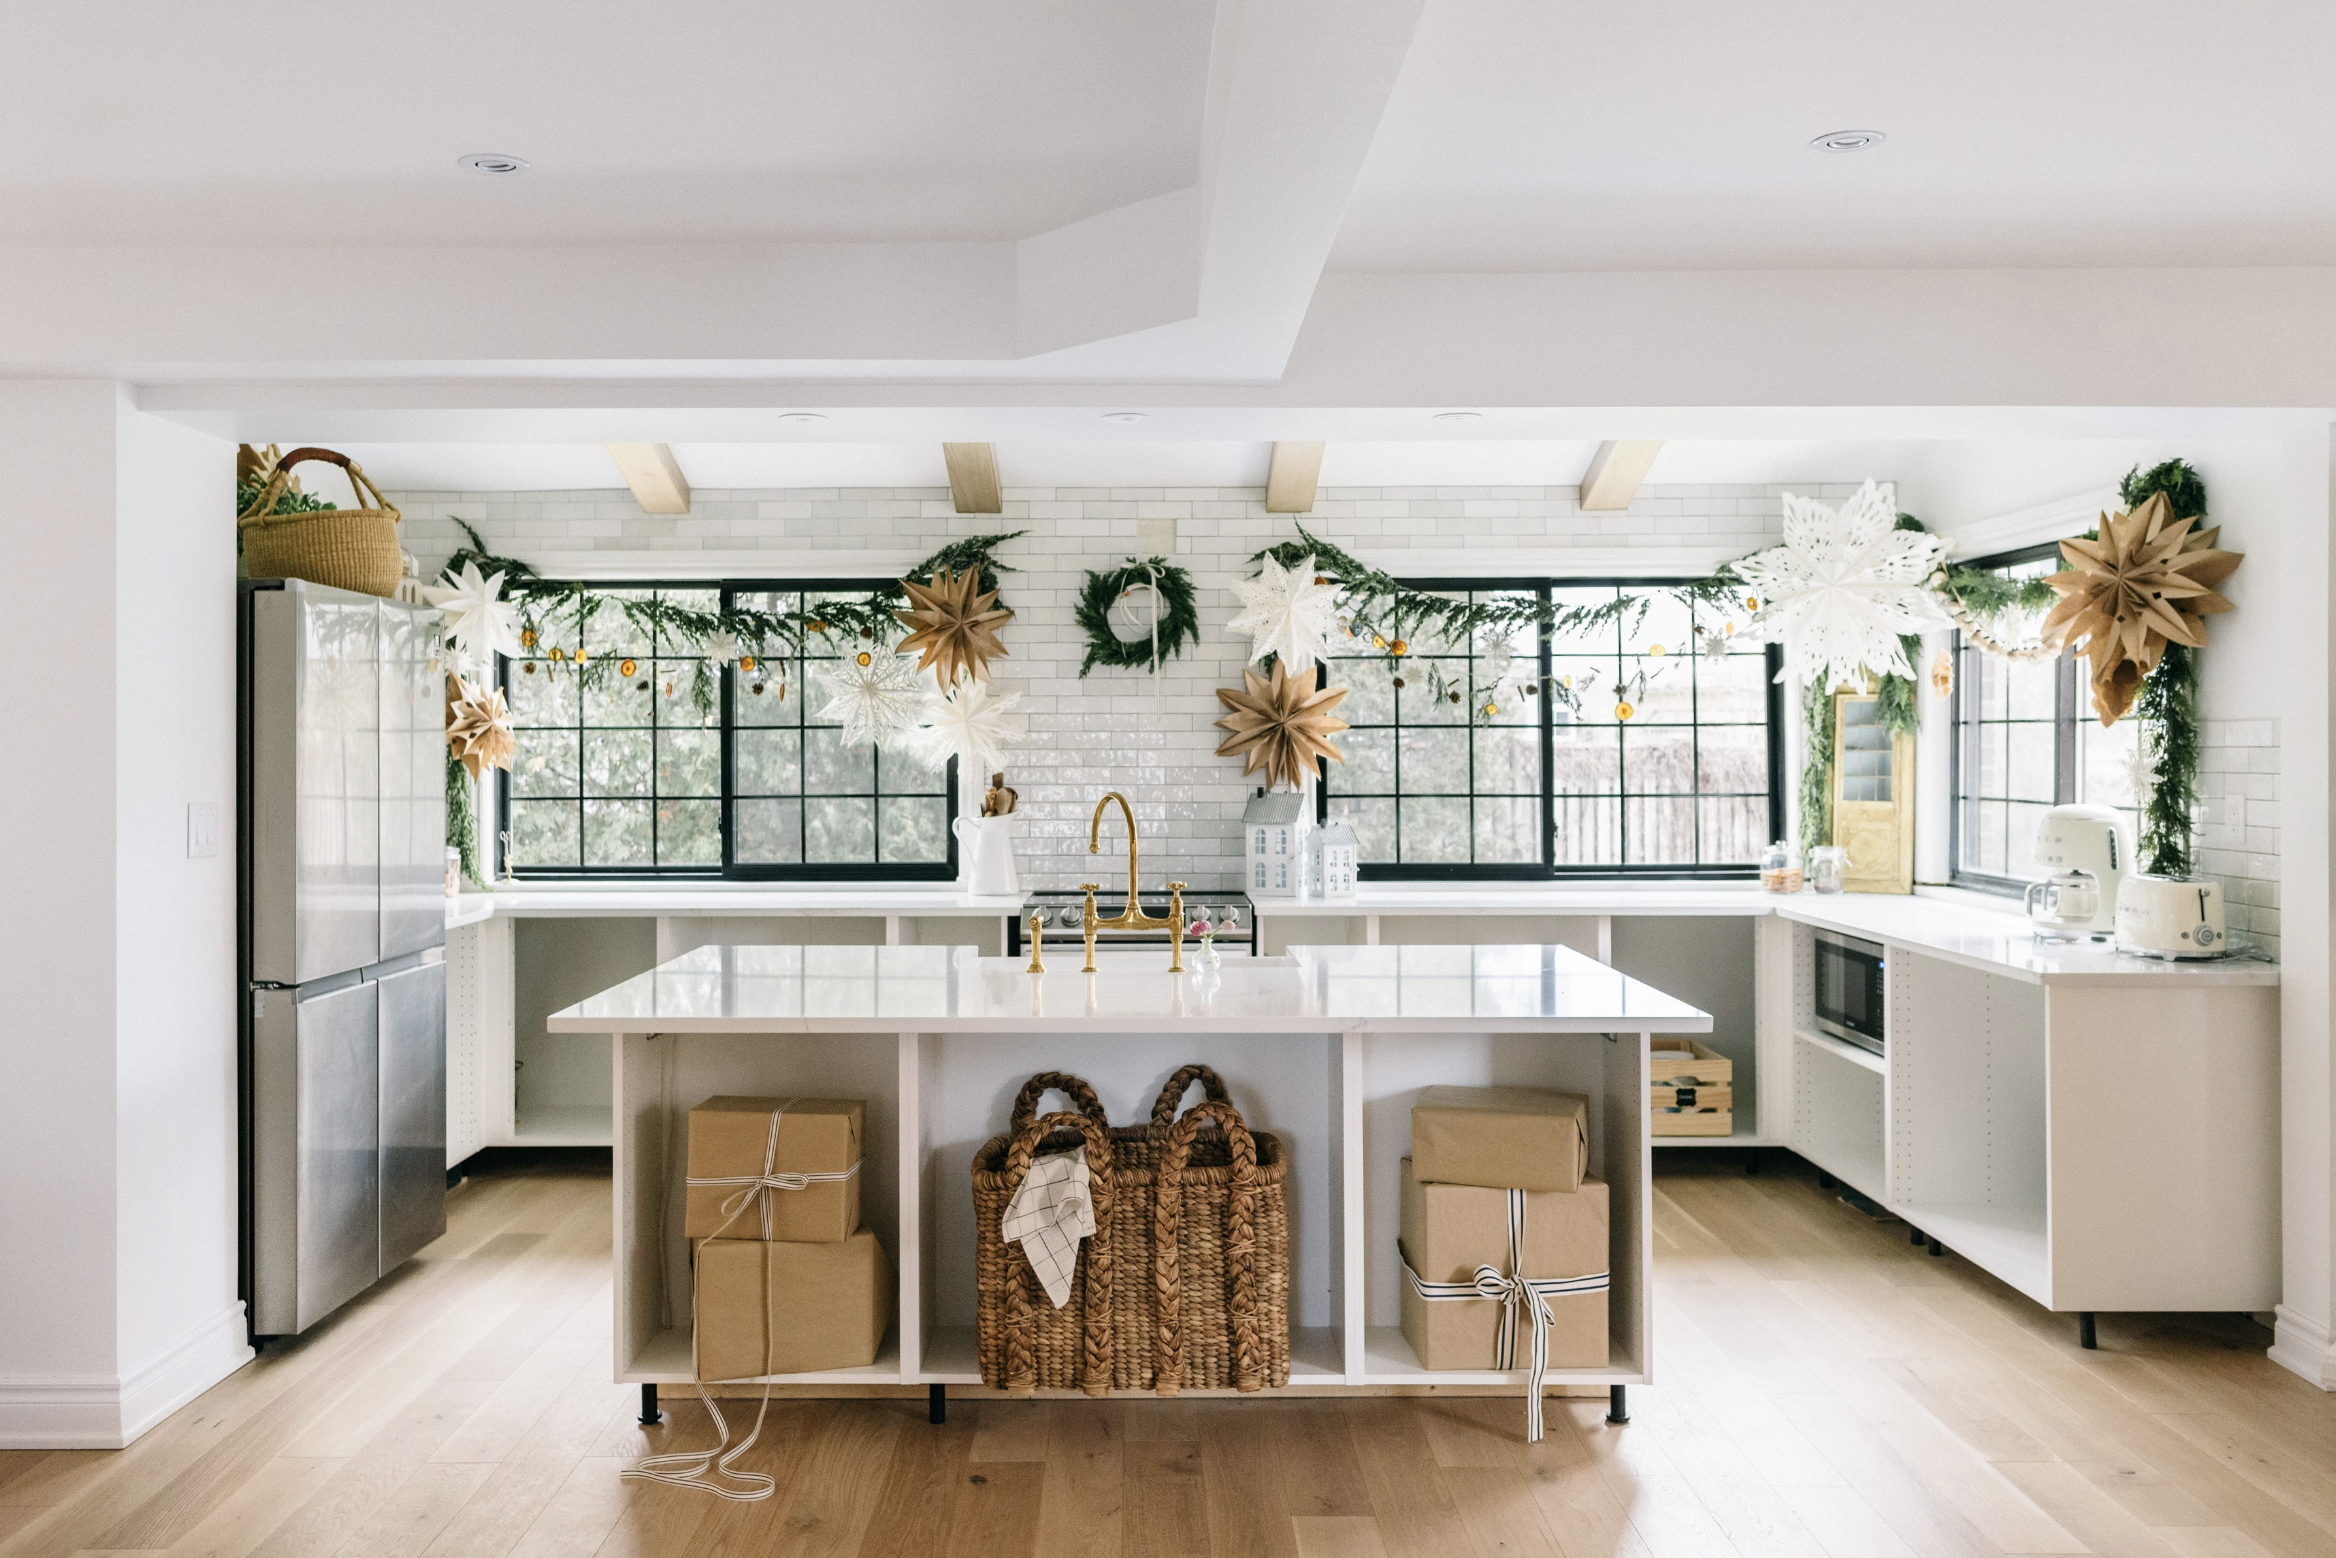
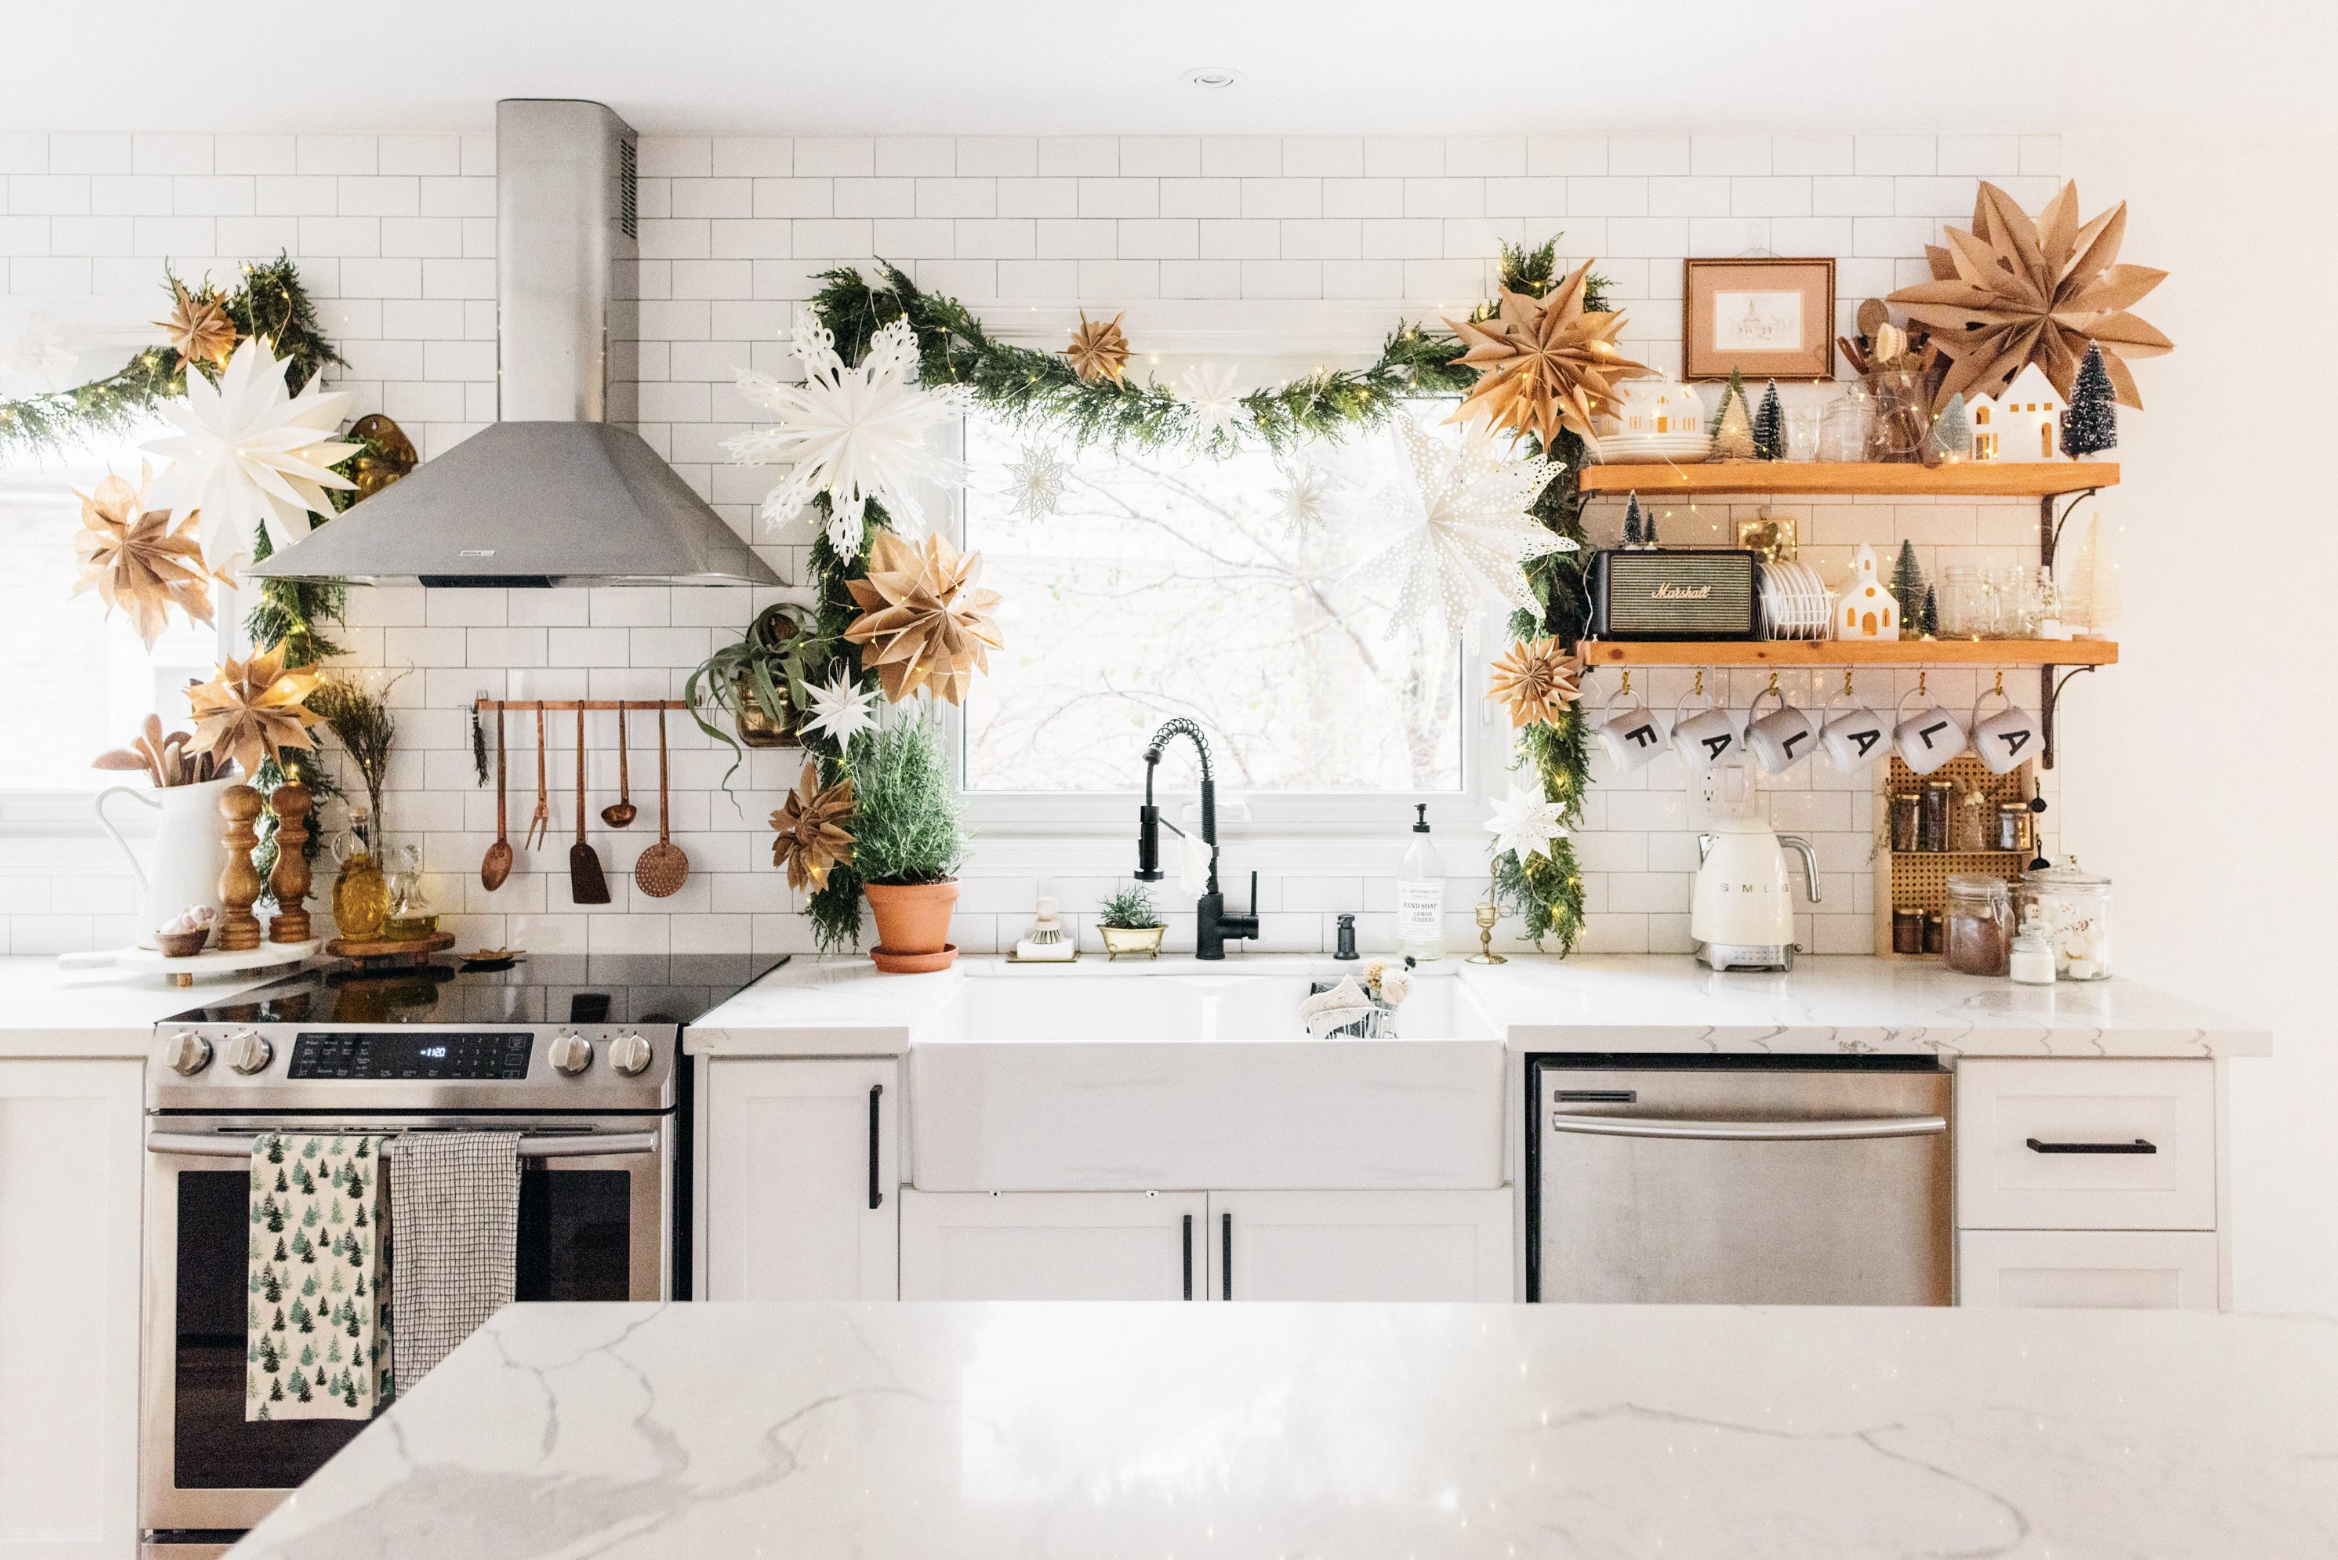
I loved using it as a garland over the fireplace, displayed over windows, draped over the staircase all with the help of some strategically placed Command hooks and thin gauge wire!
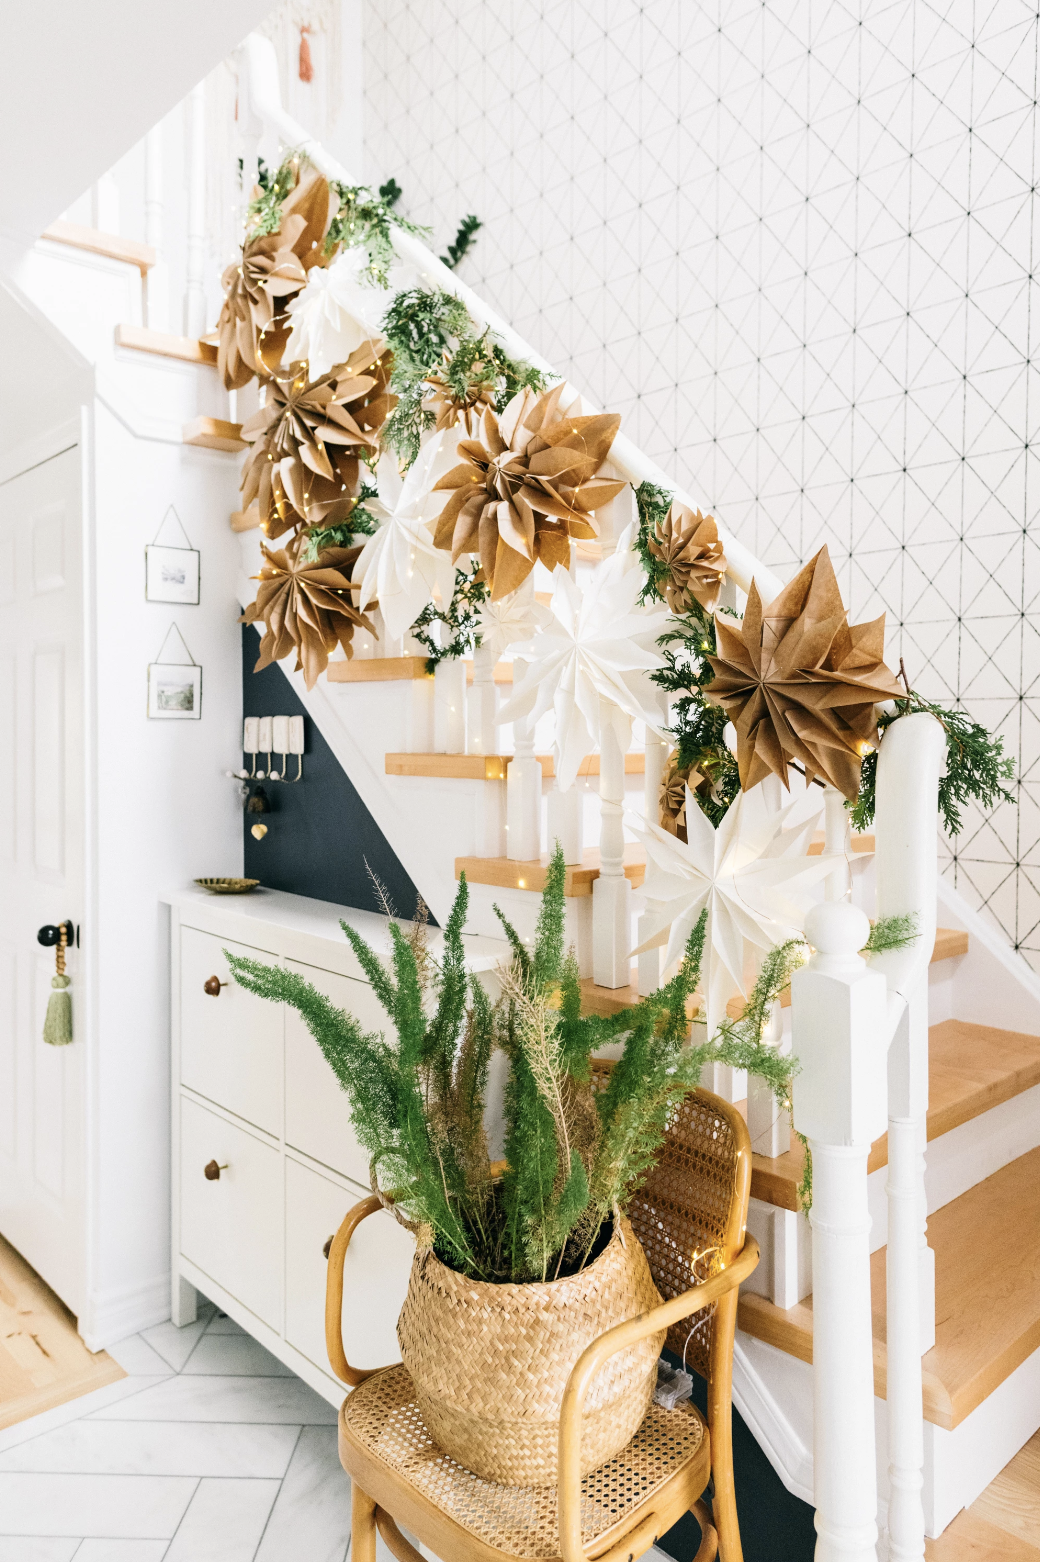

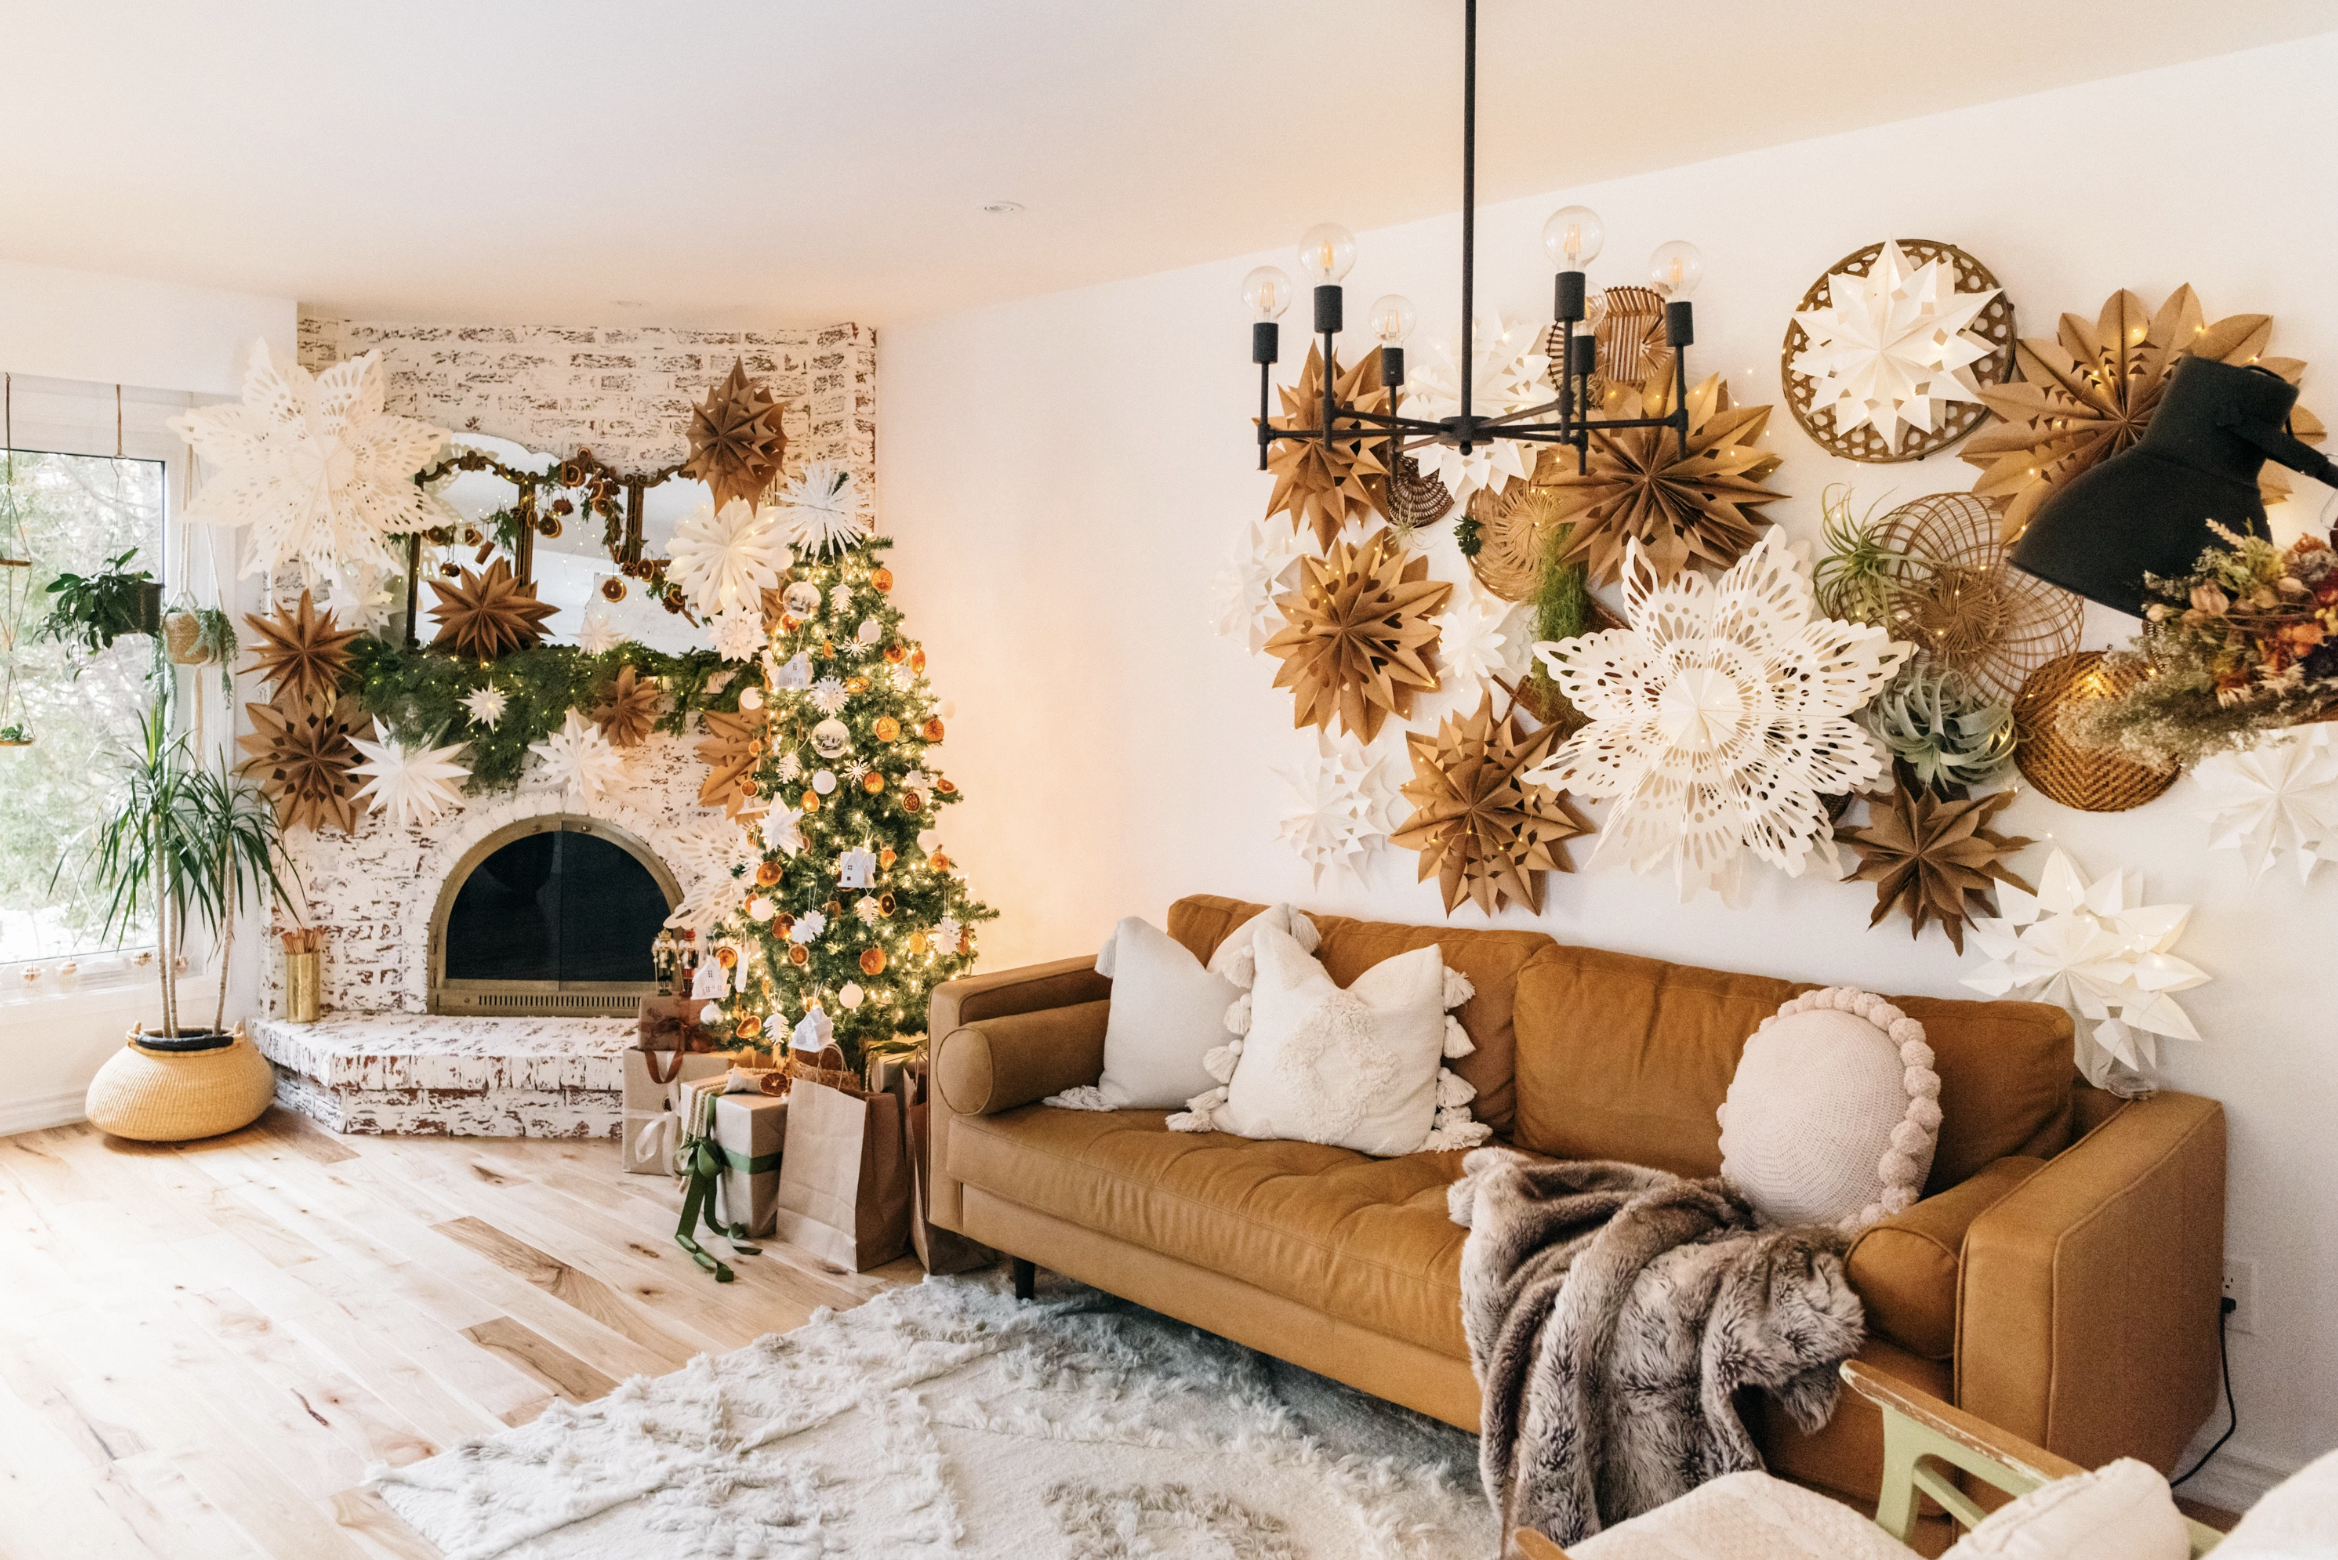
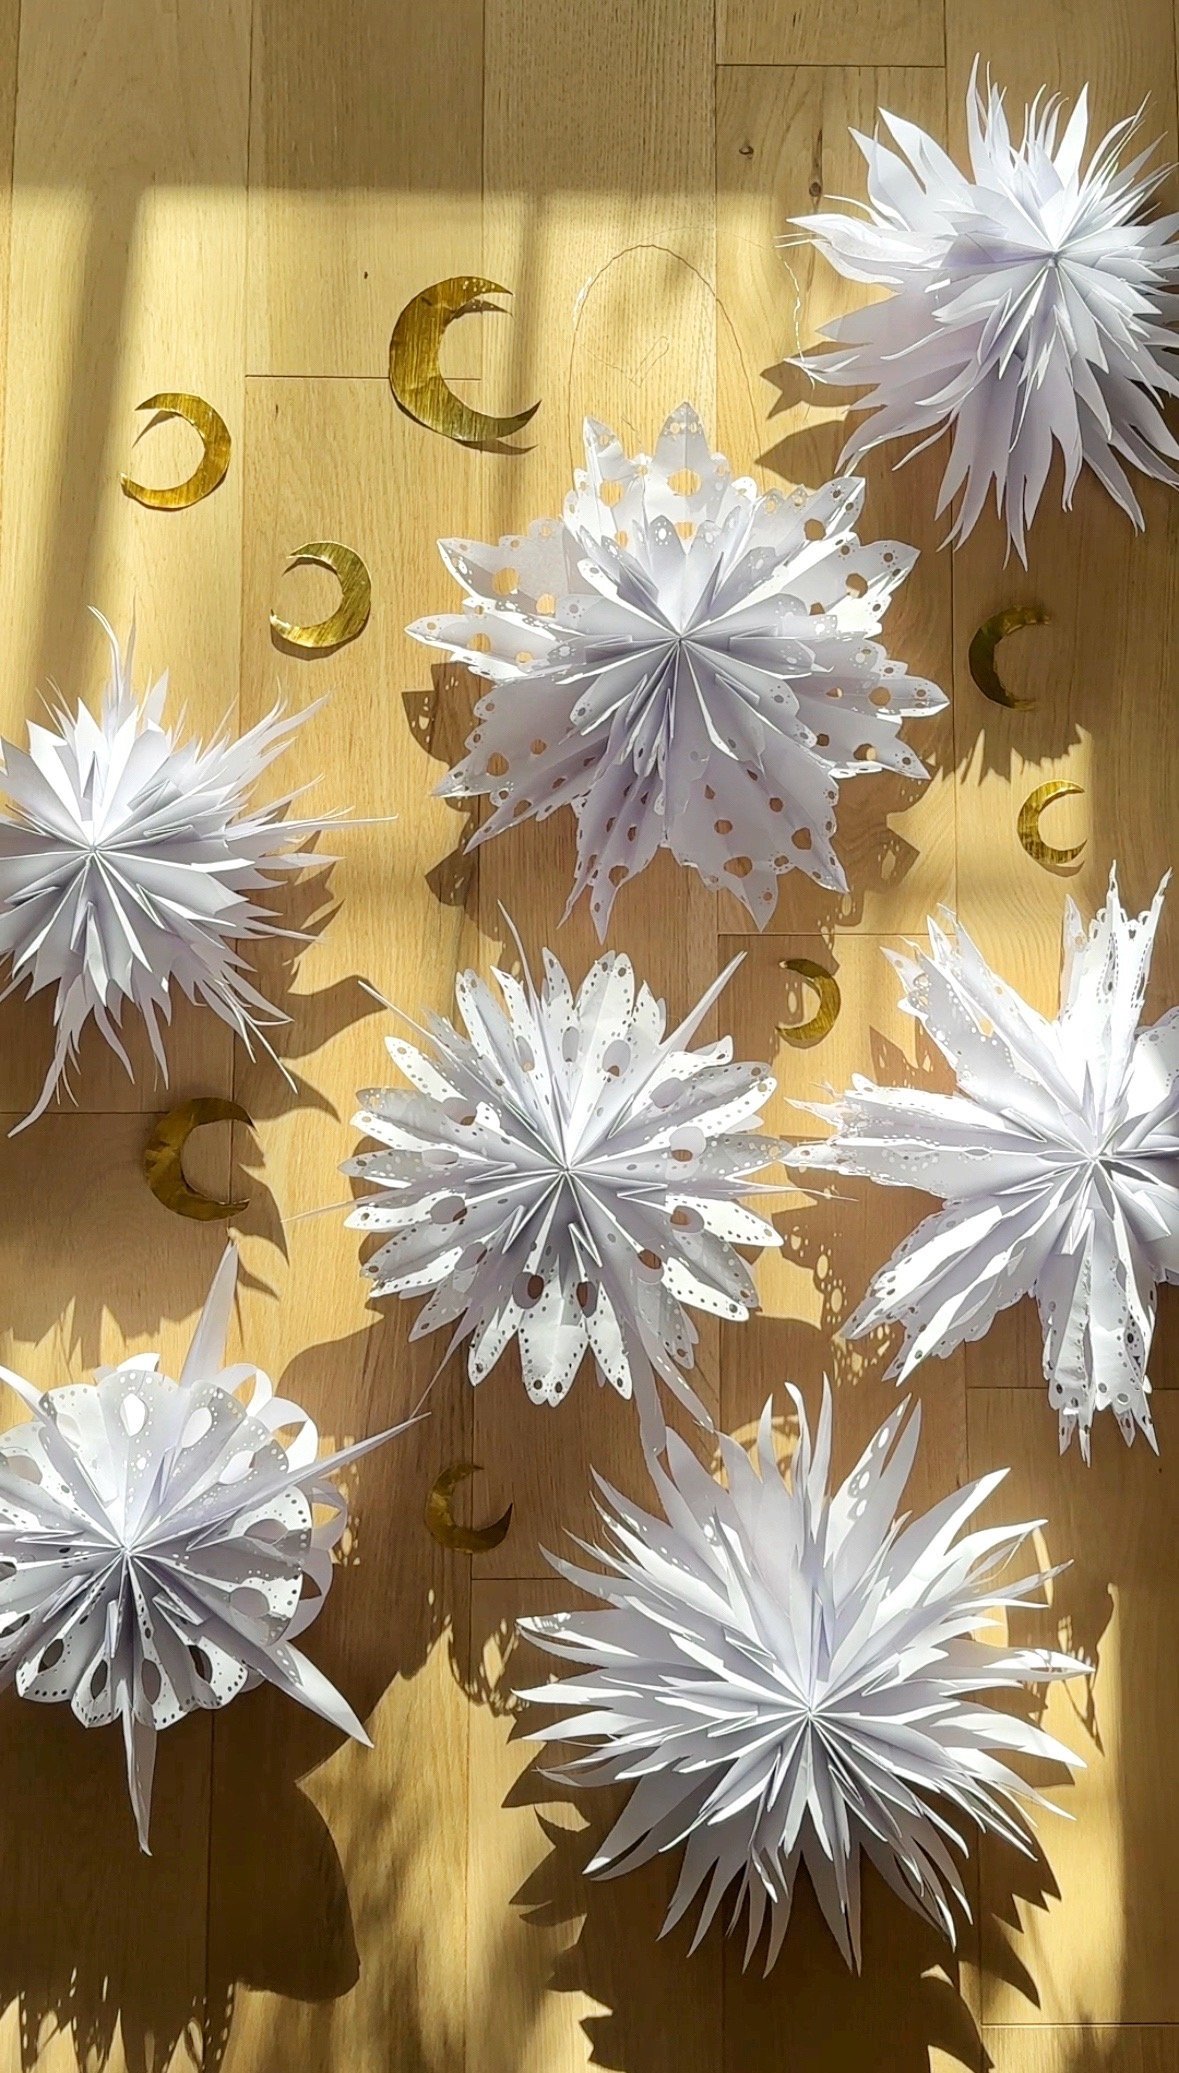
This was the snowflake blizzard I had in thekwendyhome 2.0, all captured by @janetkwan
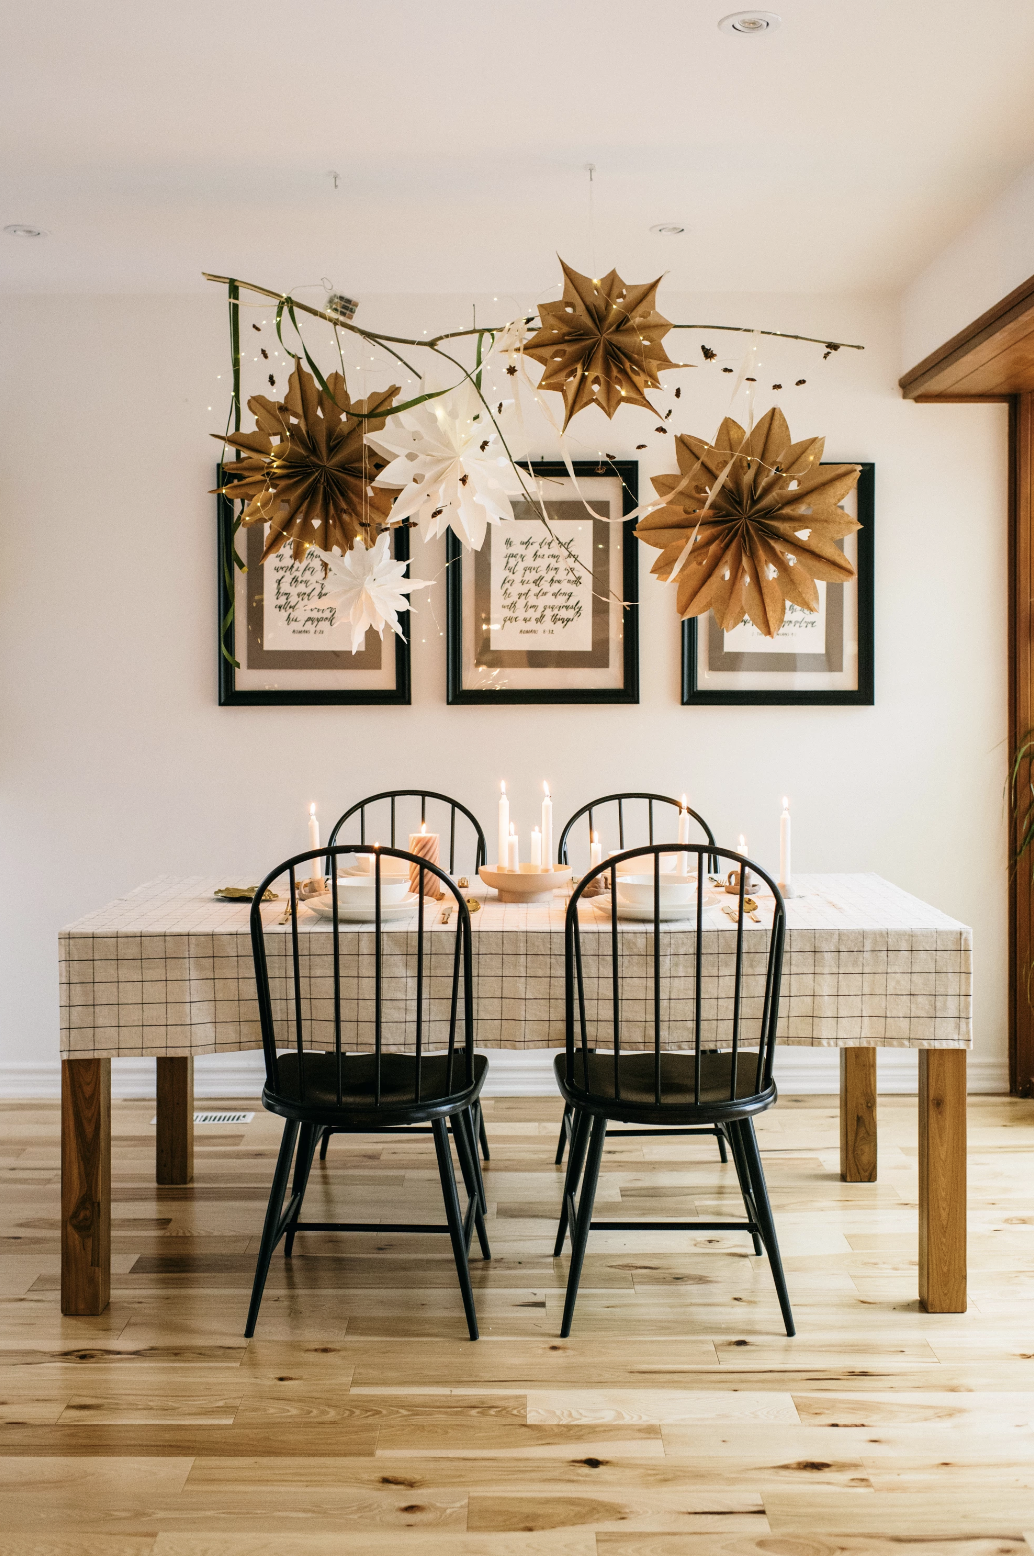
You can create a variety of snowflakes without any added effort on your part by changing the size of your paper bag or use coloured paper! Hang them up with floral wire from your ceiling over your Christmas tree, fireplace, stair banisters, or dining table for a beautiful winter wonderland.
Thanks for reading and happy crafting!
Love,